How to Make an Easy Homemade Cookie Bouquet: The Ultimate Step-by-Step Guide
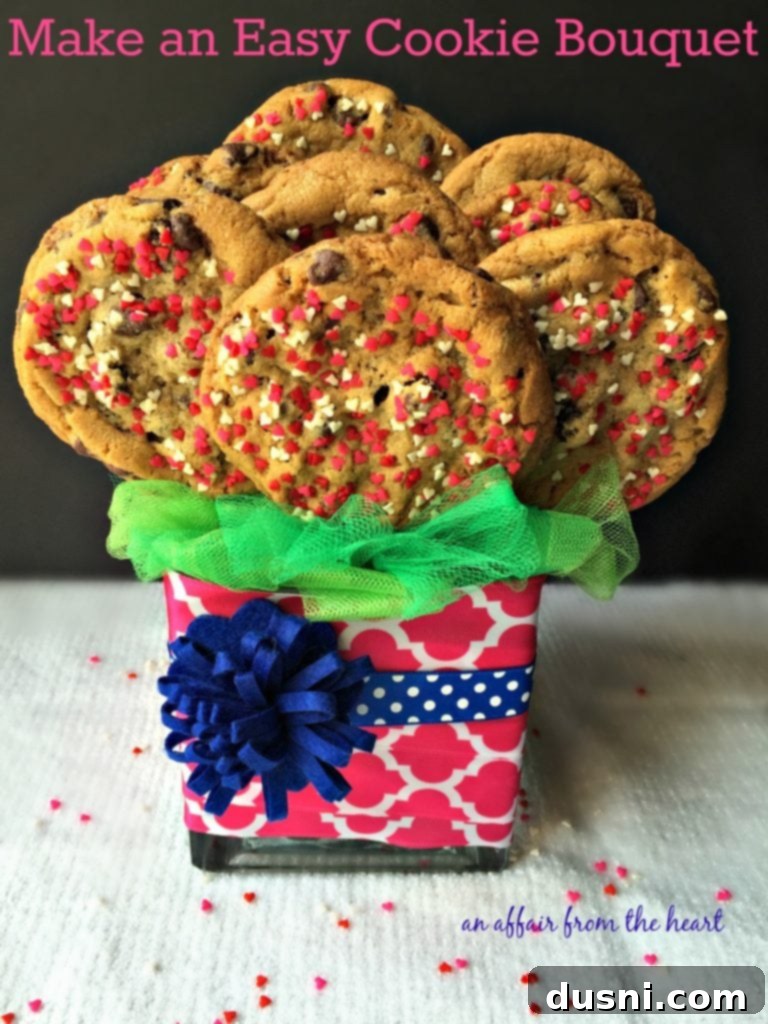
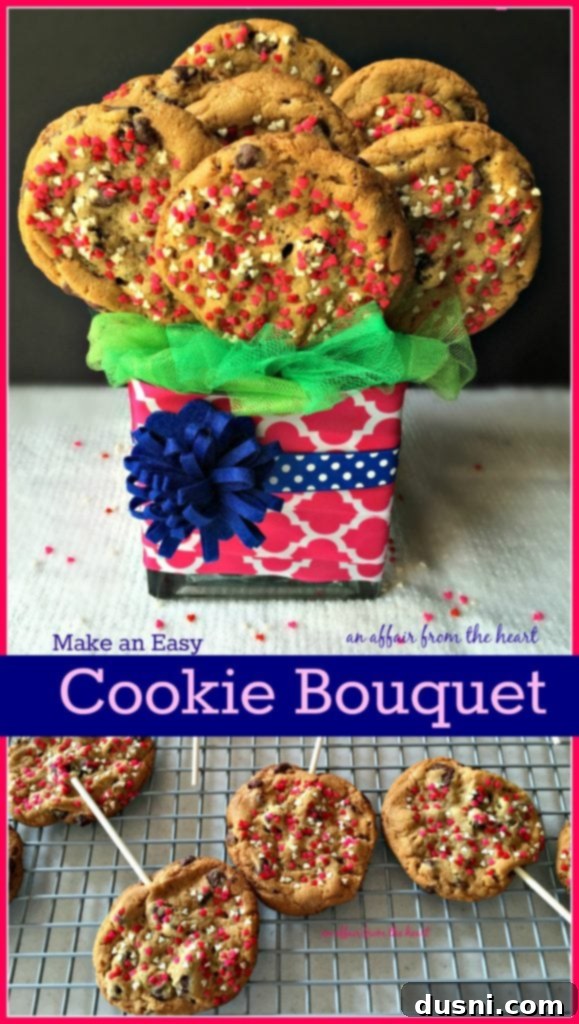
In a world where convenience often trumps thoughtfulness, there’s something truly special about a homemade gift. And what could be more delightful, more personal, and certainly more delicious than a beautifully crafted cookie bouquet? Forget the exorbitant prices of store-bought edible arrangements; creating your own cookie masterpiece at home is not only simple but also incredibly rewarding. This comprehensive guide will walk you through every step, ensuring your homemade cookie bouquet is a show-stopping success, perfect for any occasion.
The Inspiration Behind a Heartfelt Gift
The idea for this particular cookie bouquet bloomed from a desire to show love and appreciation in a truly personal way. My eldest daughter, currently navigating the demanding hours of cosmetology school, pours her heart into her studies and work. Her days are long, often starting at 7:30 AM and not ending until 8 or 9 PM. She’s incredibly driven, and witnessing her dedication is inspiring. So, when her birthday rolled around, I knew I wanted to celebrate her in a way that felt special and truly from the heart.
She had mentioned wishing for an Edible Arrangement to be delivered to her school. While these are undoubtedly lovely, a quick glance at the prices made me reconsider. There were so many other things she could use, and the thought of spending a fortune on fruit cut into shapes, no matter how artfully arranged, just didn’t sit right when I knew I could create something equally charming and more personalized. Though I still harbor the idea of attempting a fruit arrangement someday, I settled on her absolute favorite: chocolate chip cookies. Presented in a festive, cheerful bouquet, I was certain they would bring a huge smile to her face.

On her birthday, I made an appointment to take her to lunch. There, I presented her with the surprise cookie bouquet. The look on her face confirmed my suspicions – a homemade gift, tailored to her favorite treat, truly resonated. It’s these moments of genuine connection and thoughtful gestures that make homemade gifts so much more impactful than anything store-bought.
Why Opt for a Homemade Cookie Bouquet?
Choosing to make a cookie bouquet yourself comes with a multitude of benefits, making it an ideal choice for nearly any gifting occasion:
- Cost-Effectiveness: As my own experience showed, commercial edible arrangements can be surprisingly expensive. By making it yourself, you save a significant amount of money while still delivering a high-quality, impressive gift.
- Personalization: You have complete control over the flavors, decorations, and presentation. You can tailor the cookies to the recipient’s favorite flavors, use their favorite colors, or even incorporate elements related to their hobbies or interests. This level of customization is difficult, if not impossible, to achieve with pre-made options.
- Thoughtfulness: The effort and time you invest in creating a homemade gift speak volumes. It shows the recipient that you truly care and took the time to create something unique just for them.
- Versatility: Cookie bouquets are incredibly versatile. They can be adapted for birthdays, anniversaries, graduations, teacher appreciation, thank you gifts, get-well-soon gestures, or even as a cheerful centerpiece for a party.
- Enjoyment in the Process: For many, the act of baking and crafting is a relaxing and enjoyable hobby. Making a cookie bouquet allows you to indulge in this creative process.
Essential Supplies for Your DIY Cookie Bouquet
The beauty of this project lies in its simplicity. You don’t need fancy equipment or hard-to-find ingredients. Here’s what you’ll need to gather:
Ingredients & Edible Decorations:
- Break-and-Bake Chocolate Chip Cookies: This is the ultimate shortcut for ease, but feel free to use your favorite homemade cookie dough recipe if you prefer. Consider using larger cookie dough portions for a more impactful “flower” size.
- Sprinkles: These add a festive touch. Choose colors that match the occasion or the recipient’s preferences. Nonpareils, jimmies, or even edible glitter can work beautifully.
- Optional: Icing or Frosting: If you want to add more intricate decorations, a simple royal icing or buttercream can be used to pipe designs onto cooled cookies.
Craft & Assembly Materials:
- Lollipop Sticks: These are crucial for creating the “stems” of your cookie flowers. Ensure they are food-safe and sturdy enough to hold the weight of your baked cookies.
- A Vase or Container: Any sturdy vase will work. A square vase provides a stable base, but a round one is also perfectly fine. Choose a size appropriate for the number of cookies you plan to make.
- Floral Foam: This will hold your cookie sticks securely in place. You can find it at most craft stores or floral supply shops.
- Ribbon: A wide satin ribbon is perfect for wrapping around the vase to add a decorative touch. Have a thinner, contrasting ribbon for accent bows.
- Straight Pins: For securing the ribbon around your vase.
- Green Tulle: This lightweight fabric is wonderful for resembling leaves and adding volume to your bouquet. Green is traditional, but you can experiment with other colors.
- Optional: Felt Bow or Other Embellishments: To further adorn your vase and give it a polished look.
- Cellophane Wrap: For packaging your finished bouquet, keeping it fresh and making it easily transportable.
Step-by-Step Guide to Crafting Your Cookie Bouquet
Step 1: Preparing Your Cookie “Flowers”
The foundation of your bouquet begins with perfectly baked cookies. For this project, I opted for larger, circular cookies to make a more substantial “flower.”
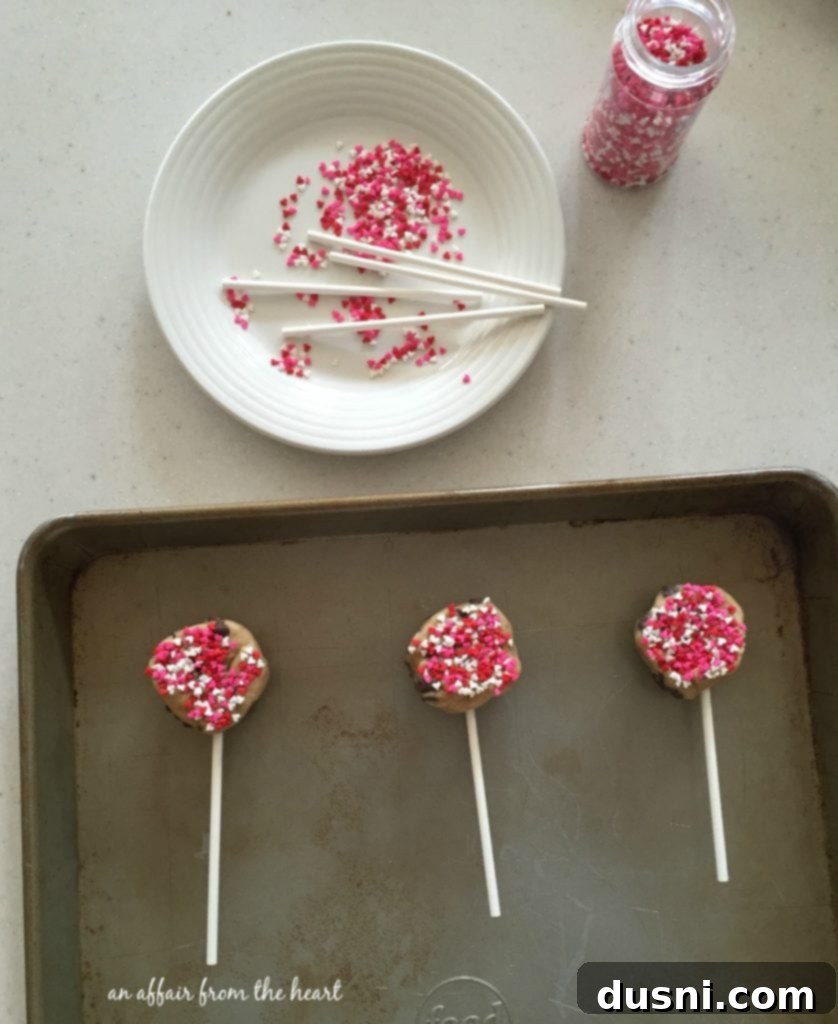
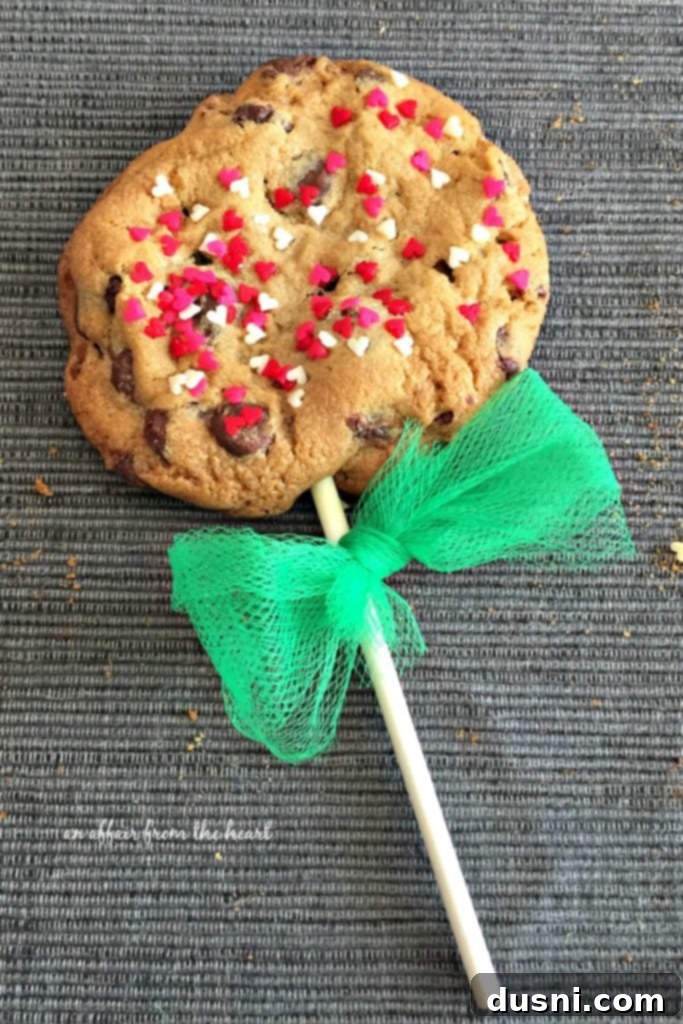
- Shape and Insert Sticks: If using break-and-bake dough, shape the dough into evenly sized, circular cookies. For optimal stability, insert a lollipop stick into each cookie about two-thirds of the way through, ensuring it’s firmly embedded but doesn’t poke out the top. This provides a strong anchor for your cookie stem. If using homemade dough, you can do this before or after shaping, ensuring the dough is pliable enough.
- Add Sprinkles: Gently press one side of each cookie into a plate of sprinkles. The unbaked dough will readily pick up the sprinkles, creating a vibrant, festive coating. Be generous for maximum visual impact!
- Bake According to Instructions: Carefully transfer your decorated cookies, with sticks still in place, to a baking sheet. Bake according to the package instructions (or your recipe’s guidelines). Watch them closely to ensure they don’t overbake. The sticks should remain in place during baking.
- Cool Completely: Once baked, transfer the cookies to a wire cooling rack. It’s absolutely crucial that they cool completely before you attempt to handle or decorate them further. Warm cookies are fragile and prone to breaking, especially with the sticks.

Allowing them to cool properly ensures they firm up and are ready for the next steps of decorating and assembling.
Step 2: Preparing Your Vase Base
The vase is more than just a holder; it’s part of the overall presentation. Decorating it adds to the charm of your homemade gift.
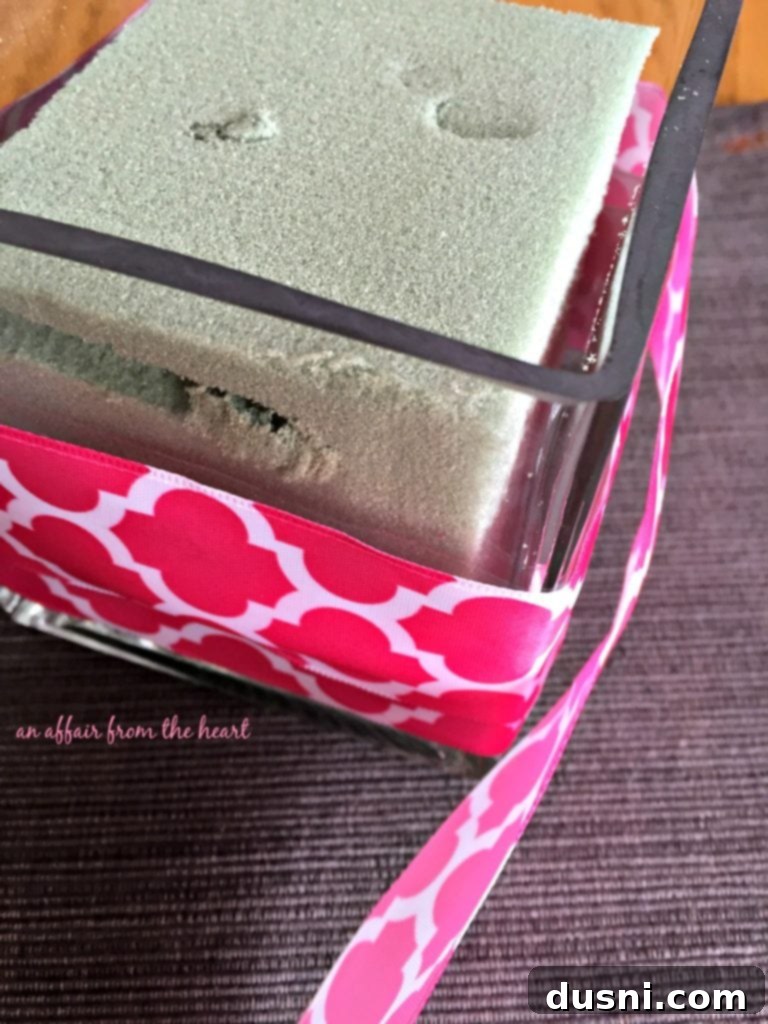
- Insert Floral Foam: Take your chosen vase (a 4-inch square vase works wonderfully for stability and appearance). Cut your floral foam to fit snugly inside the vase. You want it to be secure and not wobble. If necessary, use a small amount of hot glue to secure the foam to the bottom of the vase, though a tight fit is often sufficient.
- Wrap the Vase: Select a wide, attractive satin ribbon that complements your cookie decorations. Wrap it tightly around the exterior of the vase, ensuring it covers the floral foam from view. Secure the ribbon ends neatly with a straight pin. You can hide the pin at the back of the vase or under an embellishment.
Step 3: Arranging Your Cookie Flowers
This is where your bouquet truly comes to life! It’s an opportunity to get creative with your arrangement.
- Add Tulle “Leaves”: For each cookie stick, cut a piece of green tulle (or your chosen color) and tie it around the stick just below the cookie. When the stick is removed from the bouquet, this can create a cute bow. For the bouquet itself, you’ll want to fluff and arrange the tulle to resemble leaves.
- Insert Cookies into Floral Foam: Begin inserting your cookie sticks into the floral foam. Start with the tallest cookies in the center and work your way outwards, varying the heights to create a natural, bouquet-like appearance. Ensure each stick is firmly pushed into the foam to prevent wobbling.
- Fluff and Arrange: Once all your cookies are in place, gently fluff the tulle pieces around the base of the cookies and within the vase to mimic the look of natural foliage. This adds volume and covers any visible foam.
- Final Vase Embellishments: To give your vase a polished and festive look, secure a contrasting ribbon around the wrapped vase. You might also add a small felt bow, a personalized tag, or other decorative elements to the front. This enhances the overall presentation and adds another layer of charm.
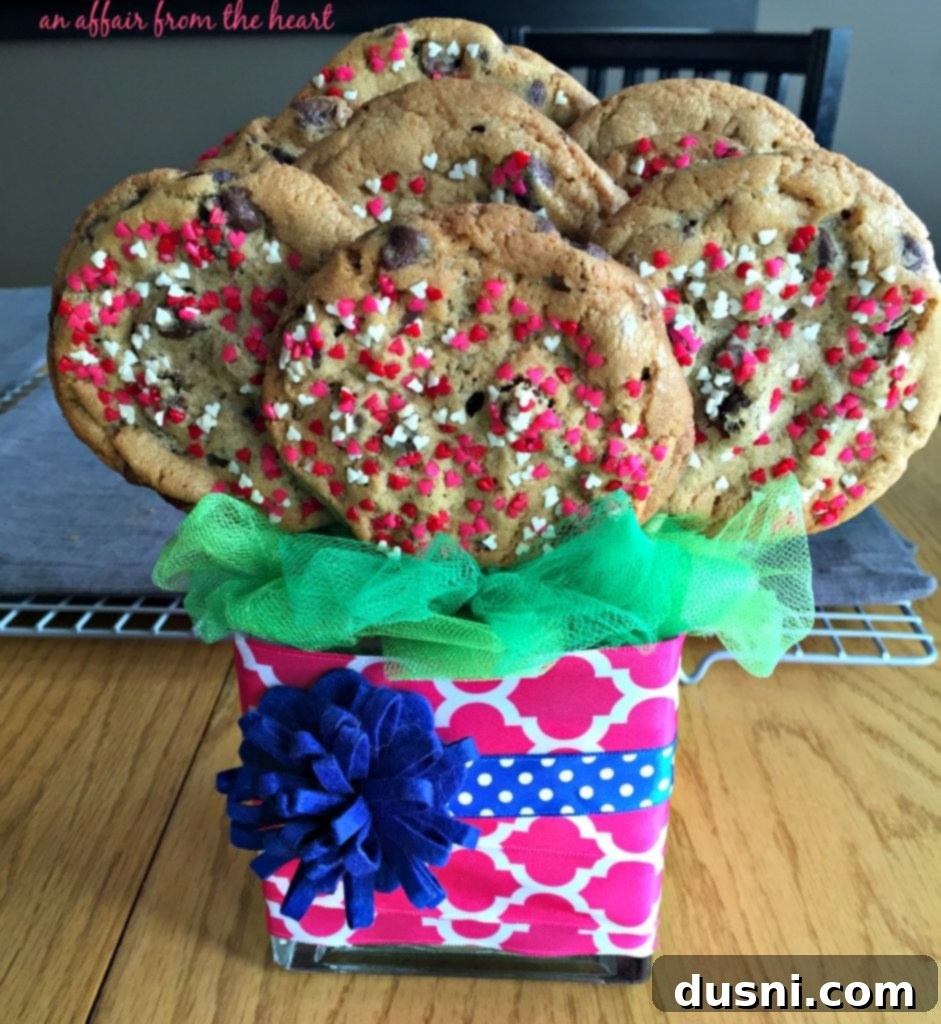
I fluffed up the tulle to resemble leaves in the vase. Secured a contrasting ribbon and a little felt bow to the front to dress up the vase, completing the elegant and thoughtful look.
Step 4: The Finishing Touch – Wrapping it Up
Once your cookie bouquet is fully assembled and looking beautiful, the final step is to package it for presentation and transport.
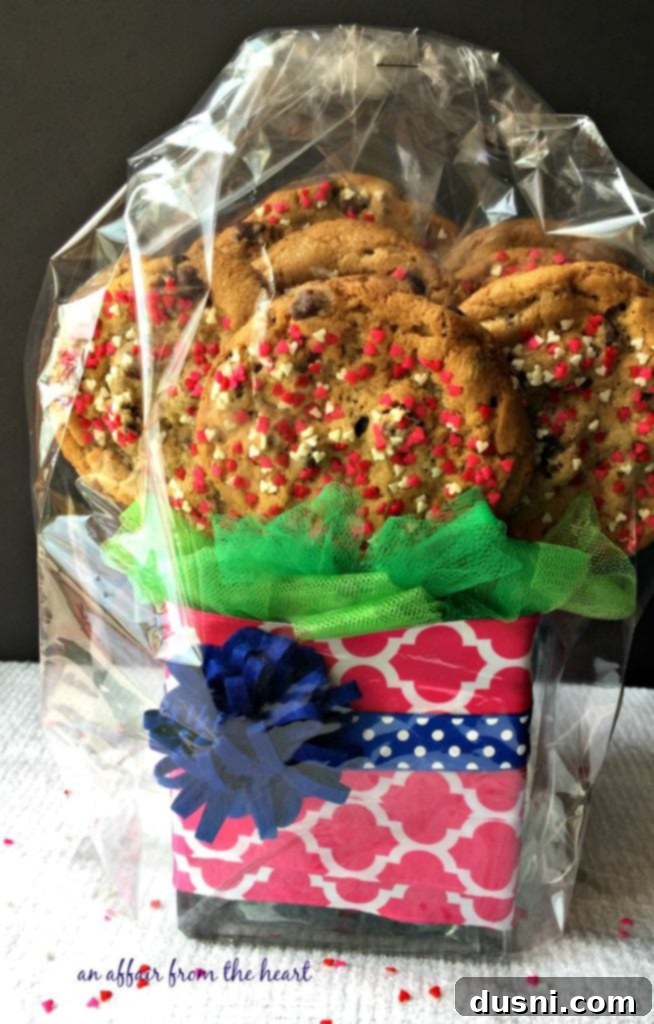
- Wrap in Cellophane: Carefully wrap the entire bouquet, including the vase, in a large sheet of clear cellophane. Gather the cellophane at the top and secure it with a ribbon or a piece of decorative string. This not only protects the cookies and keeps them fresh but also adds a professional, gift-ready finish.
- Ready to Go: With the cellophane secured, your homemade cookie bouquet is now ready to be delivered and enjoyed!
Tips for a Perfect Homemade Cookie Bouquet
To ensure your cookie bouquet is absolutely perfect, consider these additional tips:
- Cookie Selection: While chocolate chip cookies are a classic, feel free to experiment with other sturdy cookie types like sugar cookies, oatmeal cookies, or even gingerbread for seasonal themes. Just ensure they are firm enough to hold their shape on a stick.
- Decoration Variety: Beyond sprinkles, consider simple royal icing designs, edible markers, or even dipping cooled cookies in melted chocolate and then adding sprinkles or nuts.
- Vase Alternatives: If a traditional vase isn’t your style, consider a decorative tin, a sturdy mug, or even a small planter for a rustic look. Just make sure it can accommodate the floral foam.
- Add a Card: A handwritten card expressing your sentiments makes the gift even more personal and memorable.
- Transport Carefully: If you need to transport the bouquet, place it in a box that provides support around the base of the vase to prevent it from tipping over.
Customization and Variations for Every Occasion
The beauty of a homemade cookie bouquet is its adaptability. Here are some ideas for customizing your creation:
- Seasonal Themes: Use red and green sprinkles for Christmas, pastels for Easter, orange and black for Halloween, or patriotic colors for national holidays.
- Holiday Gifts: Perfect for Mother’s Day, Valentine’s Day (heart-shaped cookies!), Father’s Day, or even administrative professionals’ day.
- Teacher Appreciation: A cookie bouquet makes a thoughtful and much-appreciated gift for teachers at the end of the school year or during Teacher Appreciation Week.
- Birthday Celebrations: Incorporate birthday candles or a “Happy Birthday” pick among the cookies.
- Adding Other Treats: For an even grander arrangement, you could include individually wrapped chocolates, small candies on sticks, or even small non-edible trinkets that match the theme.
Conclusion: The Joy of Giving a Homemade Cookie Bouquet
Creating a homemade cookie bouquet is an act of love, a simple gesture that yields a profoundly impactful gift. It bypasses the commercialism of store-bought options, offering a unique blend of personal touch, deliciousness, and creativity. Whether for a hardworking daughter, a beloved teacher, or simply to brighten someone’s day, these bouquets are guaranteed to bring a smile to anyone who loves cookies – and truly, who doesn’t?! So, gather your supplies, embrace your inner baker and crafter, and prepare to spread some joy with your own beautiful, edible masterpiece.

