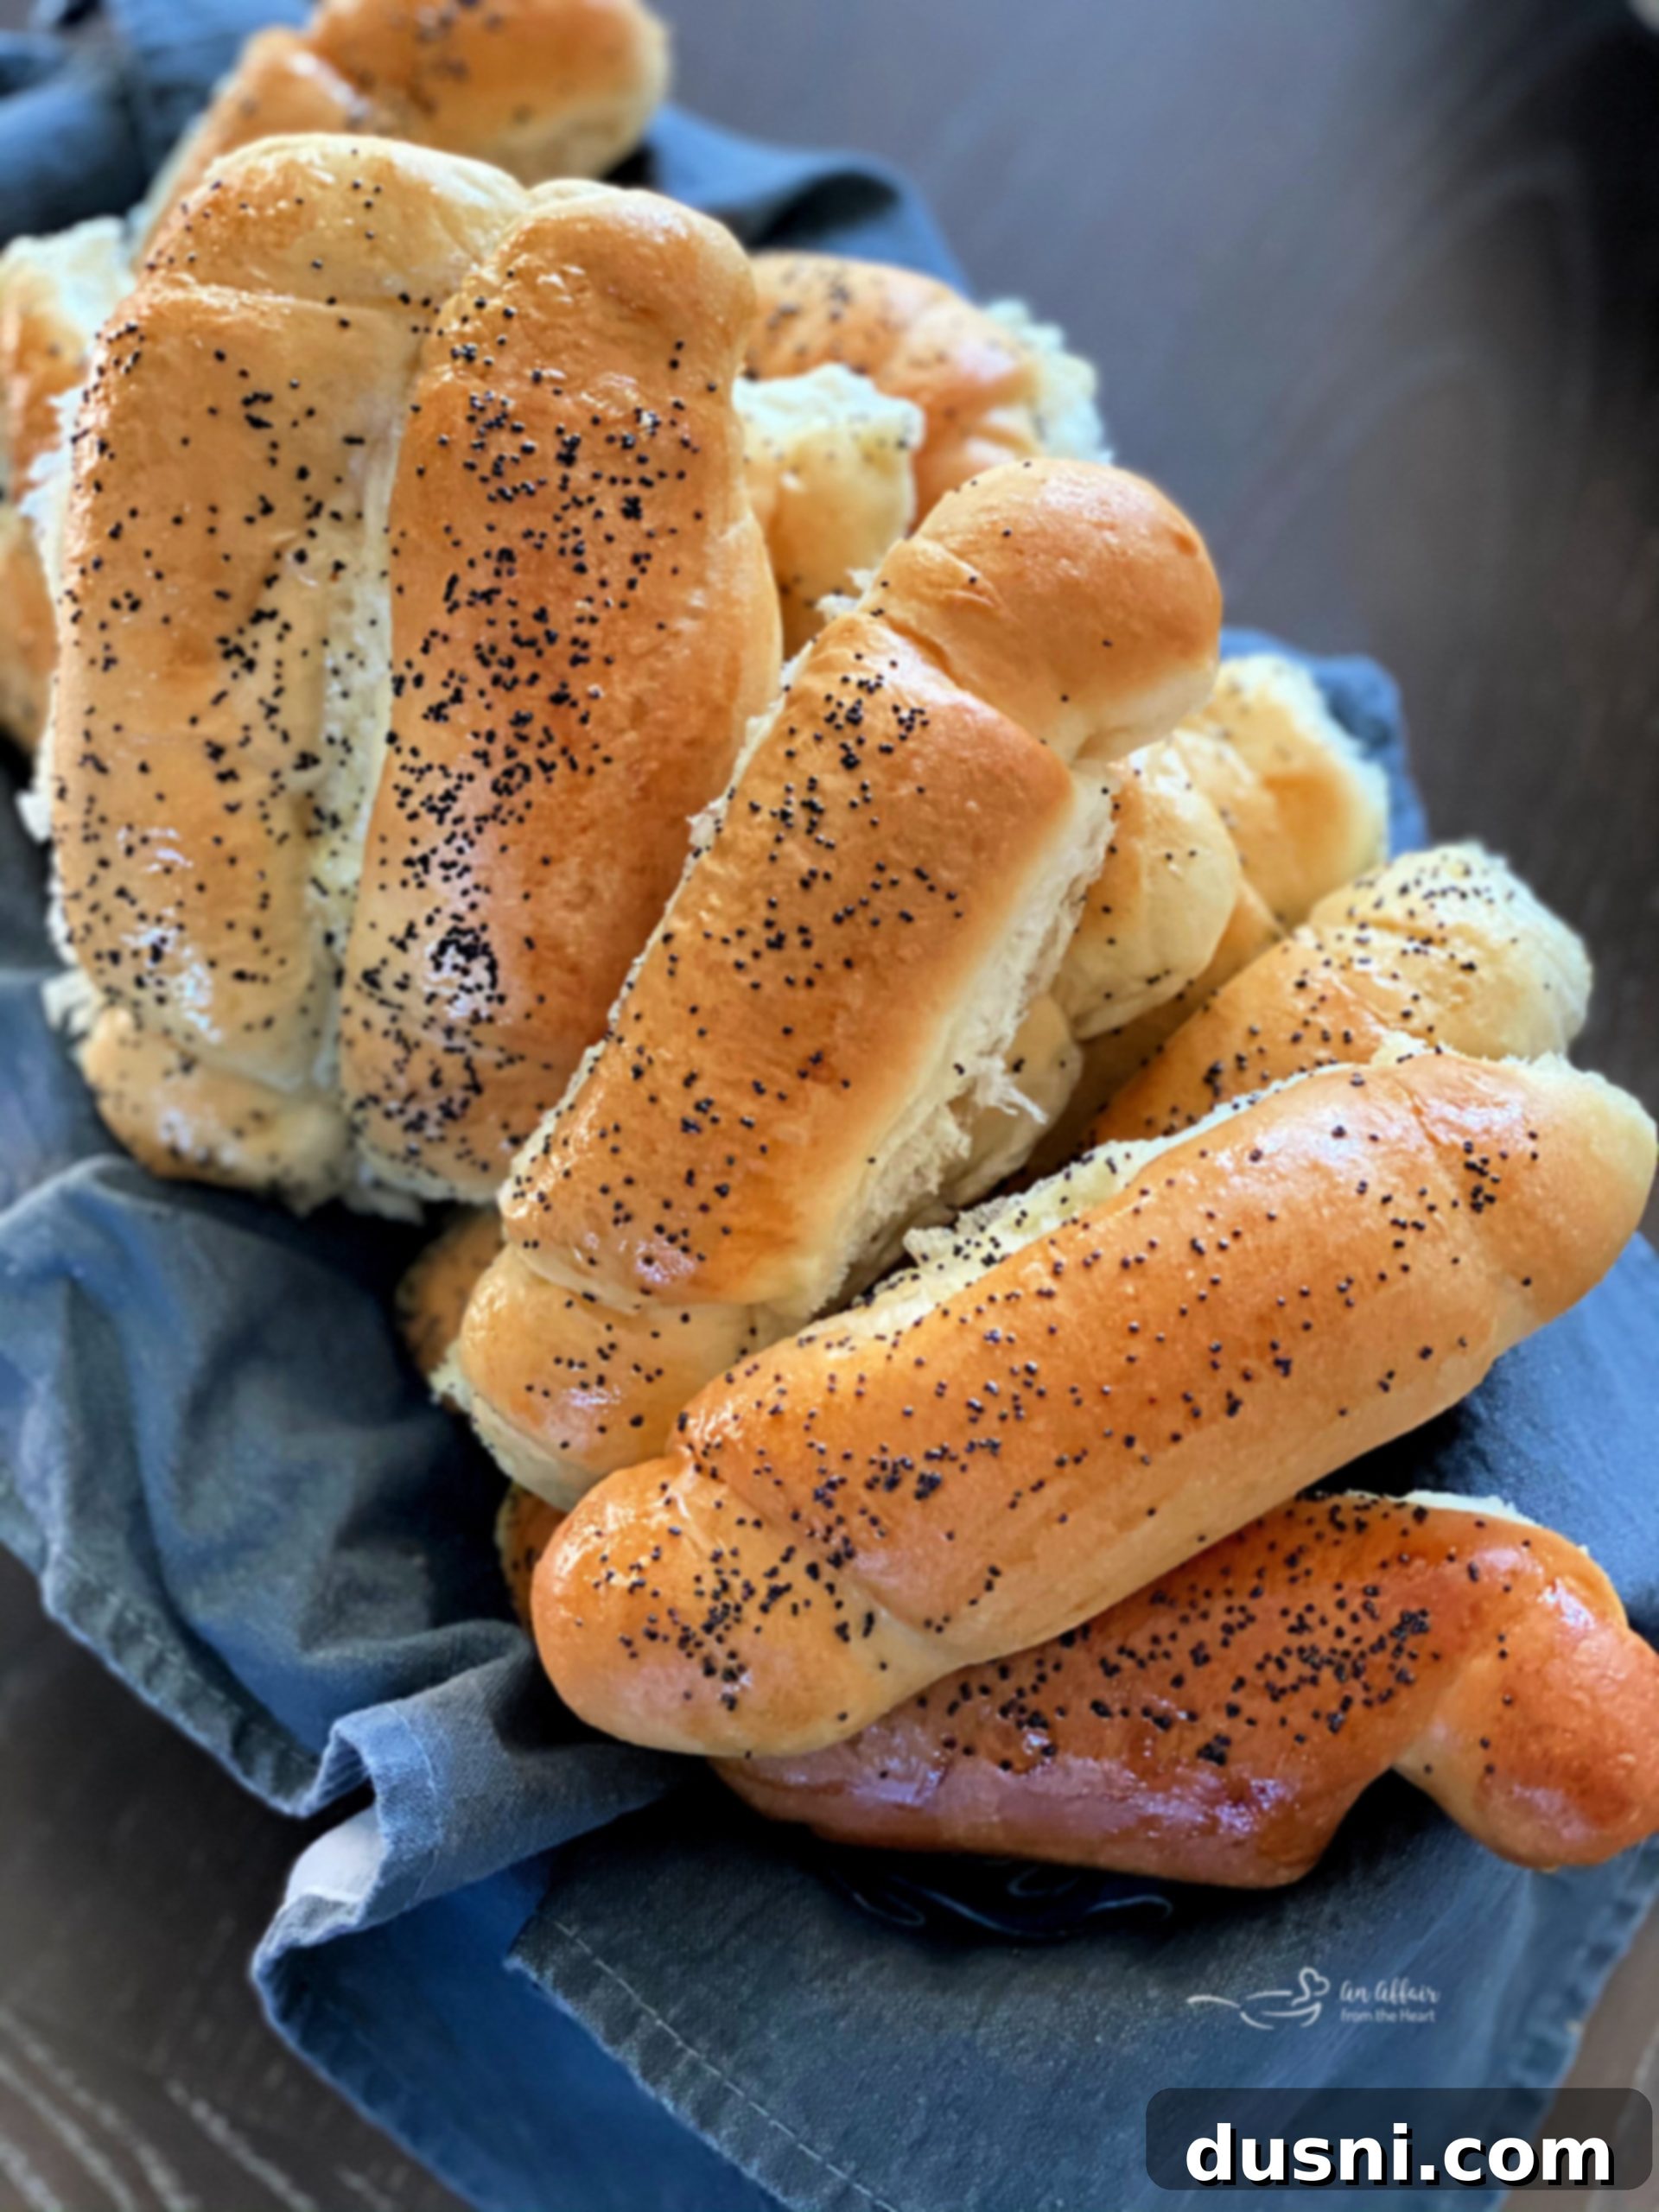
Aunt Carol’s Easy Homemade Poppyseed Rolls: Soft, Fluffy Dinner Rolls for Any Occasion
Discover the magic of Aunt Carol’s “homemade” Poppyseed Rolls – a cherished family tradition that brings warmth and deliciousness to every holiday gathering. These incredibly soft, fluffy, and golden dinner rolls, generously adorned with delightful poppy seeds, are guaranteed to vanish from your breadbasket in mere moments. While they might seem like a labor of love, prepare to be surprised! This classic recipe is far simpler to master than you could ever imagine, thanks to a clever shortcut that makes baking a breeze. Perfect for festive feasts or an everyday treat, these rolls offer the comforting taste of homemade without the fuss.
The Enduring Legacy of Aunt Carol’s Poppyseed Rolls
For as long as I can recall, Aunt Carol’s irresistible poppyseed rolls have been a highlight of our holiday celebrations. Their presence at every family gathering is a tradition I deeply cherish. This beloved recipe has been passed down through generations, with my aunt Carol learning the secret from her own mother. Just a few weeks ago, I had the incredible opportunity to finally learn this treasured family recipe directly from her. It was a heartwarming experience, filled with laughter and stories, as she patiently guided me through each step, ensuring this culinary legacy continues.
Throughout my entire married life, a generously sized bag of these fluffy, golden rolls would miraculously appear at our doorstep during the festive season. My children, with their eyes lighting up at the sight, would eagerly tear into them as if they hadn’t eaten in weeks. The joy these dinner rolls brought was palpable. I’ve always yearned to learn how to make them, and while we’d intended to do so for the past few years, life’s busy schedule always seemed to get in the way. But this year, a silver lining in 2020, we finally made it happen! Learning this recipe was truly a special moment, cementing its place as an irreplaceable part of our family’s holiday traditions.
The “Homemade” Secret: A Smart Shortcut to Deliciousness
We’ve affectionately called these “Aunt Carol’s homemade rolls” for decades, a term that carries so much nostalgia and warmth. However, during one memorable Christmas, while chatting with my aunt and her daughter, I mentioned “homemade rolls,” prompting my cousin to playfully roll her eyes and exclaim, “homemade my butt!” I was utterly confused, wondering what secret I was missing. She then revealed the family’s brilliant shortcut: these legendary rolls begin with frozen dinner roll bread dough. A gasp, followed by laughter, filled the room.
Of course, the revelation didn’t diminish their appeal in the slightest. Aunt Carol explained that while they used to make the bread dough from scratch, transitioning to frozen dough made life considerably easier, especially during the busy holiday season, without compromising on taste or quality. And honestly, who wouldn’t want to simplify their baking without sacrificing flavor? Perhaps “handmade” is a more accurate description than “homemade,” as we still put in the effort to shape and finish them with care. Regardless of the label, in our family, these delightful, soft rolls are now lovingly and jokingly referred to as “homemade my butt rolls,” a testament to their enduring charm and the cleverness behind their creation. This ingenious method ensures that anyone can achieve perfectly fluffy, bakery-quality poppyseed dinner rolls with minimal stress, making them a fantastic option for both experienced bakers and novices alike.
Crafting the BEST Poppyseed Rolls: A Step-by-Step Guide
Creating these absolutely gorgeous and incredibly delicious poppyseed dinner rolls is surprisingly straightforward. You only need a few key ingredients to bring this family-favorite recipe to life: a package of Rhodes frozen dinner rolls, a touch of non-stick cooking spray, vegetable oil for brushing, one egg for a golden wash, and, of course, a generous amount of poppy seeds for that signature crunch and flavor. This simple ingredient list means less time shopping and more time enjoying the baking process.
Typically, when sharing a recipe, I dedicate a significant amount of time to meticulously styling the food and capturing perfect “process shots” for a flawless presentation. However, on the day Aunt Carol taught me this cherished recipe, I was so deeply immersed in the moment, cherishing her presence in my kitchen, that my priority shifted. I wanted to fully experience and absorb her wisdom, living in the joy of our shared family tradition. Nevertheless, I made sure to snap photos of each crucial step for you, so you can easily follow along. My absolute favorite images are those that capture her hands at work – a beautiful representation of generations of culinary heritage. So, let’s dive into how these incredibly soft and flavorful poppyseed rolls are made, guided by Aunt Carol’s expertise!
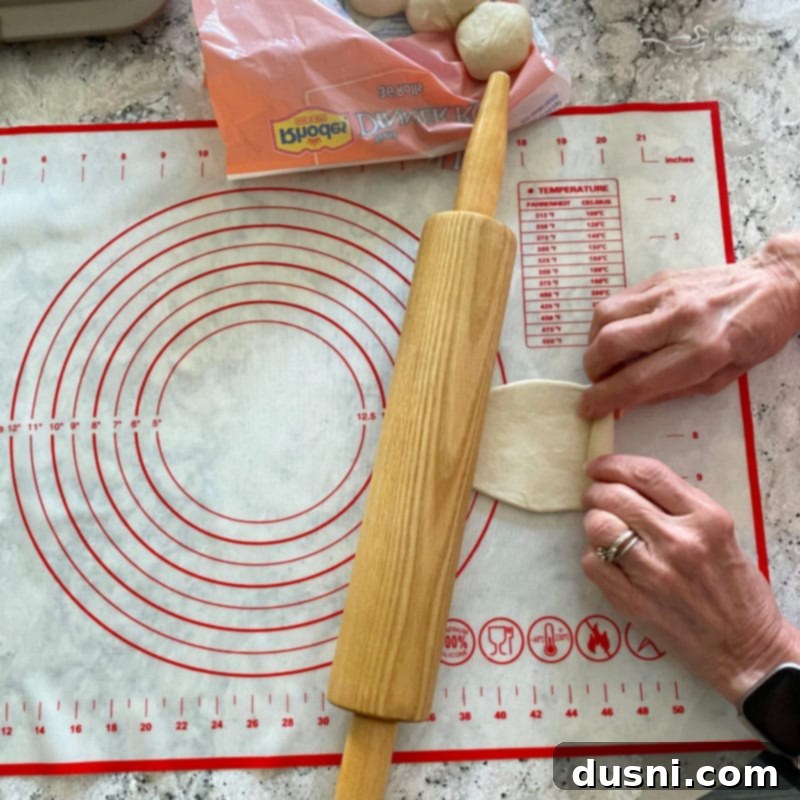
The first step to transforming these frozen dough balls into magnificent dinner rolls is to prepare them. Take one frozen roll and gently flatten it into an elongated oval shape using a rolling pin. Don’t press too hard, just enough to create a consistent, thin oval. A clever trick Aunt Carol taught me is to leave the rolling pin positioned on the edge of the dough furthest away from you – this sets you up perfectly for the next step and helps maintain control.
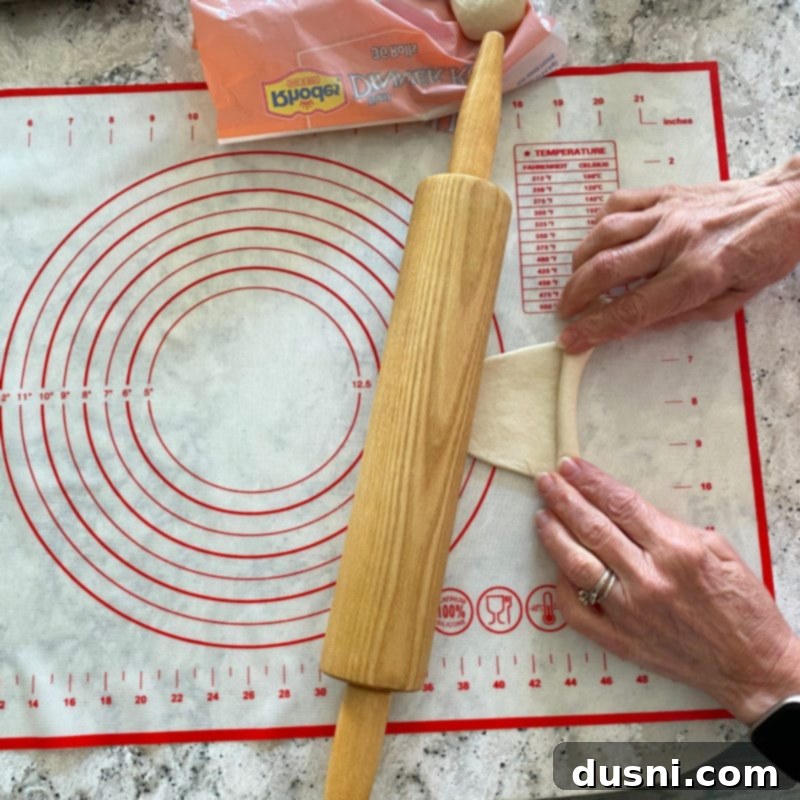
Now, begin the rolling process. Starting from the edge closest to you, gently roll the dough away from you. This creates the classic, slightly elongated shape of these delightful dinner rolls. The goal here is to create a tight, even spiral that will result in a perfectly soft and fluffy texture once baked.
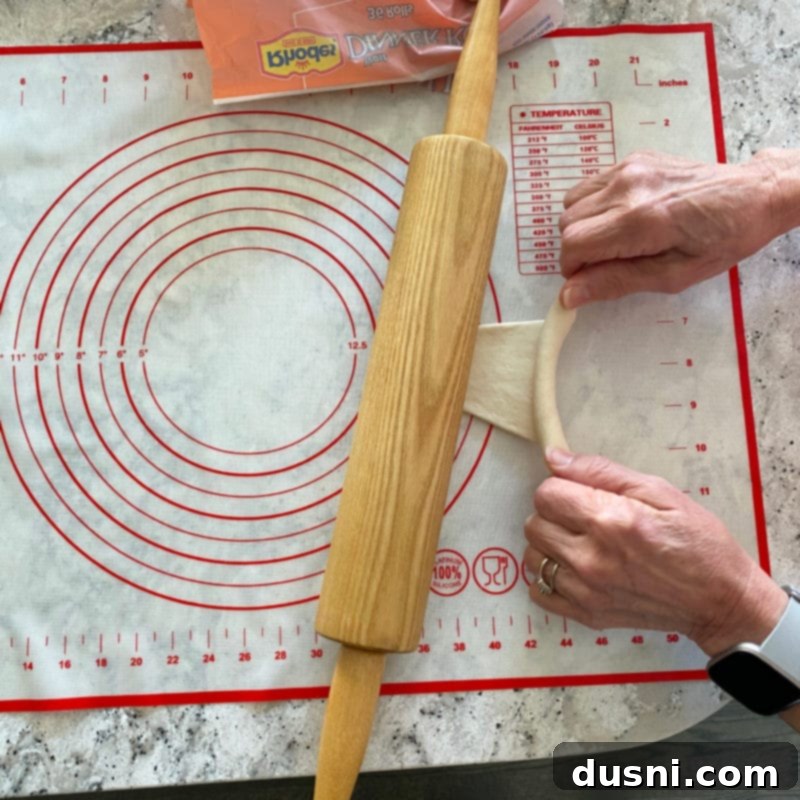
As you continue rolling, subtly tug the dough outward and slightly towards you. This technique helps to gently stretch the dough, ensuring a beautiful, even shape and a tender crumb. It’s a delicate balance of rolling and stretching that contributes to the signature texture of these poppyseed buns. You’ll quickly get the hang of it!
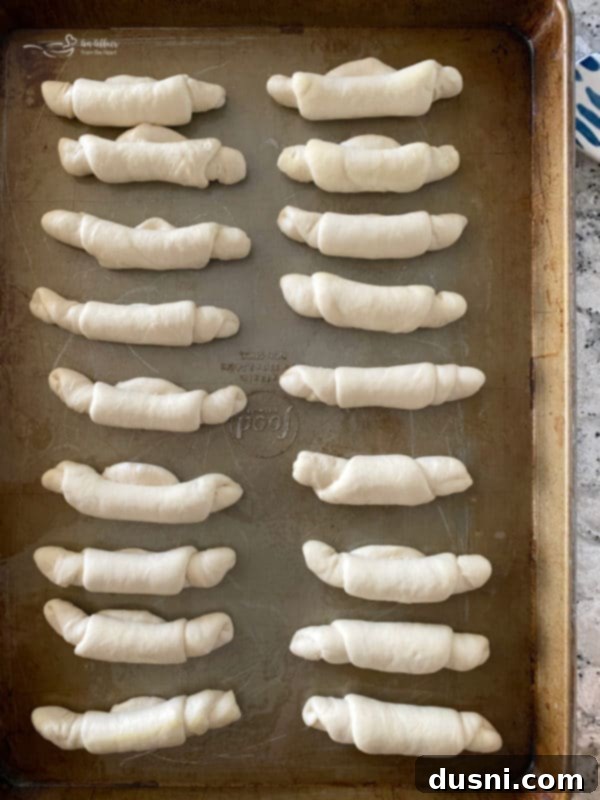
Once rolled, carefully place each shaped dinner roll onto a large, greased cookie sheet, ensuring the seam side is facing down. Arrange them all in the same direction, leaving ample “room to grow” between each roll. This spacing is crucial as the rolls will expand significantly during the rising process. We typically manage to fit 18 perfectly shaped rolls onto each standard-sized cookie sheet, allowing them enough space to proof without crowding.
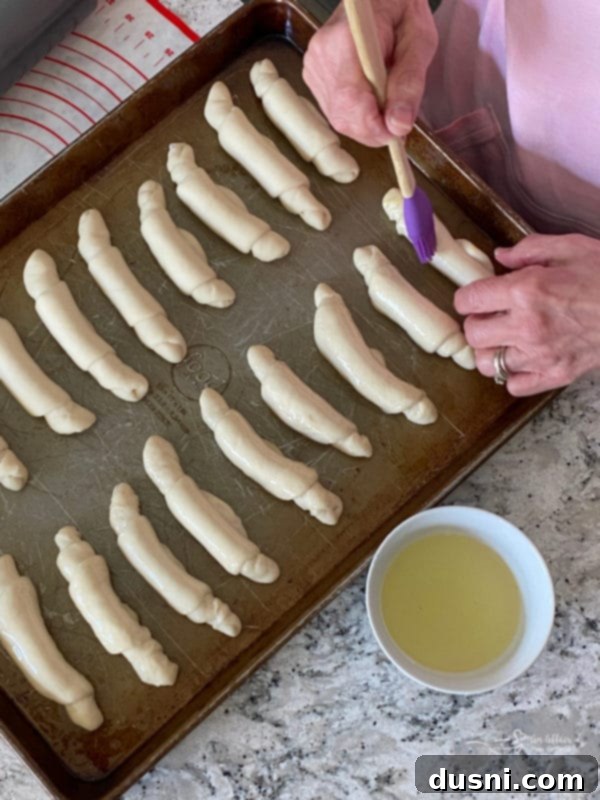
Next, take a pastry brush and gently brush the tops of each poppyseed roll with vegetable oil. This step isn’t just for appearance; it’s a vital part of Aunt Carol’s secret to achieving that wonderfully soft crust and helping the rolls stay moist during the rising process. Be gentle to avoid deflating the carefully shaped dough.

After oiling, loosely cover the cookie sheets with plastic wrap. This creates a humid environment that prevents the dough from drying out and allows it to rise beautifully. You want the plastic wrap to be loose enough not to stick to the rolls as they expand.

Now comes the magic of rising! Allow the rolls to rise for 2-3 hours, or until they have approximately doubled in size, becoming light and puffy. The exact rising time will depend significantly on the ambient temperature of your kitchen. For instance, on the day I made these with Aunt Carol, I was simultaneously simmering a big pot of my grandma’s comforting hamburger noodle soup, which kept my kitchen wonderfully warm, causing the rolls to rise quite quickly. A warm, draft-free spot is ideal for optimal proofing, ensuring your poppyseed buns achieve their signature airy texture.
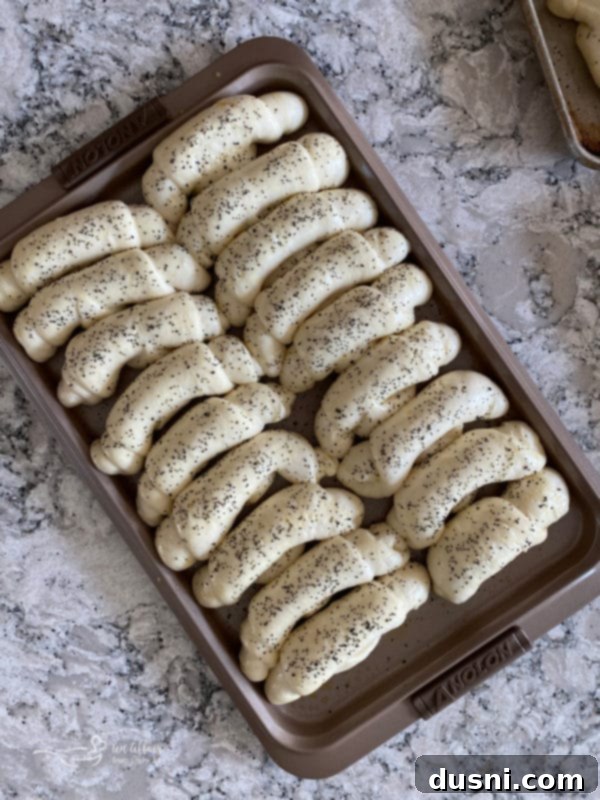
Once your dinner rolls have beautifully risen, it’s time for their crowning glory. Prepare a simple egg wash by whisking one egg (or just an egg white, as specified in the recipe card) with 1-2 teaspoons of water. Gently brush the tops of each fluffy roll with this egg wash. This step will give your poppyseed buns that gorgeous, golden-brown sheen when baked. Immediately after brushing, generously sprinkle them with poppy seeds, ensuring an even coating. The seeds will adhere perfectly to the egg wash, providing that delightful texture and signature flavor. Now, they are ready for the oven!
Bake according to the recipe instructions, keeping a close eye on them to prevent over-browning. You want them golden and inviting.

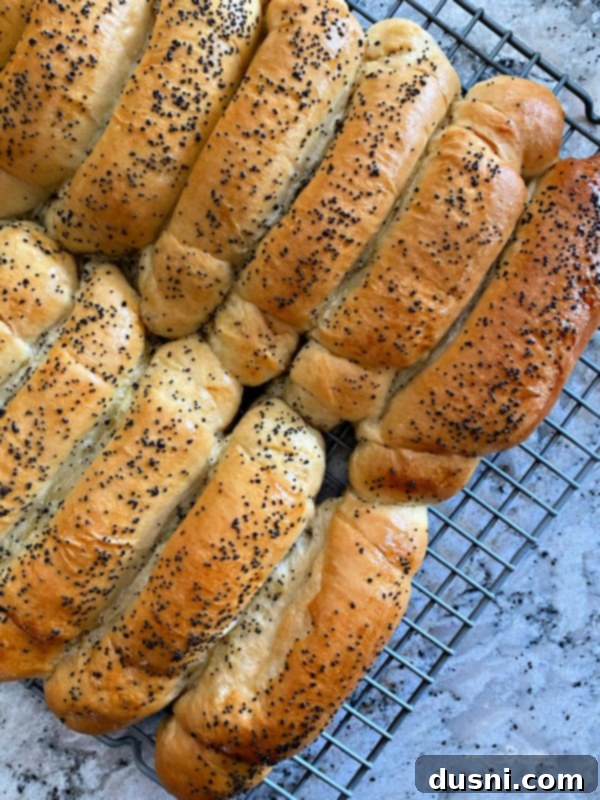
As soon as your delicious poppyseed rolls emerge from the oven, hot and golden, give them another light brush with vegetable oil. This final touch is another one of Aunt Carol’s timeless tips. She insists that this simple step is key to imparting a beautiful, enticing shine to their tops, and more importantly, it helps keep the rolls wonderfully soft and tender, ensuring they remain irresistible from the first bite to the last. This thoughtful detail truly elevates these dinner rolls from good to extraordinary.
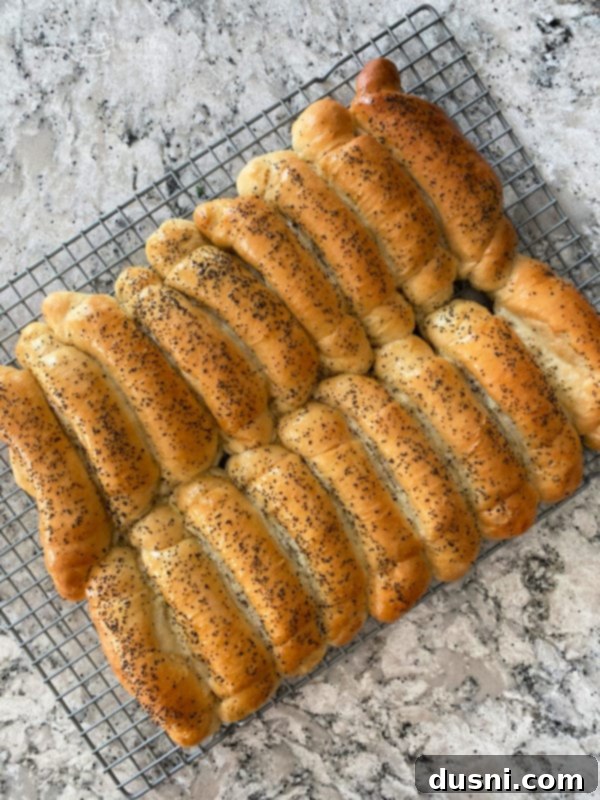
Once brushed, carefully transfer the warm rolls to cooling racks. It’s important to allow them to cool completely before storing, as this prevents them from becoming soggy. For the full, detailed instructions and ingredient measurements, you’ll find the complete printable recipe card conveniently located at the bottom of this post. Don’t miss out on creating these incredible dinner rolls for your next family meal!
Love These Rolls? Pin Them for Later!
If you’re already dreaming of baking these incredible Poppyseed Dinner Rolls, don’t let this amazing recipe slip away! Make sure to save it for future reference. Pin it directly to your favorite Pinterest recipe board before you navigate away from this page. This way, you’ll always have Aunt Carol’s secret to soft, fluffy poppyseed buns right at your fingertips whenever you need a show-stopping side for your next meal or holiday gathering. Share the love and the deliciousness!
Mastering the Art of Freezing Poppyseed Dinner Rolls
During our baking session, Aunt Carol wisely suggested purchasing three packages of Rhodes frozen dinner rolls, which allowed us to create a grand total of 108 magnificent rolls! While this might sound like an ambitious quantity, trust me when I say these poppyseed rolls freeze exceptionally well, provided you follow the right method. Having a stash of these ready-to-go rolls in your freezer is an absolute game-changer, especially during busy holiday periods or whenever a craving strikes for fresh, soft bread.
Once your freshly baked poppyseed rolls have cooled completely to room temperature – this is a crucial step to prevent ice crystals and freezer burn – it’s time to prepare them for storage. We carefully transferred them into sturdy 2.5-gallon freezer-safe ziplock bags. You’ll notice that not all 18 rolls will fit comfortably in a single layer without crowding, which could lead to them being squished. To optimize space and protect their delicate texture, we found that fitting 24 rolls per bag works best by carefully stacking them in two layers of twelve. The key here is gentle handling to maintain their fluffy shape.
Remember, these rolls are inherently soft, so handle them with extreme care to avoid crushing them before they freeze solid. For the initial freeze, place the bags in your freezer without stacking anything on top of them until they are completely frozen through. Once solid, you can safely stack the bags to save space. Just be mindful not to place heavy items, like a gallon of ice cream, directly on top of them, as they could still get squashed. Stored correctly, these delightful poppyseed dinner rolls will maintain their freshness and perfect texture in the freezer for a good 3-4 months, making them an ideal make-ahead option for any occasion.
Effortless Defrosting for Perfect Rolls Every Time
One of the best features of these frozen poppyseed rolls is the flexibility they offer. You don’t have to commit to using all 24 rolls at once. When you desire a smaller batch of warm, fresh rolls, simply remove the desired quantity from the freezer bag. Before re-sealing and returning the remaining rolls to the freezer, take a moment to wipe out any condensation that may have formed inside the bag with a paper towel. This simple step helps to prevent excess moisture from compromising the texture of the other rolls. If you decide to defrost an entire bag, be sure to perform the same condensation-wiping step once they have fully thawed. Removing this extra moisture is essential for preserving their delightful softness and ensuring they taste just as good as they did when freshly baked. Simply let them come to room temperature or warm them gently in the oven for a “fresh-out-of-the-oven” experience.

Soft Poppyseed Buns: Your New Favorite for Sandwiches & Sliders
This incredible poppyseed roll recipe yields beautifully soft and perfectly sized buns that are far more versatile than just a dinner side. Their shape and wonderfully tender crumb make them ideal for crafting delightful sandwiches. Imagine pairing these fluffy rolls with delicious holiday leftovers – it’s a culinary match made in heaven! The slightly sweet, buttery flavor of the rolls perfectly complements savory fillings, creating a truly memorable bite.
For those who adore those popular overnight slider recipes often made with Hawaiian rolls, such as classic Ham & Cheese Sliders, prepare to have your mind blown! Swapping out the Hawaiian rolls for these homemade poppyseed rolls will elevate your sliders to an entirely new level of deliciousness. The added texture and subtle nutty flavor from the poppy seeds bring a gourmet touch that guests will rave about. These soft buns hold up wonderfully to various fillings and sauces, making them an excellent choice for any mini sandwich creation.
Consider using these beautifully soft and handmade poppyseed buns instead of Hawaiian Rolls in my popular Baked Roast Beef Slider recipe. The combination of savory roast beef and zesty horseradish sauce nestled within these fluffy poppyseed rolls creates an unforgettable gourmet experience that’s perfect for parties, game days, or a delightful family dinner.
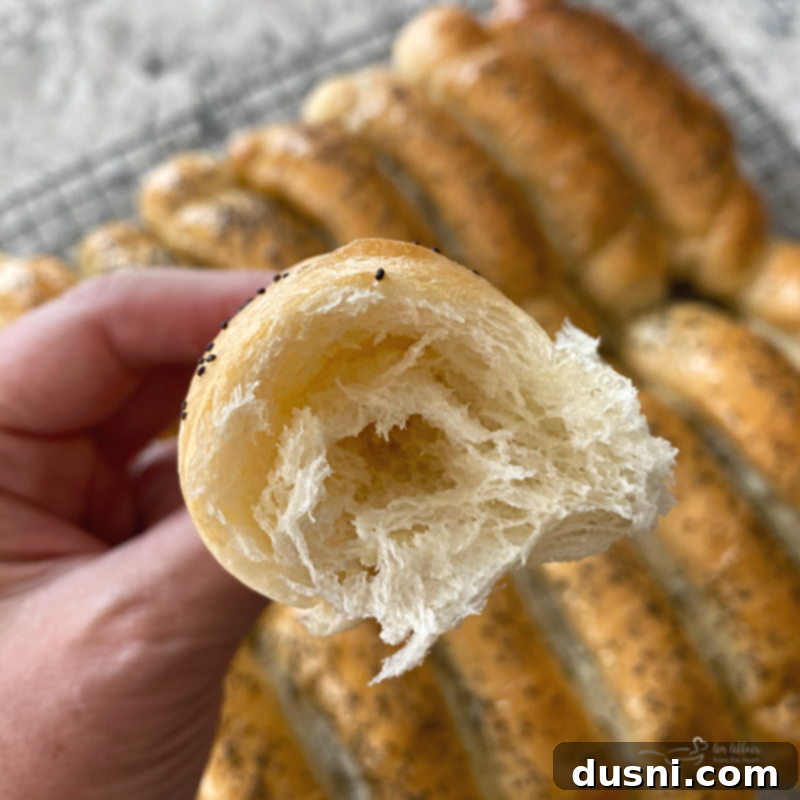
Just take a moment to admire those perfectly golden, soft, and pull-apart poppyseed rolls! Their tender crumb and irresistible aroma are a testament to how simple steps can lead to extraordinary results. They’re not just bread; they’re a delicious experience waiting to happen.
Cherished Traditions: More Tried & True Family Recipes
Aunt Carol’s Poppyseed Rolls are not just a delicious addition to our family menu; they will proudly take their place as the newest jewel in my expanding collection of cherished family recipes. This recipe joins other beloved classics, like her delightful Cherry Pie Jell-O Salad, a sweet and tangy treat that evokes fond memories of countless gatherings. These are more than just recipes; they are culinary heirlooms, passed down through generations from my mother, grandmothers, and other dear family members. Each dish carries with it stories, laughter, and the warmth of shared meals, making them truly invaluable to me.
My entire collection of family recipes is built upon generations of wonderful food and the enduring tradition of gathering around the family table, a practice I hold incredibly dear. It’s a testament to the power of food to connect us, to celebrate, and to create lasting memories. I can confidently promise that you simply cannot go wrong with any of these tried and true family recipes. Each one has stood the test of time, earning its place at the heart of our family’s culinary heritage, and now, I’m thrilled to share them with you, so you can start your own delicious traditions.
Explore More Delicious Bread Recipes to Bake and Love
My passion for baking bread manifests in countless delightful forms, offering a world of comforting aromas and tastes. From effortlessly simple Quick Bread Recipes that require no yeast, to the satisfying artistry of Yeast Breads, and the comforting familiarity of Muffins, Biscuits, and Rolls – few things can evoke such a profound sense of warmth and fill your kitchen with a more heavenly scent than freshly baked bread. There’s a primal satisfaction in creating something so nourishing and delicious from scratch (or with a clever shortcut!).
I warmly invite you to explore my extensive collection of Bread Recipes, where you’ll find everything from hearty loaves to delicate pastries. Before you leave, be sure to also browse through my dedicated section of Biscuits, Rolls, and Muffins. Whether you’re looking for a quick breakfast treat, a perfect side for dinner, or a comforting snack, you’re sure to discover a new favorite that will become a staple in your home.
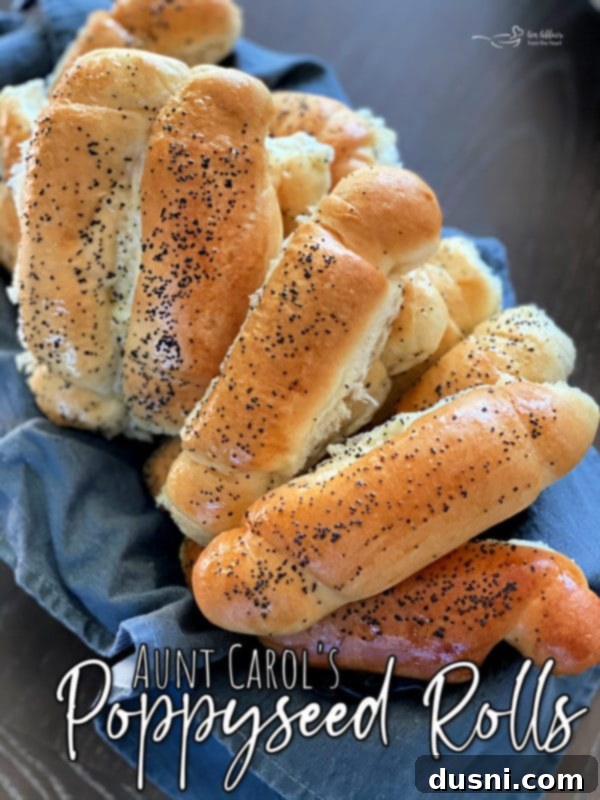
Now that you’re well-versed in the history, the secret, and the joy of these “homemade” Poppyseed Rolls, it’s time to get baking! Let’s dive into the full, easy-to-follow recipe. 
LIKE THIS RECIPE?
Don’t forget to give it a ⭐️⭐️⭐️⭐️⭐️ star rating and
leave a comment below the recipe!

Print Recipe
The BEST Poppyseed Rolls
Ingredients
- 1 package 36 count Rhodes Frozen Dinner Rolls
- Vegetable Oil
- 1 egg
- poppy seeds
Instructions
-
Spray a large cookie sheet with non-stick cooking spray. Set aside.
-
Take one roll and flatten it into an oval with a rolling pin. Leave the rolling pin on the edge furthest away from you.
-
Begin rolling the dough away from you, tugging outward and towards you as you go to stretch it a bit.
-
Lay them, seam side down, facing the same way, with “room to grow” on the cookie sheet. We fit 18 to each cookie sheet.
-
Brush each roll gently with vegetable oil. Cover the cookie sheets loosely with plastic wrap.
-
Let rise for 2-3 hours, or until rolls are about one and one half to two times their size.
-
Preheat oven to 350 degrees F.
-
Mix an egg white with 1-2 teaspoons of water to make an egg wash. Brush the tops of the risen rolls with egg wash, and sprinkle them with poppy seeds.
-
Bake for 10 minutes and turn the pan 180 degrees. Bake for about 8 minutes more, watch them closely so they don’t get too brown.
-
Remove them from the oven, and brush the tops with vegetable oil.
-
Transfer them to cooling racks to cool completely.
-
Store in large (2.5 gallon) zippered bags.
Notes
The rolls are really soft, so be careful not to smash them. Place them in the freezer, without stacking them, until they freeze. Then you can safely stack them if need be. They will keep nicely in the freezer for 3-4 months.
DEFROSTING ROLLS – You don’t have to use all 24 rolls when you want some, simply remove what you want from the bag, take a paper towel and wipe out any condensation from the inside of the bag, re-seal and place back in the freezer. If you defrost the whole bag, wipe out that condensation from the bag after they defrost, to keep that extra moisture out.
Nutrition
