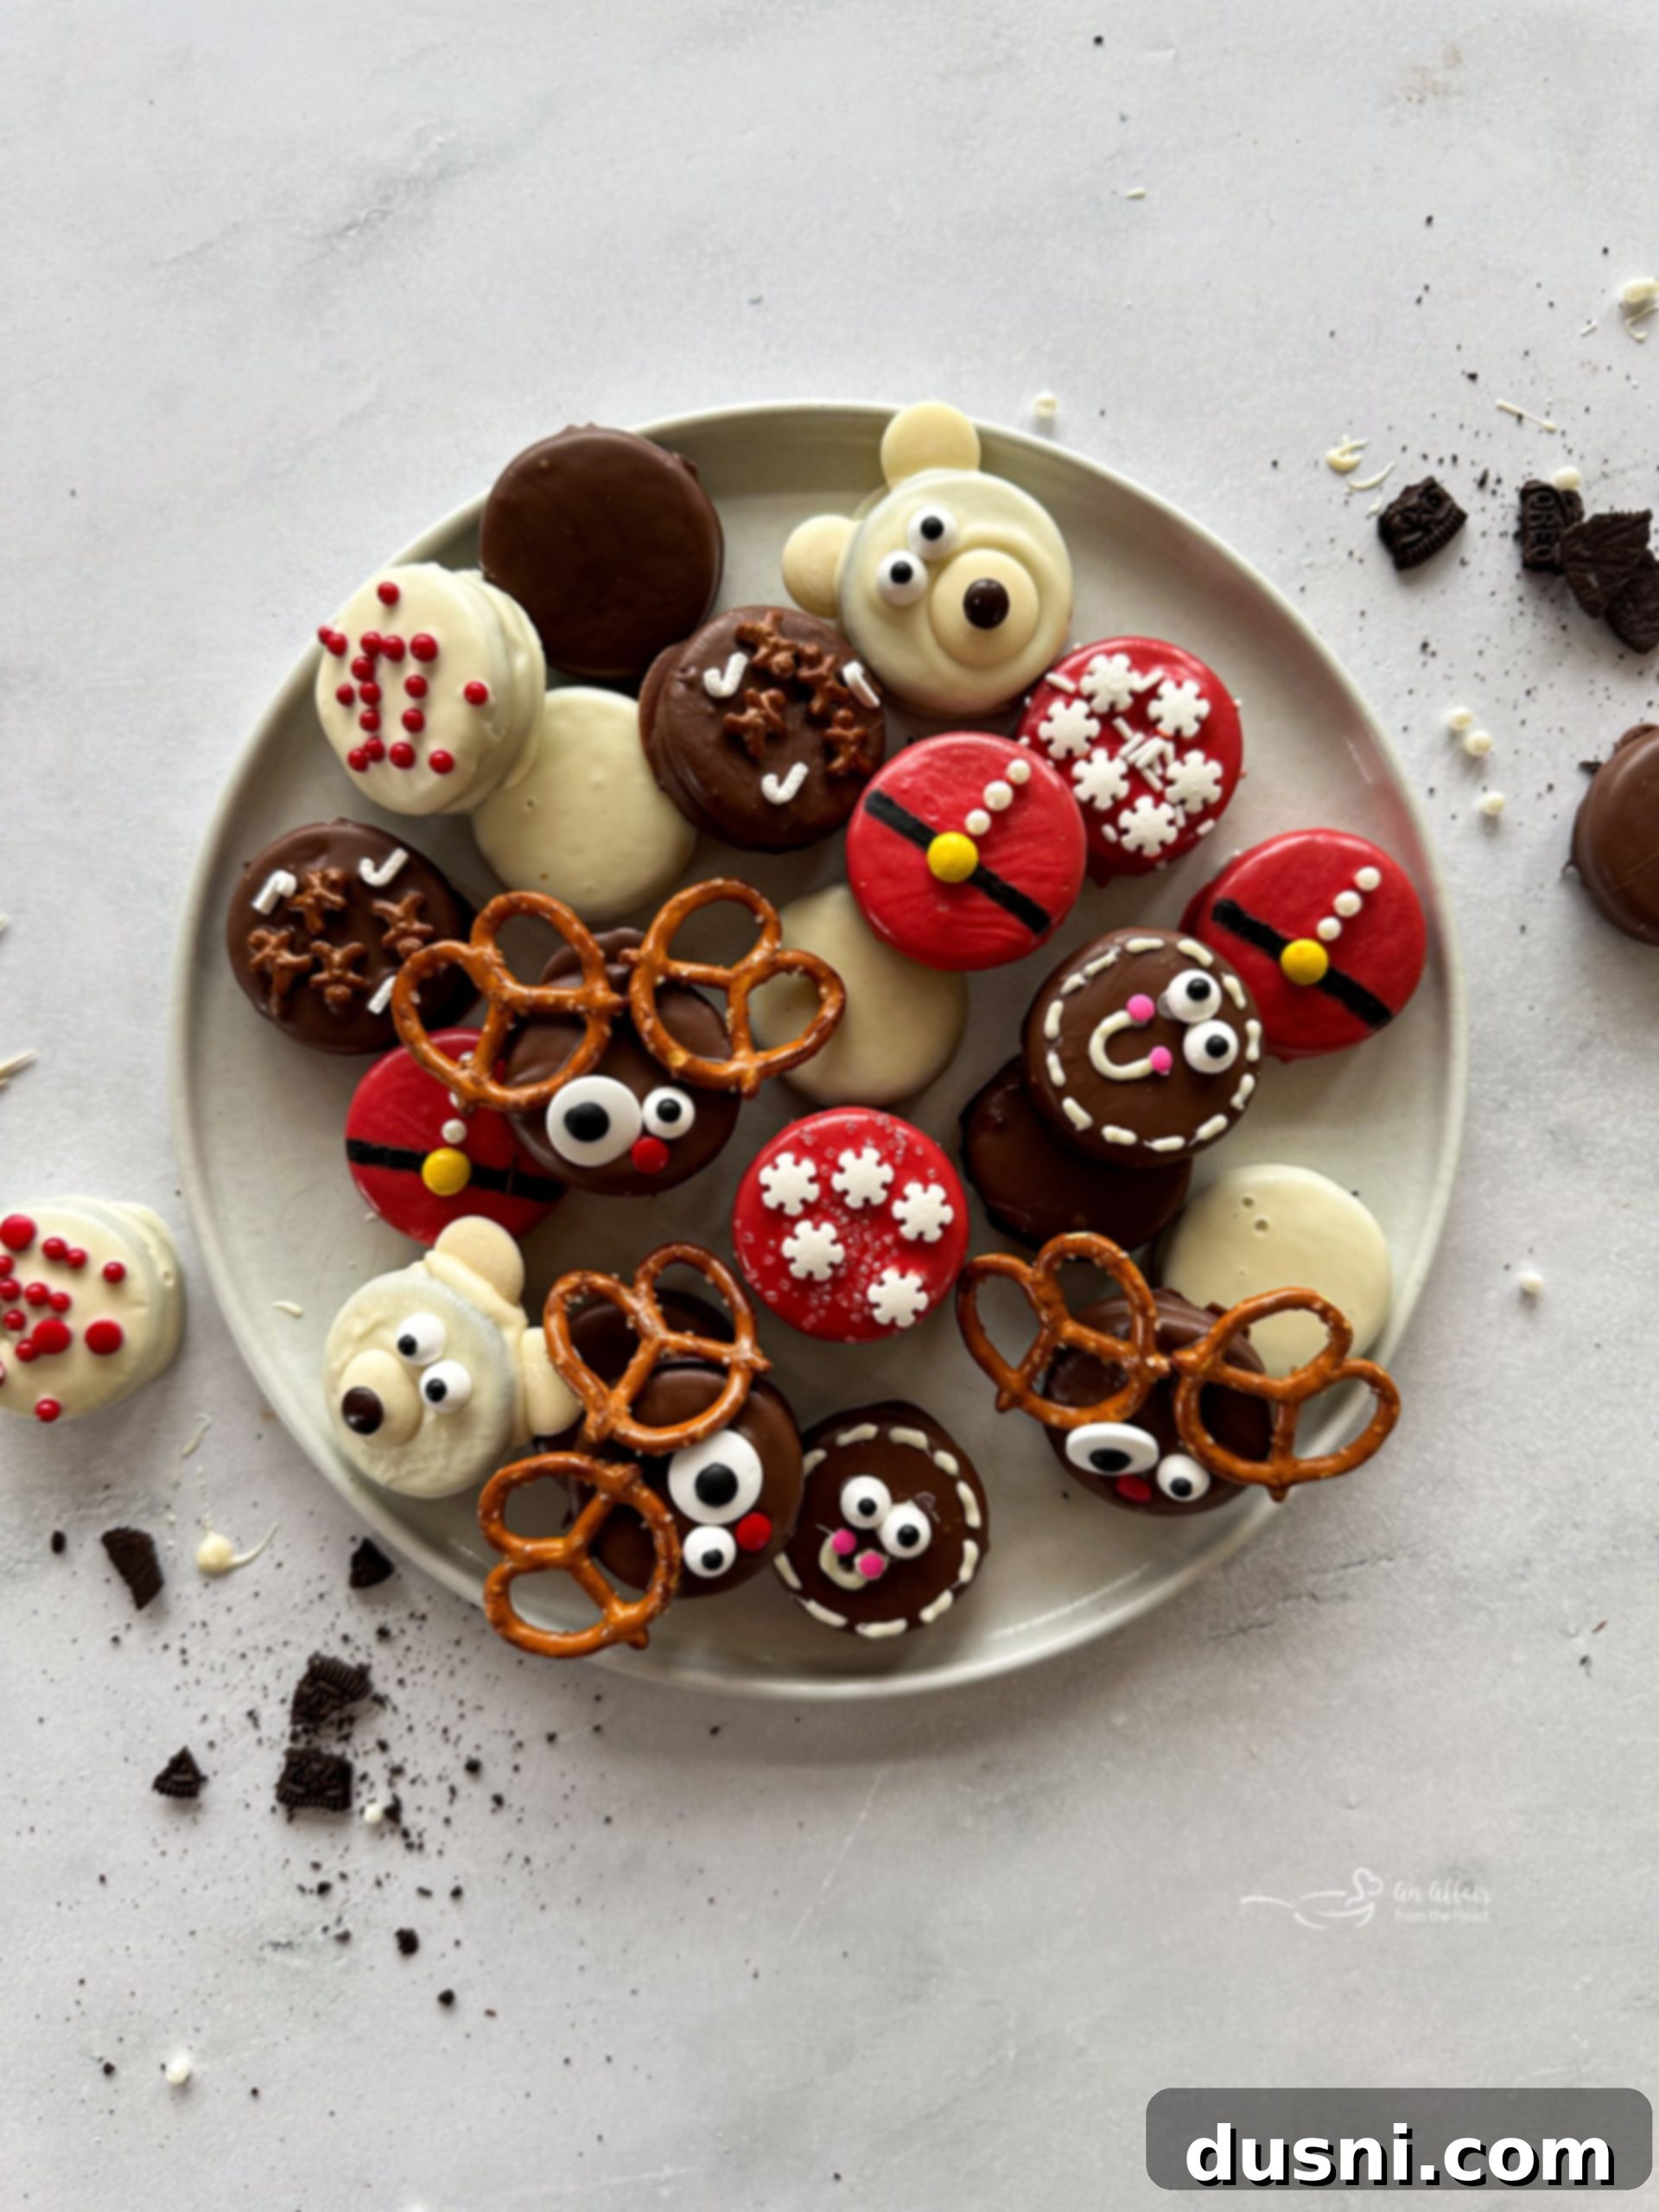
Festive & Easy: The Ultimate Guide to Chocolate-Dipped Christmas Oreos
Get ready to transform your favorite sandwich cookies into adorable, delicious, and undeniably festive holiday treats! These Christmas Oreos are so charming, you might almost hesitate to take a bite – but we guarantee they won’t last long once they hit your holiday spread. Combining the beloved crunch of Oreos with a smooth chocolate coating and whimsical decorations, these holiday cookies are as delightful to create as they are to devour. Perfect for sharing, gifting, or simply enjoying with a warm cup of cocoa, these dipped Oreos embody the spirit of the season in every bite.
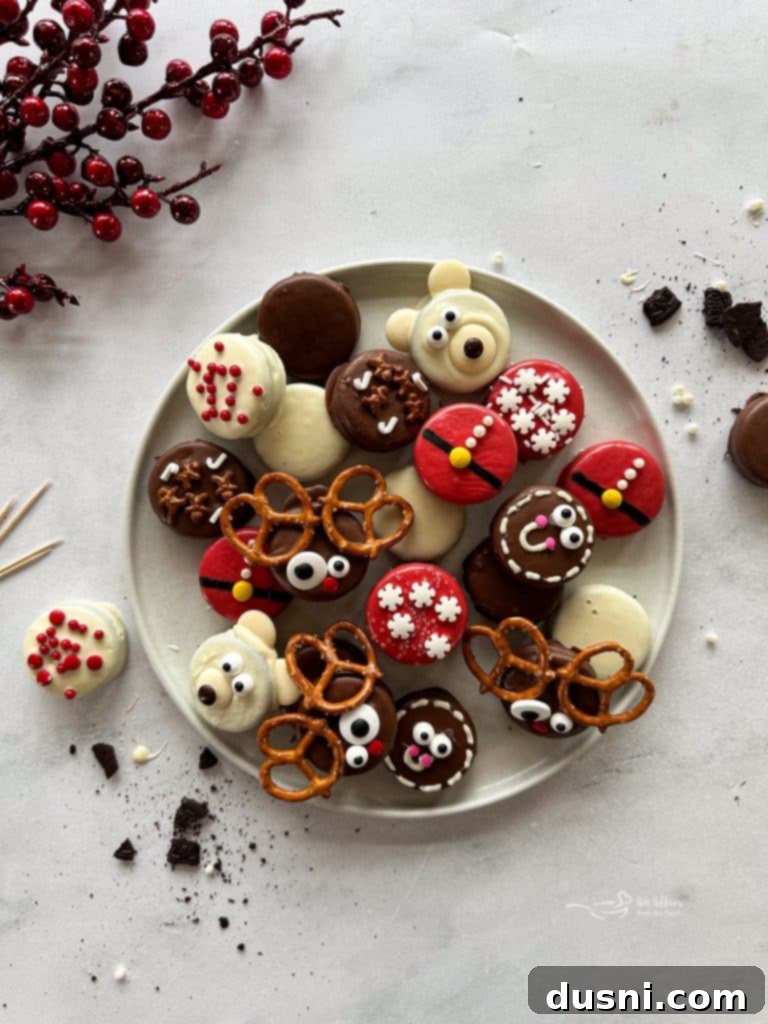
It feels like our pantry is perpetually stocked with Oreo cookies, a testament to their universal appeal and my husband’s particular weakness. They’re the perfect quick, sweet bite after a meal. While Oreo often releases special holiday editions with colored fillings or peppermint flavors, and even some dipped in chocolate (those mint ones straight from the freezer are a personal favorite!), I’ve rarely encountered anything as truly festive and creatively adorned as these homemade dipped Oreos in local stores. Have you?
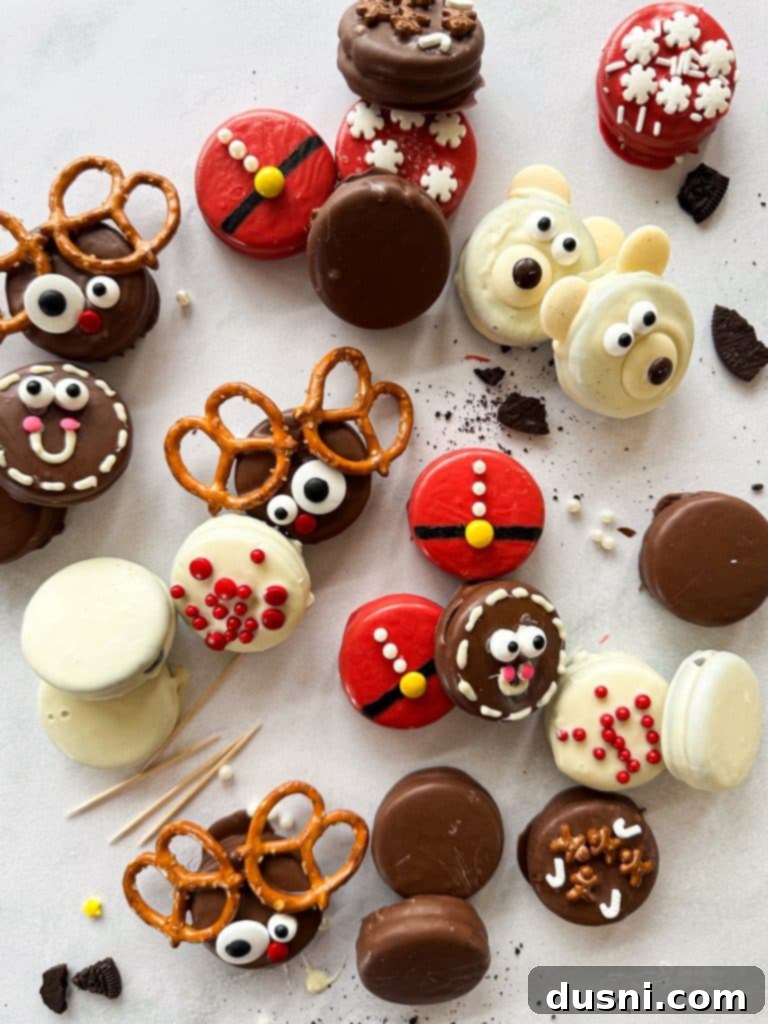
Unwrap the Magic of Christmas Oreos
If you’re a devoted Oreo enthusiast, prepare to fall in love with these holiday-themed creations. Whether you opt for classic Original Oreos or experiment with holiday-flavored varieties, these cookies are effortlessly transformed into delightful characters like jolly Santa Clauses, adorable polar bears, and charming reindeer. The secret lies in using candy melting wafers and a selection of festive decorations. Despite their elaborate appearance, these dipped Oreos are surprisingly simple to make, making them an ideal project for all skill levels. And of course, the taste is pure holiday magic – a perfect blend of crisp cookie and sweet, smooth chocolate.
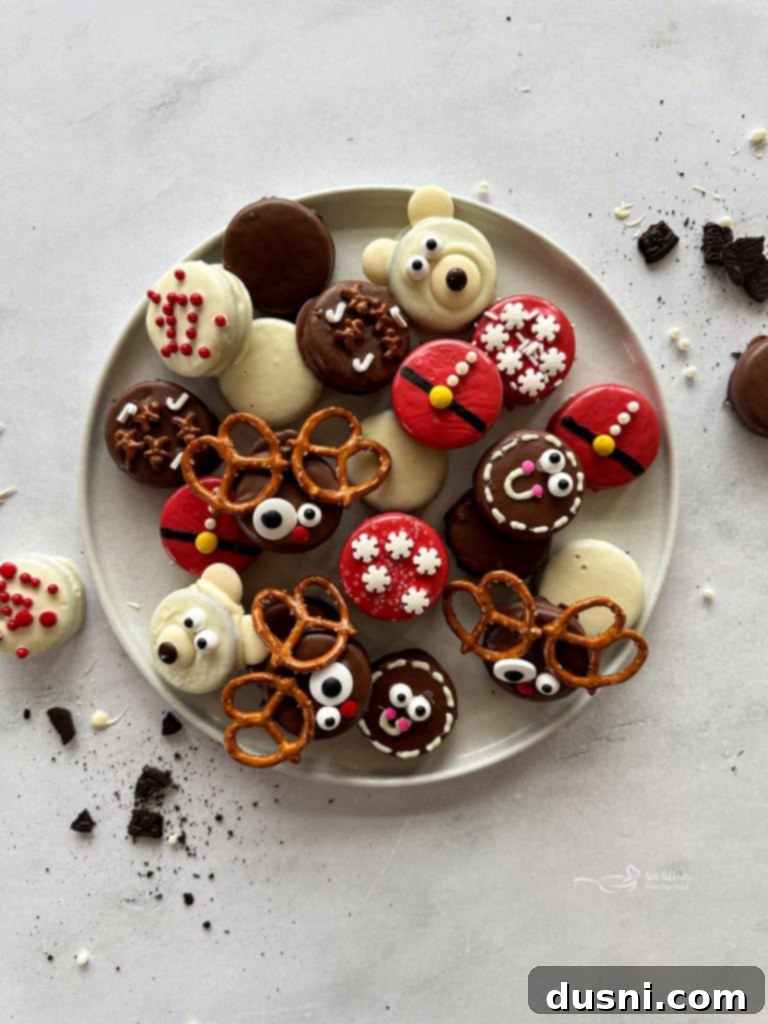
Festive & Fun: Christmas Oreo Cookies for Every Occasion
Nothing says “Happy Holidays” quite like a batch of homemade, festively decorated cookies. These Christmas Oreos are not only a fantastic treat for your family but also make an affordable and thoughtful gift for neighbors, friends, teachers, and colleagues. Imagine wrapping a collection of these cheerful cookies in a clear bag with a festive ribbon – a quick, easy, and incredibly charming present! They’re also a sensational addition to any holiday cookie swap, guaranteed to stand out with their intricate designs and delicious flavor. Beyond gifting, these cookies are perfect for a kid’s holiday activity, providing endless entertainment and a sweet reward for their creativity. Plus, they add a vibrant pop of color and cheer to any holiday dessert table or party spread.
If you’re already a fan of these delightful Christmas Oreos, you’ll surely adore my other Oreo-inspired creations. Be sure to check out my Oreo Bark and Oreo Truffle recipes for more ways to enjoy this iconic cookie!
Effortless Elegance: Easy Christmas Cookies You Can Make Ahead
One of the best features of these Christmas Oreos is their make-ahead convenience. Prepare a batch a week or two in advance and store them properly, and you’ll have delightful holiday treats ready at a moment’s notice. To keep them fresh, layer them between sheets of parchment paper in an airtight container at room temperature. For an extra refreshing indulgence, you can even stash them in the freezer for up to three months – simply thaw them at room temperature when you’re ready to enjoy. Whether served at your annual holiday gathering, gifted to loved ones, or simply enjoyed as a festive snack, these cookies are guaranteed to be a hit and a memorable addition to your holiday dessert table.
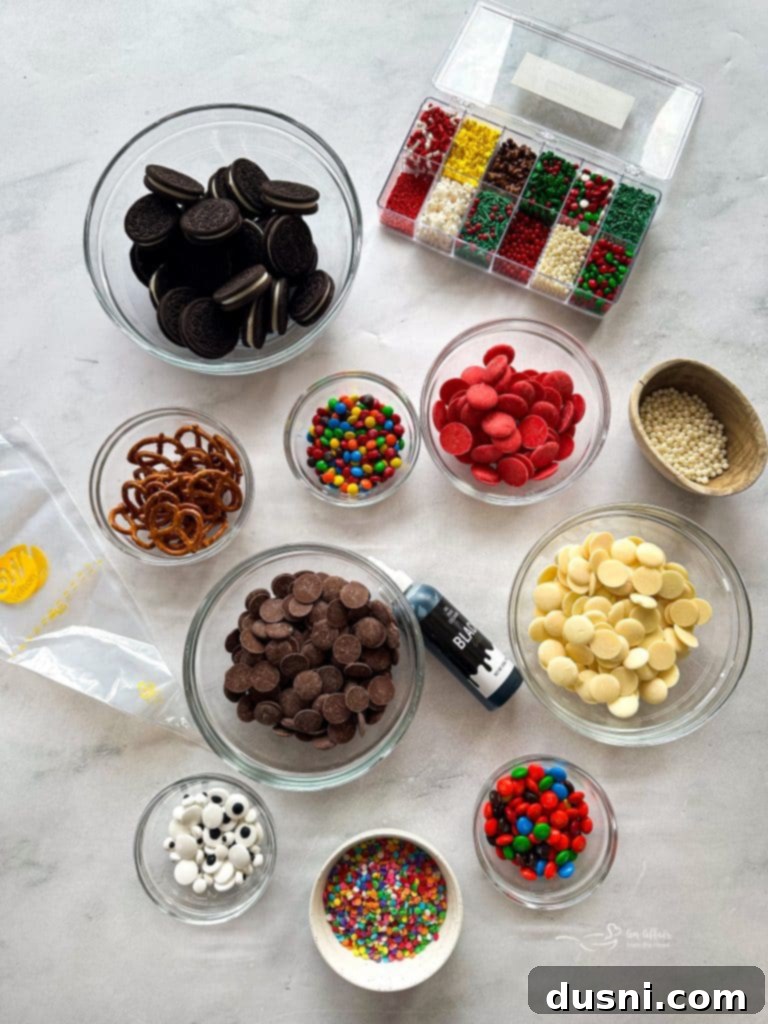
Gather Your Ingredients for Chocolate-Dipped Christmas Oreos
Crafting these adorable Christmas Oreos requires a few key ingredients, most of which are easily found at your local grocery or craft store. For a complete list with precise measurements, please refer to the detailed recipe card at the bottom of this post. Here’s what you’ll need for each festive design:
To Make the Reindeer Oreos:
- Candy Melting Wafers: Choose classic milk chocolate or rich dark chocolate wafers to create the perfect base coating for your reindeer.
- Oreo Cookies: Original Oreos are a fantastic choice, but feel free to use any variety of Oreo you prefer!
- Candy Eyes: These delightful little edible eyes bring your reindeer to life with a playful gaze.
- Red M&Ms: A single red M&M serves as the iconic Rudolph nose, adding a pop of color and charm.
- Mini Pretzel Twists: These crunchy pretzels are ingeniously used to form the reindeer’s distinctive antlers.
For Making the Santa Suit Oreos:
- Red Candy Melting Wafers: Essential for creating Santa’s vibrant red coat. These wafers melt smoothly for an even, festive finish.
- Oreo Cookies: Again, any type of Oreo will work wonderfully as the base for Santa’s suit.
- Black Gel Writer: A black gel writer or fine paintbrush with black icing is used to draw Santa’s classic belt.
- Yellow M&Ms: Small yellow M&Ms are ideal for crafting Santa’s shiny belt buckle.
- Small White Sugar Pearls: These delicate pearls add the perfect touch for Santa’s suit buttons. Alternatively, you can pipe small dots of white icing.
To Make the Polar Bear Oreo Cookies:
- White Chocolate Candy Melting Wafers: Crucial for achieving the polar bear’s pristine white fur. Ensure they melt smoothly for the best coating.
- Oreo Cookies: Select your favorite Oreo variety to serve as the foundation for these frosty friends.
- Festive Sprinkles, M&Ms, and Candy Eyes: Unleash your creativity! Use these to decorate your polar bears, adding personality and flair.
- Small White Candy Wafers: Needed for the polar bear’s ears and snout.
- Brown Mini M&Ms: A small brown M&M creates a cute, button-like nose.
For Chocolate Dipped Sprinkled Oreos:
- Oreos: Whether you choose Original, Golden, or a seasonal flavored Oreo, these will be the canvas for your sprinkled masterpieces.
- Melting Wafers: Gather various colored melting wafers (white, milk, dark, or colored) to create a diverse assortment of dipped cookies.
- Decorations: Stock up on sugar pearls, M&Ms, vibrant festive sprinkles, colored sugars, and gel writers. The sky’s the limit – let your imagination guide you!
As you continue reading, you’ll discover valuable tips and tricks, smart substitutions, and answers to frequently asked questions about making these irresistible dipped Oreo cookies for Christmas.
Crafting Joy: How to Make Easy Chocolate-Covered Christmas Oreos
Making these festive Christmas Oreo cookies is a truly enjoyable and straightforward process. For a visual guide and additional assistance, be sure to watch the accompanying recipe video!
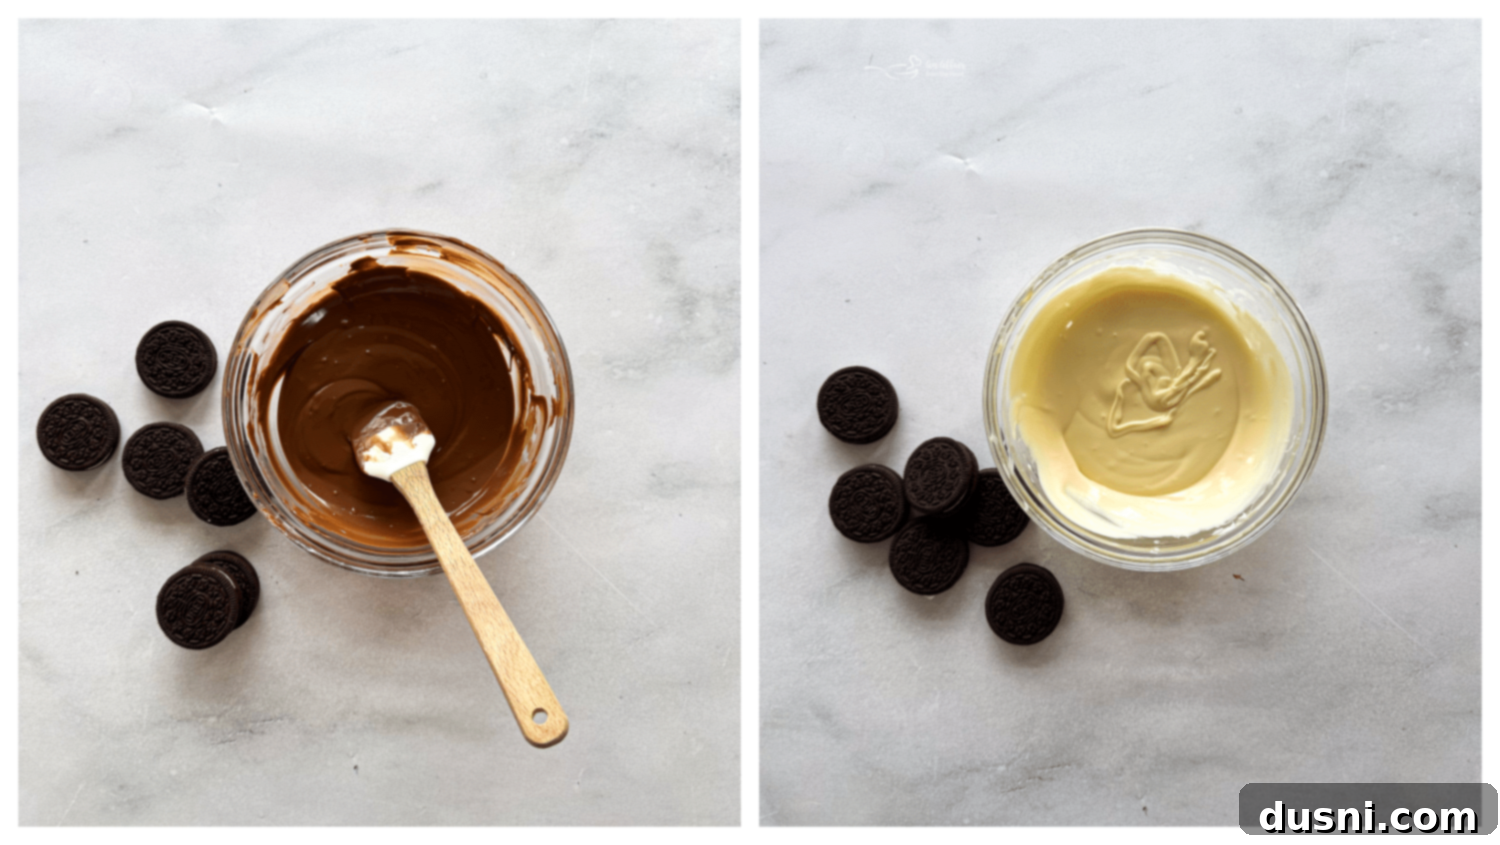
Step-by-Step Instructions:
- Prepare Your Workspace: Begin by lining a baking sheet with parchment paper, wax paper, or a silicone baking mat (like a Silpat). This will prevent your dipped Oreos from sticking as they set.
- Melt the Candy Wafers: In a medium-sized, microwave-safe bowl, add your chosen candy melting wafers (the type will depend on the decoration you’re making). Heat them in the microwave for 1 minute at 50% power, then stir thoroughly. Continue heating in 30-second intervals at 50% power, stirring well after each interval, until the wafers are completely melted and smooth, with no lumps remaining. Alternatively, you can use a double boiler for a more controlled melting process, stirring constantly until smooth.
- Dip the Oreos: Carefully place an Oreo cookie onto a fork. Submerge the Oreo completely into the melted chocolate, turning it gently to ensure it’s fully coated. Lift the cookie out with the fork, tapping the fork lightly against the side of the bowl several times to allow any excess melted chocolate to drip off. This helps create a smooth, even coating.
- Transfer and Decorate: Using a toothpick, gently slide the chocolate-covered Oreo from the fork onto your prepared baking sheet. Repeat this process with the remaining Oreos. Now comes the fun part – decorating!
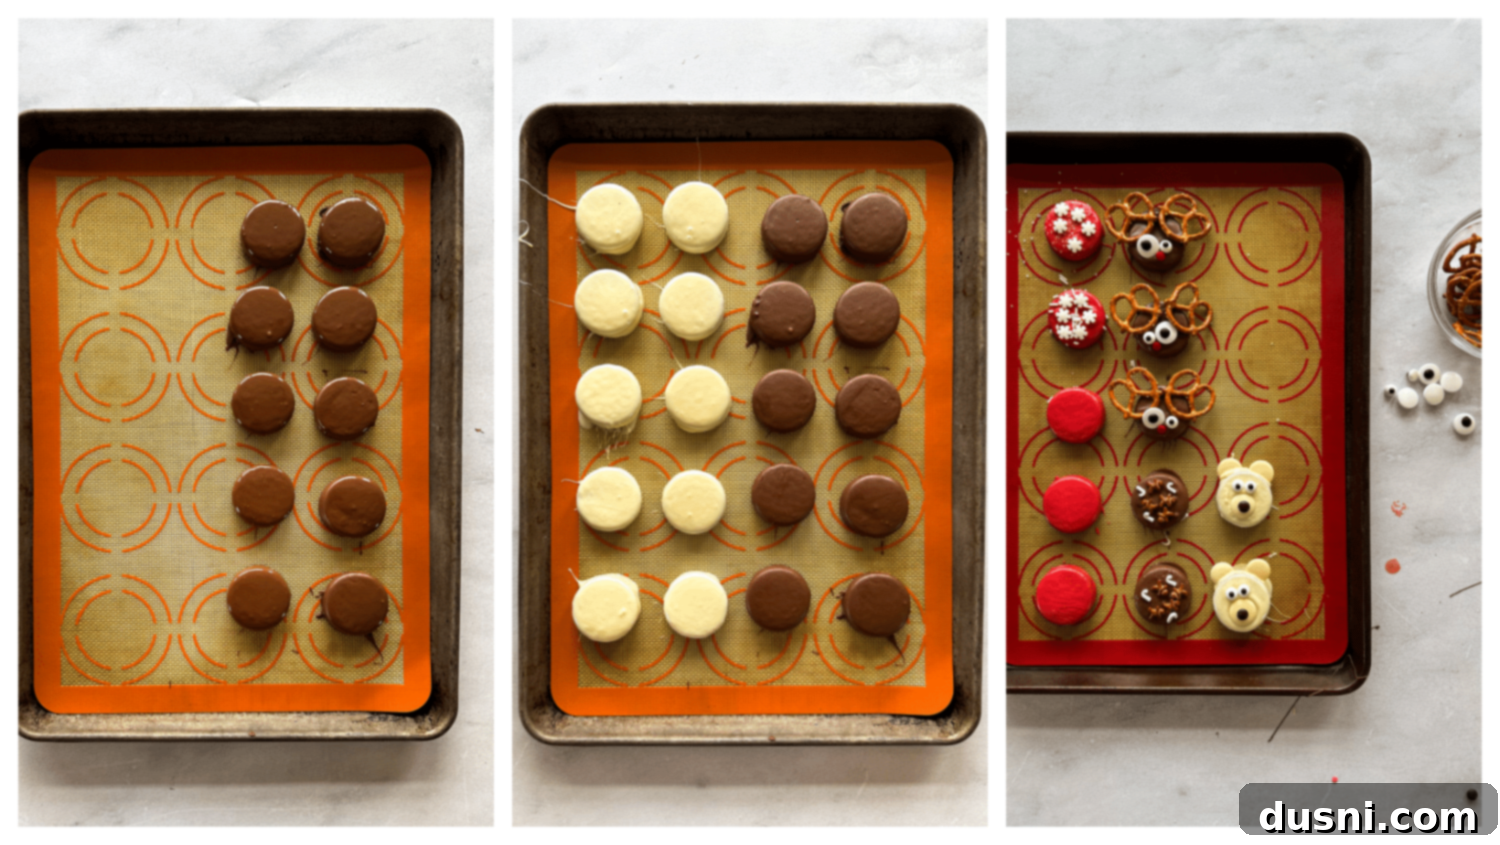
Specific Decoration Techniques:
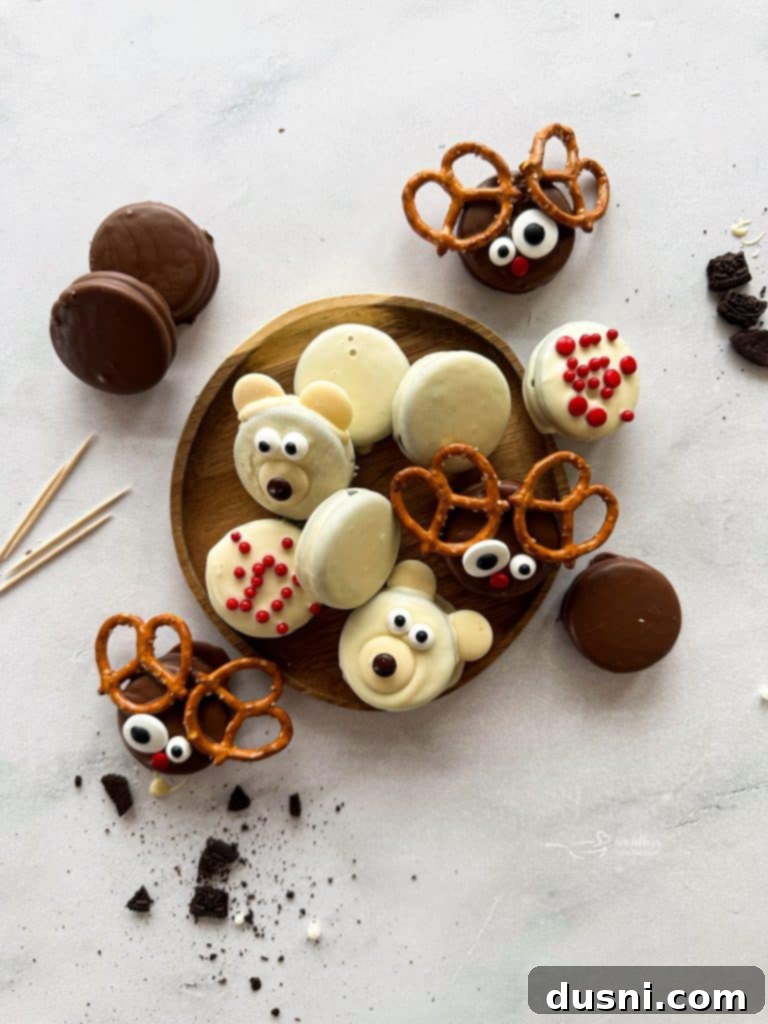
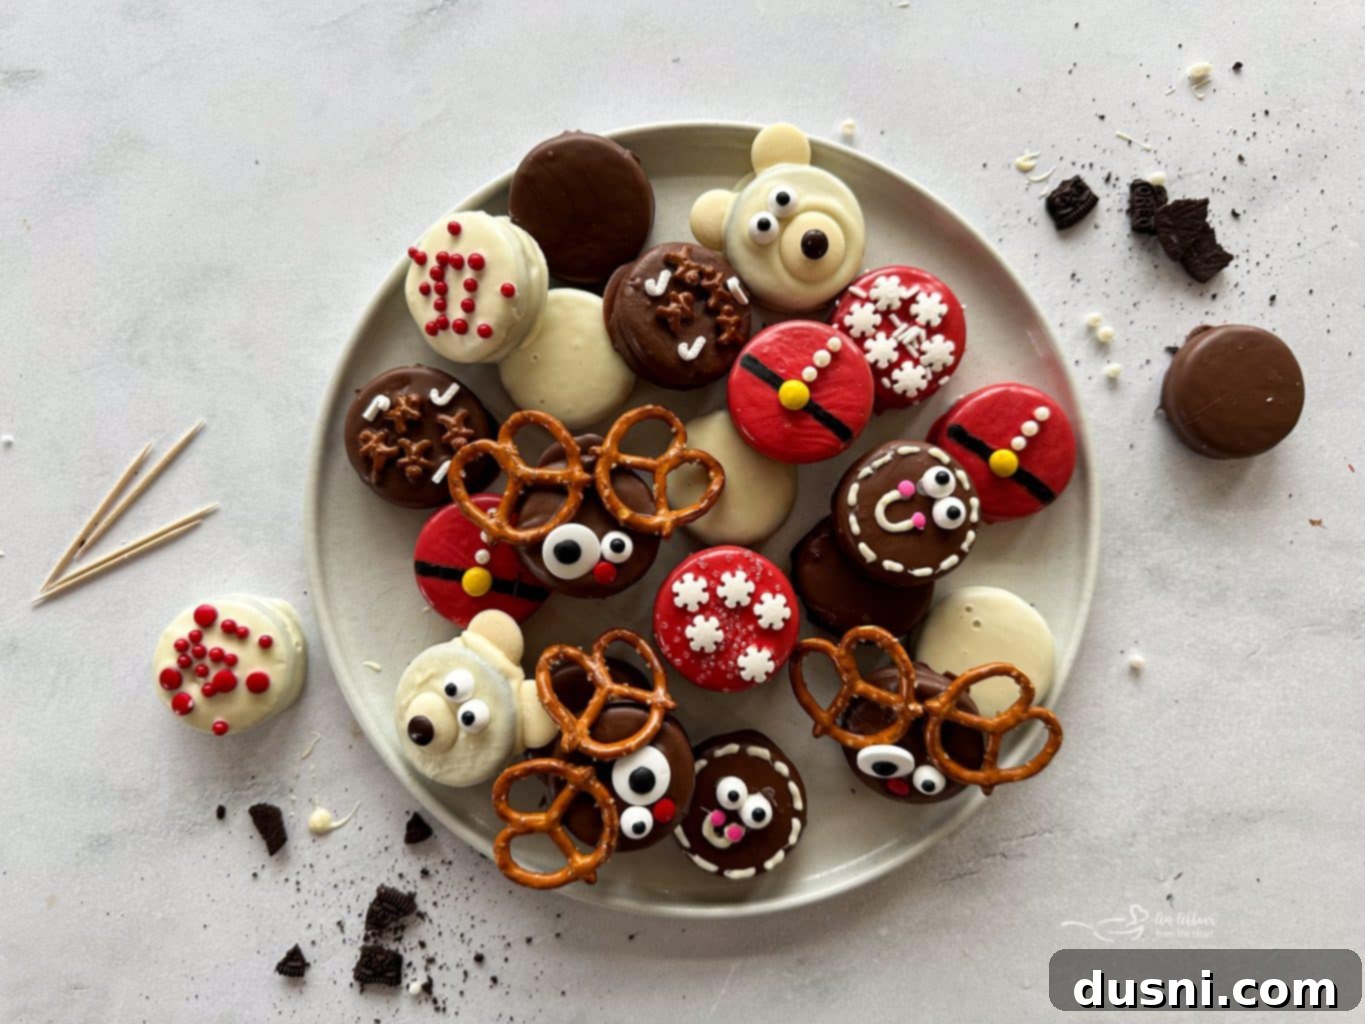
To Make the Reindeer Oreos: While the milk or dark chocolate coating is still warm and pliable, immediately place two candy eyes near the top for the eyes and one red M&M below them for the nose. Then, gently press two mini pretzel twists into the top of the cookie to form the antlers. Allow the cookie to set completely until the chocolate is firm. Repeat for all your reindeer. The warmth of the chocolate will help the decorations adhere securely.
To Make the Polar Bears: As soon as you’ve dipped your Oreo in white chocolate and transferred it to the baking sheet, place two candy eyes. For the ears, position two small white chocolate candy wafer melts at the top of the cookie. For the snout, use another white candy wafer melt, pressing it gently into the center. Finally, press one brown mini M&M onto the tip of the snout to create the polar bear’s nose. Let them set completely.
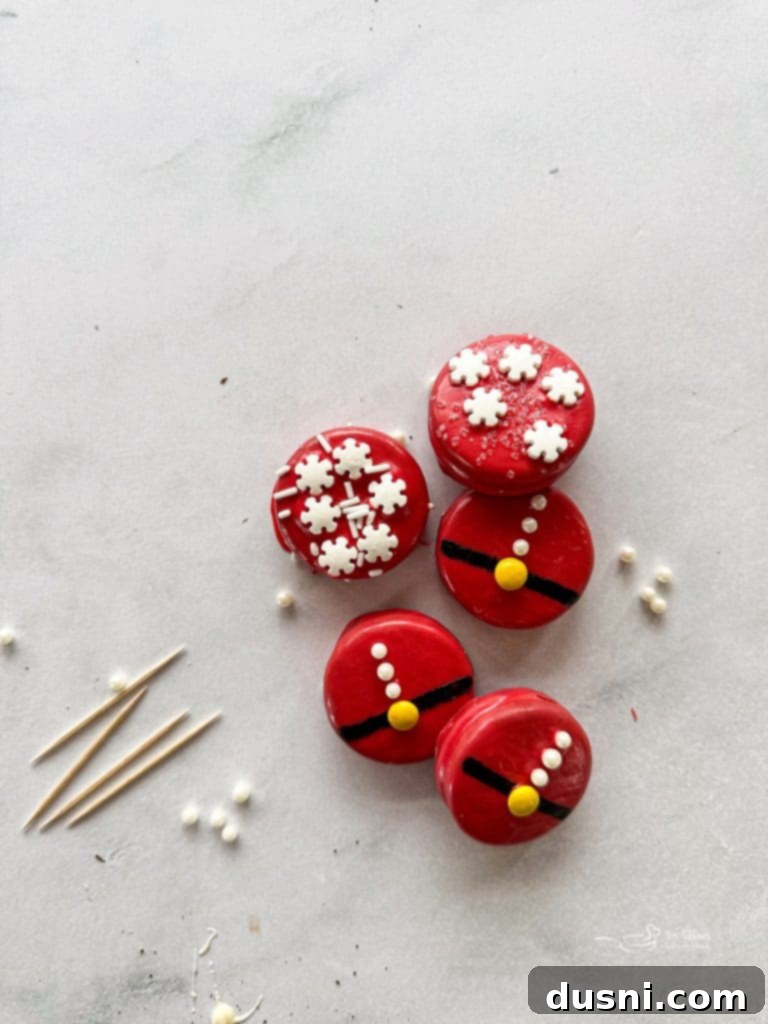
To Make the Santa Suit Oreos: This design requires the red candy coating to harden completely before you begin decorating the details. Once the coating is firm, use a black gel writer (or a fine paintbrush dipped in black icing) to draw a horizontal line across the lower center of the Oreo, resembling Santa’s belt. Next, add a tiny dab of melted chocolate to the back of one yellow M&M and place it in the center of the black belt line to form the belt buckle. For the buttons, you can either pipe small dots of melted chocolate or use small white sugar pearls for a more elegant touch. Allow all decorations to set.
To Make Sprinkled Cookies: For a simpler, yet equally festive look, immediately after dipping an Oreo in your chosen chocolate (while it’s still warm), liberally sprinkle it with an assortment of festive sprinkles, colored sugars, or crushed candy canes. Let the cookie come to room temperature to set completely. This creates a beautiful, sparkling finish.
Fun Idea: For a truly unique touch, add a mini Reese’s peanut butter cup to the top of a dipped and sprinkled Oreo before it sets. This makes them look like adorable edible ornaments!
Once your chocolate-dipped Oreos have fully set, store them in an airtight container at room temperature, where they will remain fresh and delicious for up to two weeks. For longer storage, you can freeze them for up to three months. Simply thaw them at room temperature on the kitchen counter when you’re ready to enjoy.

Love It? Pin It!
If you’re as enchanted by this recipe for Christmas Oreo cookies as we are, don’t let it get lost in the holiday rush! Be sure to pin it to your favorite Pinterest recipe board now so you can easily find it for years to come. Share the festive joy!
Creative Substitutions for Your Christmas Oreos
When it comes to baking and decorating, don’t be afraid to experiment! Recipes are guidelines, and personalizing them to suit your taste, dietary preferences, or even what you have on hand is part of the fun. Here are some ideas for substitutions to make these Christmas Oreos uniquely yours:
- Oreo Varieties: Instead of traditional Original Oreos, consider using Golden Oreos for a vanilla base, Mint Oreos for a cool, refreshing flavor, or even Peanut Butter Oreos for an extra indulgent treat.
- Melting Wafers: If you don’t have candy melting wafers, you can easily substitute them. Use good quality white chocolate chips or melted white chocolate bars for the white coating, or almond bark for a similar texture. For chocolate coatings, dark chocolate chips or bars can replace dark chocolate wafers, and milk chocolate chips can stand in for milk chocolate wafers. Just be aware that real chocolate may require tempering for a truly smooth, shiny finish that doesn’t melt easily at room temperature.
- Small Candies: Any small, round candy can be used in place of M&Ms for noses or buttons. Think mini chocolate chips, Reese’s Pieces, or even small gumdrops cut into shapes.
- Additional Toppings: Beyond sprinkles, get creative with your toppings! Sprinkle chopped nuts (like pecans or walnuts), finely crushed candy canes for a minty crunch, or even edible glitter for extra sparkle over the wet chocolate coating.
- Flavor Extracts: Add a drop or two of peppermint, almond, or orange extract to your melted chocolate or candy coating for an extra layer of festive flavor.
Frequently Asked Questions About Christmas Oreo Cookies
Here are some common questions and helpful answers to ensure your Christmas Oreo making experience is a breeze:
Q: Can I make this Christmas Oreos recipe in advance?
A: Absolutely! These festive cookies are ideal for making ahead, which is perfect for busy holiday schedules. When stored properly in an airtight container at room temperature, they will keep beautifully for up to two weeks. For even longer storage, they can be frozen for up to three months; just allow them to thaw completely at room temperature before serving.
Q: Why is the coating on my Christmas Oreos not firming up?
A: If your candy coating isn’t setting properly, it could be due to a few reasons. One common issue is that the coating might be too thick. If it’s too thick, it won’t set as quickly or as firmly. To remedy this, add a small amount (about 1/2 to 1 teaspoon) of coconut oil or vegetable shortening to your melted coating and stir until it reaches a thinner, more fluid consistency. Ensure you’re using proper candy melting wafers or chocolate that is designed to set hard at room temperature. High humidity can also affect setting time.
Q: What are some great packaging ideas for gifting these?
A: There are countless charming ways to package these holiday cookies for gifting! For budget-friendly options, visit your local dollar store or craft store, which often have an abundance of festive cellophane bags, decorative tins, small gift boxes, and holiday-themed wrapping paper. You can place a few cookies in small cello bags tied with ribbon, arrange a dozen in a decorative tin, or stack them in clear containers. Adding a handwritten tag or a sprig of evergreen can make your gift even more special and personalized.
Q: Can I use regular chocolate chips instead of melting wafers?
A: While you can technically use regular chocolate chips, they don’t always yield the same smooth, firm, and non-sticky finish as candy melting wafers. Chocolate chips contain less cocoa butter, which means they might require a touch of shortening or coconut oil to achieve a good dipping consistency, and they might not set as hard or have the same sheen. For the best results, especially if you’re looking for a professional-looking finish, candy melting wafers (also known as candy melts or compound chocolate) are recommended because they are designed to melt smoothly and set firmly without tempering.
Q: How can I prevent the chocolate from “blooming” (white streaks) after it sets?
A: Chocolate bloom, the white, streaky, or splotchy appearance on chocolate, is usually caused by improper storage (temperature fluctuations) or incorrect melting/setting. To minimize this, ensure you melt your chocolate slowly and evenly, avoiding overheating. Once dipped, let the Oreos set in a cool, stable environment – not too warm and not too cold (avoid the fridge unless specified to cool quickly, and even then, cover them to protect from moisture). Store them in an airtight container at a consistent room temperature.
Expert Tips & Tricks for Perfect Dipped Oreos
- Achieve Smooth Melt: Always ensure your melted candy wafers or chocolate are completely smooth and free of lumps before you start dipping the Oreos. This will guarantee a beautiful, even coating. Stir frequently during melting.
- Tap Off Excess: After dipping, tap the fork holding the Oreo against the side of your melting bowl several times. This allows any excess coating to drip off, preventing puddles and ensuring your decorations adhere better and the cookie isn’t too thick with chocolate.
- Speed Up Setting: For quicker setting, especially if you’re making many batches or live in a warm climate, place the freshly dipped Oreos on the baking sheet into the refrigerator for 5-10 minutes. Be cautious not to leave them in for too long, as extreme temperature changes can cause some chocolates to bloom.
- Double Boiler Method: If you’re nervous about microwaving, or prefer a more gentle approach, melt your wafers or chocolate over a double boiler. This provides consistent, indirect heat, reducing the risk of scorching and ensuring a silky-smooth consistency.
- Piping for Precision: For intricate details like Santa’s belt buttons or tiny outlines, use a piping bag (or a small ziplock bag with a tiny corner snipped off) rather than trying to dab with a toothpick. This offers much greater control and precision.
- Work in Batches: If you’re making a large quantity or using multiple colors, it’s often best to melt and dip in smaller batches. This keeps your melted coating at the right temperature and consistency, preventing it from hardening prematurely.
- Prep Your Decorations: Before you start dipping, have all your sprinkles, M&Ms, candy eyes, and pretzels laid out and ready. Once an Oreo is dipped, the clock is ticking for the chocolate to set, so you need to apply decorations quickly!

This recipe is proudly part of The Sweetest Season, an inspiring annual virtual cookie swap. Co-hosted by Erin of The Speckled Palate and Susannah of Feast + West, this event brings food bloggers together each year to share innovative holiday cookie recipes perfect for making and gifting. We believe that holiday treats can do more than just delight taste buds; they can also make a meaningful difference.
This year, we are channeling our collective passion for baking into a crucial cause: raising money for Cookies 4 Kids’ Cancer. This recognized 501(c)3 non-profit organization is dedicated to funding research for new, innovative, and less-toxic treatments for childhood cancer. Since its inception in 2008, Cookies for Kids’ Cancer has generously granted nearly $18 million towards pediatric cancer research, providing over 100 research grants to leading pediatric cancer centers across the country. These grants have directly led to more than 35 treatments currently available to children bravely battling cancer today.
We invite you to join us in supporting this incredibly important cause! You can make a difference by donating through our dedicated fundraising page. Your contribution, no matter the size, is invaluable.
There’s even more exciting news: Cookies for Kids’ Cancer is currently in a matching window with their generous friends at OXO. This means OXO will match every dollar raised through the end of 2024, up to a remarkable $100,000! Any money we collectively raise will automatically be doubled on our fundraising page, significantly amplifying our impact. Let’s bake some cookies and make a difference!

Discover More Holiday Recipes to Love
If these festive Chocolate-Dipped Christmas Oreos have ignited your holiday baking spirit, you’ll be thrilled to explore more delicious treats perfect for the season. Elevate your holiday dessert table with my elegant Holiday Biscotti, savor the comforting spice of Gingerdoodle Cookies, or enjoy the delicate sweetness of Peppermint Meringues. For recipes with a delightful festive twist, don’t miss my decadent Chocolate Mint Candy Cookies or these charming Hot Chocolate Thumbprint Cookies. Each recipe offers a unique way to celebrate the most wonderful time of the year!
These creative Christmas Oreo cookie ideas are guaranteed to be a sensational hit, whether you’re serving them as a decadent treat or presenting them as a thoughtful, handcrafted holiday gift. Enjoy the magic of holiday baking!

LIKE THIS RECIPE?
Don’t forget to give it a ⭐⭐⭐⭐⭐ star rating and
leave a comment below the recipe!
Print Recipe
Christmas Dipped Oreo Cookies
These Christmas Oreos are almost too cute to eat and they won’t stick around for long! Easy and festive, these holiday cookies are as much fun to make as they are to eat.
15 mins
30 mins
Course: Cookies |
Cuisine: American |
Keyword: Christmas cookies, Christmas Oreos, Dipped Oreos, Oreo Polar Bears, Oreo Reindeer, Oreos, Santa Oreos
Servings: 48 servings
Ingredients
- For Making the Santa Suit Oreos:
- 2 cups Red candy melting wafers
- 24 Oreo cookies
- Black gel writer
- 24 Yellow mini M&Ms
- Sugar pearls or piped chocolate
- To Make the Polar Bear Oreo Cookies:
- 2 cups White chocolate or vanilla candy melting wafers (+ 72 additional for ears and nose)
- 24 Oreo cookies
- 48 Candy Eyes
- 24 Brown mini M&Ms
- For Making the Reindeer Oreos:
- 2 cups Milk chocolate or dark chocolate candy wafers
- 24 Oreo cookies
- 48 Candy eyes
- 24 Red mini M&Ms
- 48 Mini pretzel twists
- For Chocolate Dipped Sprinkled Oreos:
- 24 Oreos
- 2 cups Various melting wafers
- M&Ms, festive sprinkles, colored sugars, and gel writers.
Instructions
- Line a baking sheet with parchment paper, wax paper, or a silicone baking mat.
- In a medium, microwave-safe bowl, add your choice of candy melting wafers. Heat for 1 minute at 50% power and stir. Continue heating in 30-second intervals at 50% power until the chocolate is completely melted and smooth, stirring well between each interval to remove any lumps. Alternatively, you may use a double boiler for a more controlled melt.
- Place an Oreo cookie on a fork and dip it into the melted chocolate, turning to coat completely. Lift the cookie out with the fork and gently tap the fork on the side of the bowl several times to allow excess melted chocolate to drip off.
- Using a toothpick, carefully slide the dipped Oreo onto the prepared baking sheet. Repeat this process with the remaining Oreos.
- To Make the Santa Suit Oreos: Let the red candy coating harden completely before decorating. Using a black gel writer or a fine paintbrush with black icing, draw a line across the lower center of the Oreo to create the belt. Add a dab of melted chocolate to one yellow mini M&M to form the belt buckle, then create buttons by piping on small dots of chocolate or using sugar pearls.
- To Make the Polar Bear Oreos: While the white chocolate is still wet, place two candy eyes. For the ears, position two small white chocolate candy wafer melts at the top, and one for the snout in the center. Press one brown mini M&M onto the tip of the snout for the nose.
- To Make the Oreo Reindeer: While the milk chocolate is still wet, place two candy eyes for the eyes and one red mini M&M for the nose. Add two mini pretzel twists to the top for antlers. Allow them to set completely. Repeat with remaining Oreos.
- To Make the Sprinkled Oreo Cookies: While the chocolate is still wet, generously sprinkle with festive sprinkles, colored sugars, or other desired decorations. Let the cookies set completely at room temperature or in the refrigerator.
Notes
- Use white, milk, or dark chocolate depending on your flavor or color preference.
- Experiment with different Oreo varieties: choose holiday flavors, Golden Oreos, Original, or Double Stuff Oreos.
- For a fun party treat, insert a lollipop stick into the cream filling of each Oreo before dipping and decorating.
- Decorate with various toppings like colored sprinkles, chopped nuts, cookie crumbs, crushed candy canes, or sugar crystals.
- Store finished Christmas Oreos in an airtight container at room temperature for up to 2 weeks. These cookies can also be frozen for up to 3 months; thaw at room temperature before serving.
