Delicious Russian Rose Bread: A Sweet Cinnamon Braided Wreath Recipe
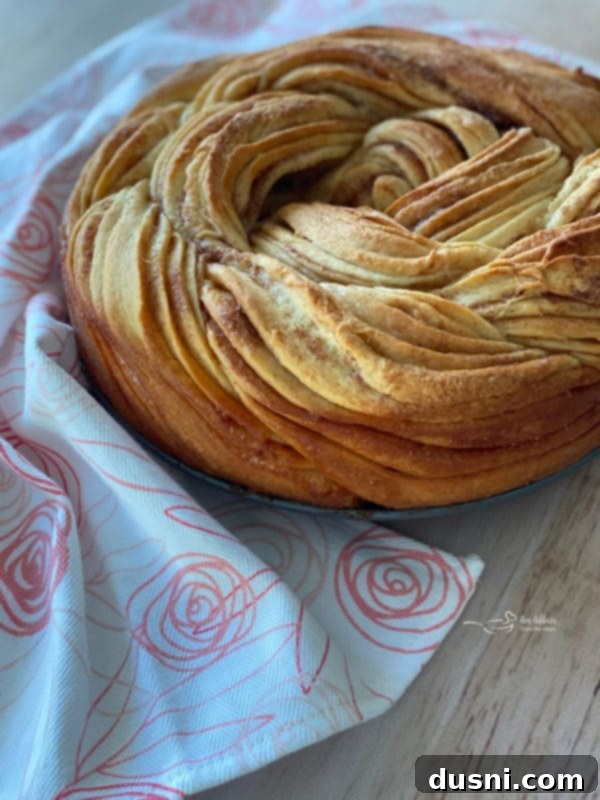
Discover the enchanting world of baking with this slightly sweet Russian Rose Bread, a truly delectable cinnamon braided wreath baked to golden perfection. Infused with the comforting flavors of warm cinnamon and rich butter, all nestled within a wonderfully soft, sweetened dough, this rose bread recipe is an absolute delight. It’s perfect for any occasion, whether you’re seeking a festive dessert, an impressive brunch centerpiece, or a special breakfast treat.
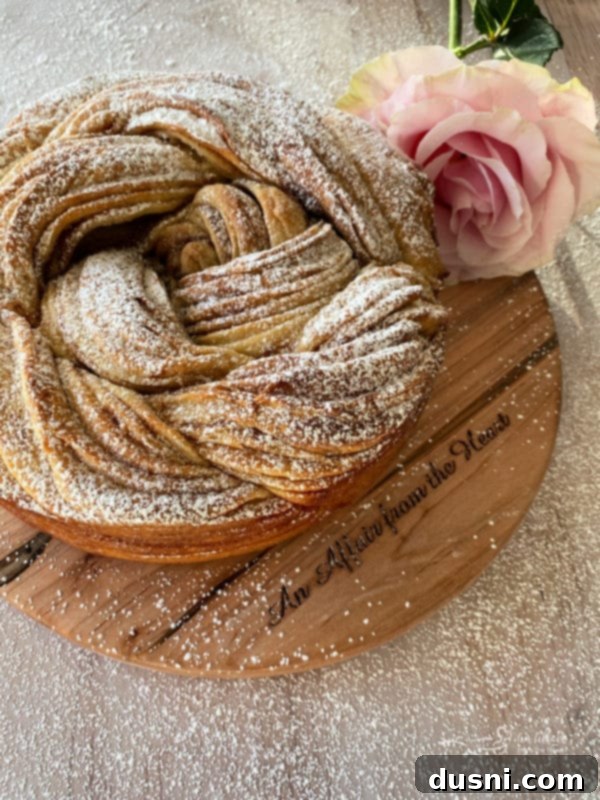
If your heart yearns for sweet baked goods brimming with luscious, soft cinnamon centers, then you are destined to fall in love with this tender and flaky Russian braided bread. Beyond its incredible taste, one of the most rewarding aspects of creating this rose bread recipe is the sheer joy and satisfaction it brings. With just a few straightforward steps, you can transform simple ingredients into a visually stunning and incredibly delicious loaf that will impress everyone.
There’s an undeniable satisfaction that comes from channeling your creativity into baking, especially when working with yeast-based doughs like this one. This traditional Russian recipe offers a wonderful opportunity to create something truly beautiful and gratifying, both to behold and to savor. If you’re eager to embark on more enjoyable baking adventures, you might also enjoy exploring my recipes for quick crescent knots and a comforting cinnamon banana streusel bread, both designed to bring joy to your kitchen.
The Allure of Russian Rose Bread: A Culinary Masterpiece
Russian Rose Bread, affectionately named for the intricate floral design created by its woven dough, is a versatile yeast-based bread. It’s a cherished recipe often prepared for holiday celebrations, but its irresistible charm makes it a perfect choice for any time of year when you crave a truly delicious and comforting bread. One of the most remarkable qualities of this particular bread is its adaptability: while our focus here is on a sweet cinnamon version, the foundational dough can be effortlessly transformed into either a savory or sweet masterpiece, appealing to all palates. This adaptability means you can experiment with various fillings, making it a truly dynamic addition to your baking repertoire.
Rose Bread Rolls: Perfect Individual Servings
For those extra festive occasions, or if you simply wish to try something new and charming, consider transforming this versatile dough into individual, mini Russian rose bread rolls. These smaller portions are absolutely perfect for sharing during gatherings, making delightful holiday gifts, or even as elegant additions to a brunch buffet. To achieve these individualized sizes, you simply need to divide the dough into smaller sections before you begin the braiding process. This thoughtful adaptation allows each guest to enjoy their own beautiful, perfectly portioned rose bread, adding a special touch to your spread.
The Art and Science Behind Braided Bread
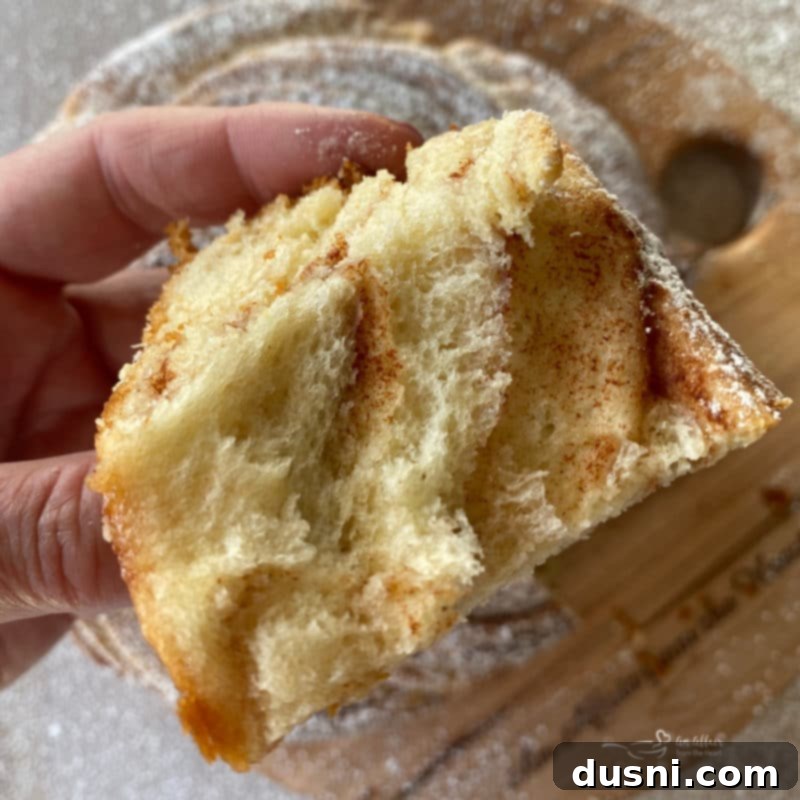
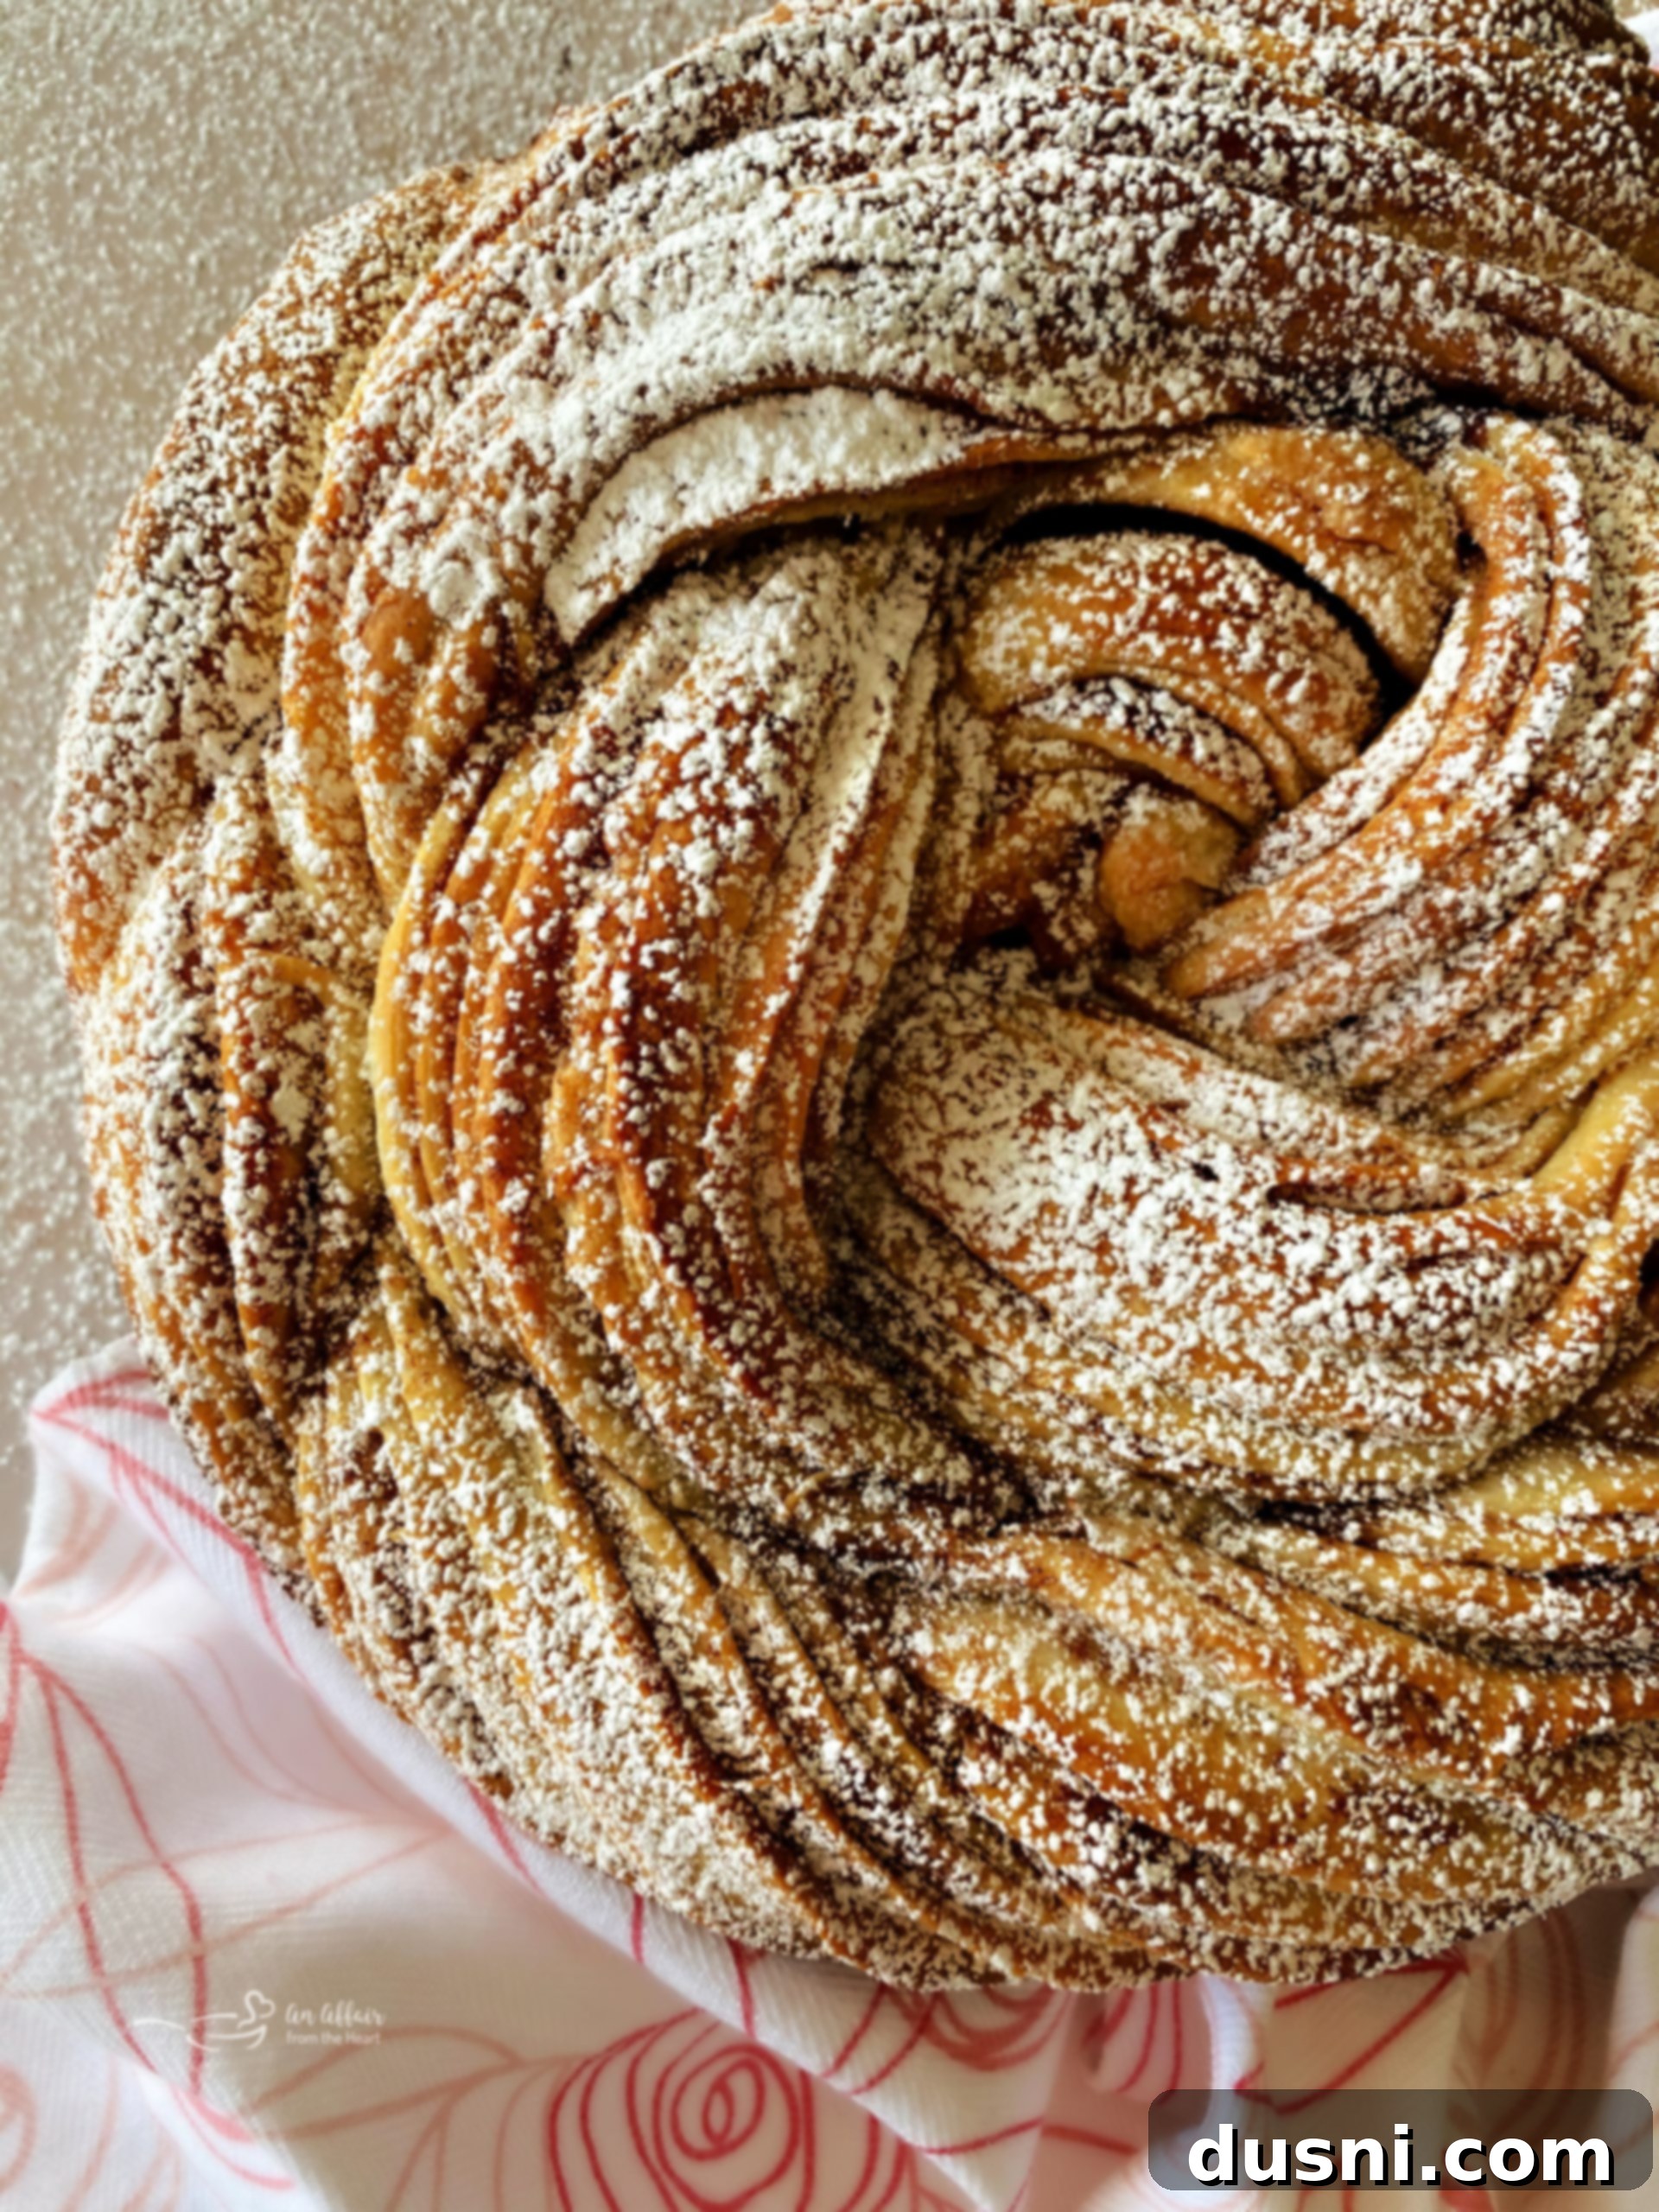
You might wonder why so many cinnamon and other sweet bread recipes feature an elaborate braid. The answer lies in both aesthetics and flavor. Braided bread isn’t just about looking beautiful; it creates a truly astonishing and appetizing visual presentation. The interwoven strands give the bread an overall floral, wreath-like appearance, which is precisely where the “Russian Rose” gets its endearing name. This intricate design elevates a simple loaf into a centerpiece, hinting at the deliciousness within.
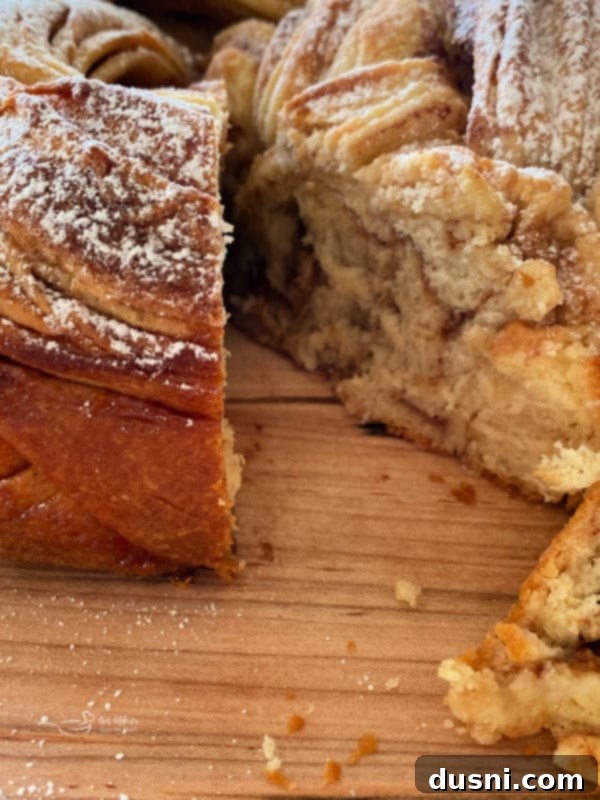
Beyond its undeniable visual appeal, there’s a practical culinary reason for braiding. The act of braiding dough truly allows the flavors to mend and meld together throughout the bread. As the dough rises and bakes, the layers of filling (like our sweet cinnamon butter) are distributed more evenly, creating pockets of intense flavor and a more complex, tender texture in every single bite. This ensures that each slice offers a consistent burst of cinnamon and butter, making for an unforgettable eating experience.
Key Ingredients for Your Perfect Russian Rose Bread
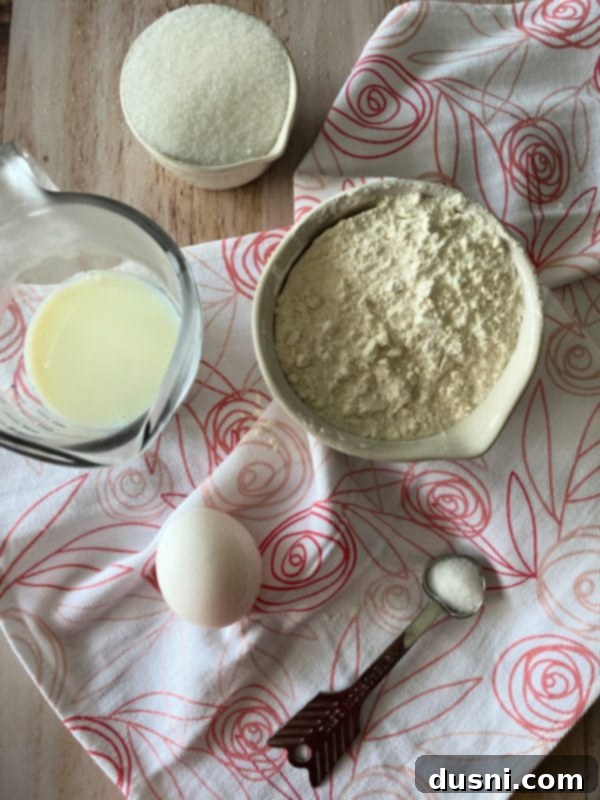
Crafting the perfect Russian Rose Bread starts with understanding the role of each ingredient. Here’s a breakdown of what you’ll need and why it’s essential for achieving that soft, flavorful, and beautifully braided loaf:
Yeast: As the heart of any yeast-based bread, active dry yeast is crucial for making the dough rise and achieve its characteristic soft, airy texture. Proper activation is key, so ensure your water and milk are at the correct temperatures.
Milk: Warm milk plays a vital role in activating the yeast and adding richness to the dough. It also helps create a softer crumb. The temperature is critical: keep it between 105° and 115° Fahrenheit. If the milk is too hot, it can kill the yeast; too cold, and the yeast won’t activate properly, leading to a dense loaf.
Water: Warm water is used to initially dissolve the dry yeast, kickstarting the proofing process. Like milk, its temperature is important, ideally around 110°F, to provide the perfect environment for yeast to thrive.
Butter: Used generously in both the dough and the luxurious filling, butter is responsible for the bread’s incredible tenderness, rich flavor, and moist crumb. Make sure your butter for the dough is softened to room temperature for easier incorporation, and the filling butter is equally pliable for spreading.
Sugar: For this sweet Russian Rose Bread, sugar not only provides a delightful sweetness but also acts as food for the yeast, aiding in its activation and the dough’s rise. If you opt for a savory version, you can significantly reduce the sugar to just a couple of tablespoons to balance the flavors.
Salt: A small amount of salt is essential for balancing and enhancing all the flavors in the bread. It also plays a role in regulating yeast activity and strengthening the gluten structure. Any type of salt, such as table salt or fine sea salt, will work perfectly.
Egg: A lightly beaten egg contributes to the dough’s richness, helps bind the ingredients together, and yields a beautiful golden color and a wonderfully fluffy texture in the final baked bread. Ensure it’s at room temperature for optimal incorporation.
Flour: All-purpose flour is the foundation of this bread, providing the structure. Its gluten content allows the dough to stretch and capture the gases produced by the yeast, resulting in a light and airy loaf.
Cinnamon: Ground cinnamon is the star of the spiced filling, offering its iconic warmth and aroma. When mixed with softened butter and sugar, it creates that irresistible swirl of flavor that defines this braided bread.
Powdered Sugar: (Optional) This is used for a beautiful finishing dust. It adds an extra touch of sweetness and a delicate, elegant appearance, making the bread even more appealing.
To Dust or Not to Dust: Finishing Your Rose Bread
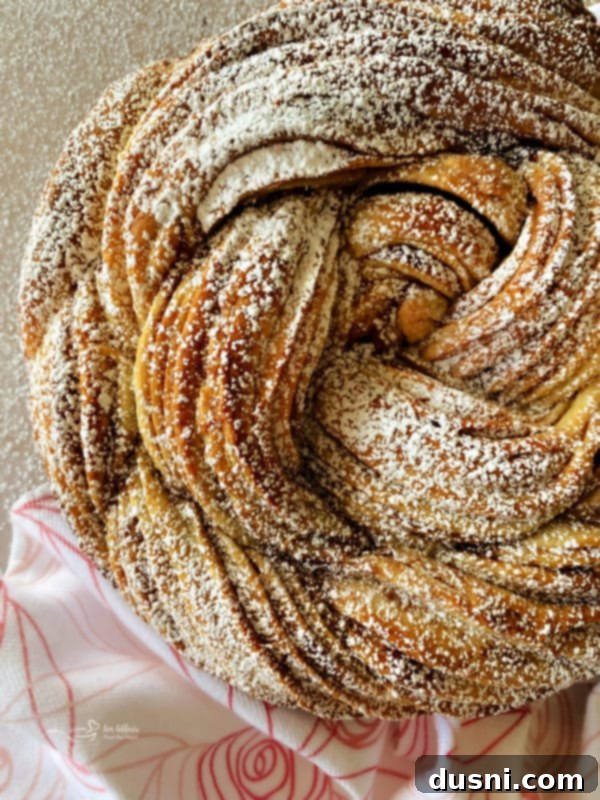
Once your beautiful Russian Rose Bread emerges from the oven, a delightful decision awaits: to dust or not to dust with powdered sugar? If you want to lean into the sweeter side and add an elegant touch, a generous snowfall of powdered sugar creates a stunning contrast against the golden-brown crust. This adds a delicate sweetness that perfectly complements the cinnamon filling, making it even more appealing for dessert or a festive treat. However, the powdered sugar is entirely optional. If you prefer a slightly less sweet option, don’t have powdered sugar on hand, or simply want to appreciate the natural beauty of the baked dough, feel free to omit it. The bread is equally delicious without it, offering a more rustic charm.
Creative Savory Variations for Braided Bread
While our cinnamon-filled Russian Rose Bread is undoubtedly divine, the beauty of this yeast dough lies in its incredible versatility. For those who prefer something a little more savory, this braided bread can be completely transformed into a delicious meal or appetizer. Instead of the sweet cinnamon and sugar, let your culinary imagination soar! Consider replacing the sweet filling with vibrant **pesto**, sun-dried **tomatoes**, or even a flavorful **protein** like cooked, crumbled sausage or shredded chicken. The options are truly endless! Imagine a rich **cheddar cheese** and diced **ham or turkey** filling, perhaps with a touch of mustard. Or, for a vegetarian delight, incorporate finely chopped **broccoli** or sautéed spinach with feta cheese. You can literally name your favorite savory combination, and it will likely work wonderfully in this braided format. For inspiration, check out this fantastic pesto recipe that could easily be adapted as a filling.
Mastering the Braid: A Step-by-Step Visual Guide
I understand that braiding bread might seem a little intimidating at first, especially if you’re new to yeast baking. However, I assure you, it’s actually quite simple and incredibly rewarding! The process is more intuitive than it looks, and with a bit of guidance, you’ll be creating stunning braided loaves in no time. Below, I’ve included some detailed step-by-step photos to help guide you through each stage of this creative process. If you prefer a more dynamic, visual learning experience, I highly recommend searching for videos online that demonstrate various bread braiding techniques. Seeing it in action can often make all the difference, but these images provide a clear path to success.
How to Bake Exquisite Russian Rose Bread: Detailed Instructions
Achieving the perfect Russian Rose Bread requires attention to detail, especially when it comes to temperatures and timing. Follow these steps for a beautifully risen, flavorful, and perfectly baked loaf:
Begin by gently heating the milk in a saucepan over low to medium heat. Your goal is to scald the milk until a thin layer forms on top, reaching approximately 170°F. It’s crucial not to let it boil. Once scalded, remove the milk from the heat and allow it to cool down to a lukewarm temperature, which should be between 105°-110°F. This precise temperature is essential for yeast activation without killing it.
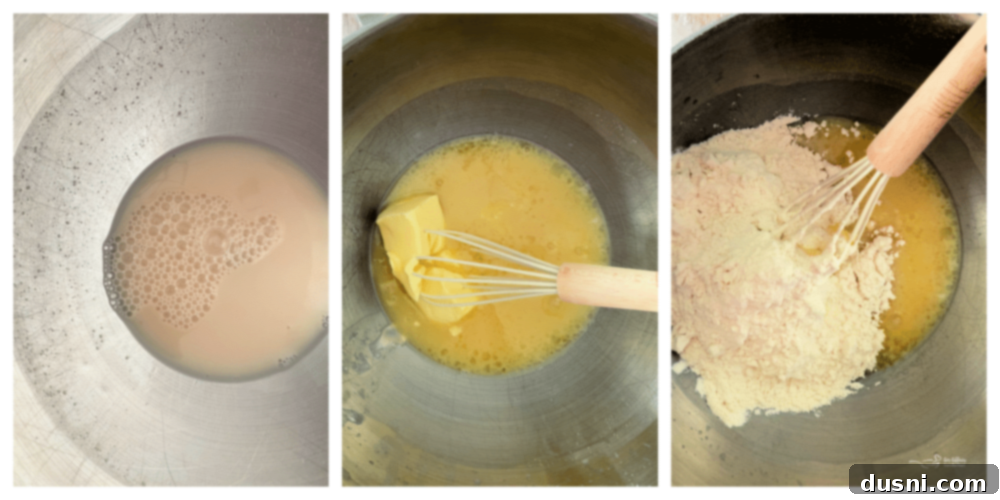
Next, in a large mixing bowl, dissolve the active dry yeast in warm water (ensuring the water is precisely 105°F). Whisk the yeast and water together until thoroughly combined, then allow this mixture to proof for at least 5 minutes. You’ll know it’s ready when a frothy, creamy foam layer appears on the surface, indicating the yeast is active and alive.
Once your yeast is proofed, add in the granulated sugar, salt, softened butter, the cooled warm milk, and the lightly beaten egg. Incorporate these wet ingredients thoroughly. Then, gradually mix in two cups of all-purpose flour, continuing to mix until the batter is smooth and free of lumps. This initial flour addition helps develop some gluten early on.
After that, gradually mix in the remaining 2 cups of flour. Continue to mix until the dough comes together, is well combined, and becomes easy to handle, pulling away from the sides of the bowl. You can easily do this by hand, kneading on a lightly floured surface, or, as I prefer, by using the dough hook attachment of your stand mixer. With a stand mixer, this step usually takes about 5 minutes, resulting in a smooth, elastic dough.
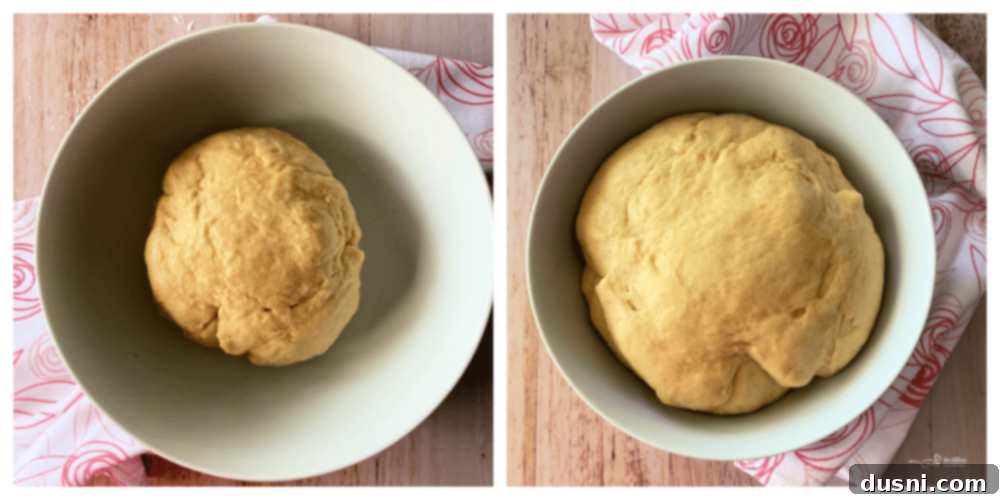
By now, your dough should be beautifully smooth and elastic-like. Lightly coat a large clean bowl with a bit of neutral oil (vegetable or olive oil works well). Place your dough ball into the oiled bowl, and turn it over a few times to ensure it’s evenly coated in the oil. This prevents it from sticking during the rise.
Cover the bowl tightly with plastic wrap or a clean, damp kitchen towel. Allow the dough to rise in a warm, draft-free place until it has visibly doubled in size. This crucial first rise will typically take approximately 90 minutes, depending on the warmth of your environment.
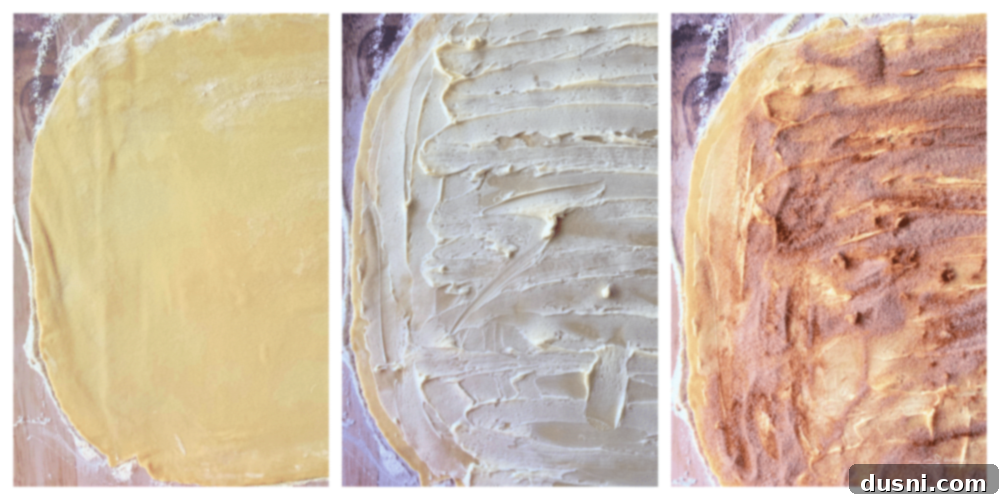
Once the dough has doubled, gently punch it down to release the air. Then, on a large surface lightly dusted with flour, roll the dough ball out into a large, even rectangle. Aim for a thickness of about 1/4 inch, ensuring the edges are as straight as possible for a neat roll.
Now for the delicious filling! Using a rubber spatula or an offset knife, spread the softened butter evenly over the entire surface of the dough rectangle, leaving a small border free along one long edge. In a separate small bowl, mix the sugar and cinnamon together, then generously dust this mixture over the top of the butter.
Starting at one of the longest sides of the rectangle (the one *without* the border), carefully roll the dough tightly, pinwheel style, into one long, uniform tube. Ensure it’s snug to prevent gaps in the finished product.
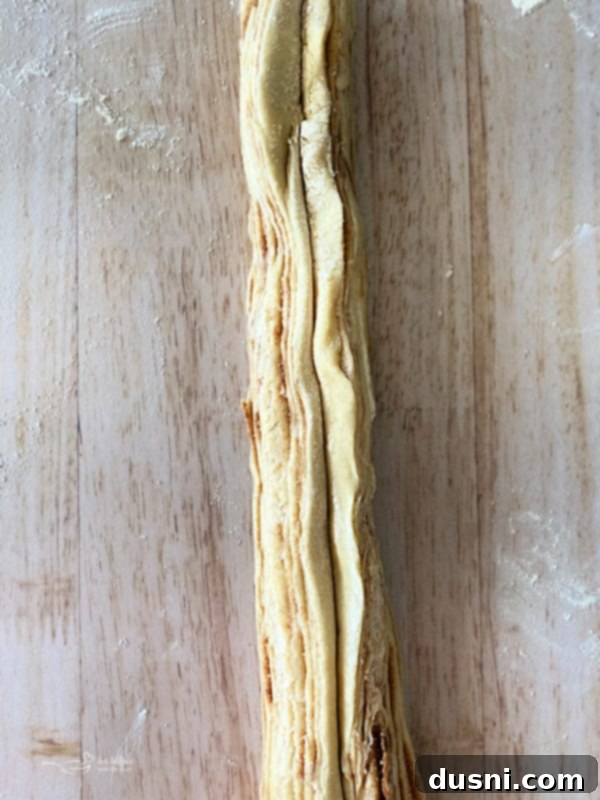
Next, take a very sharp knife (a serrated knife can also work well) to slice the “tube” lengthwise, cutting all the way through from one end to the other. Once cut, gently turn the exposed cut edges outward, revealing the beautiful cinnamon-swirled layers inside. You’re essentially creating two long strands from your single dough tube, each showcasing the filling.
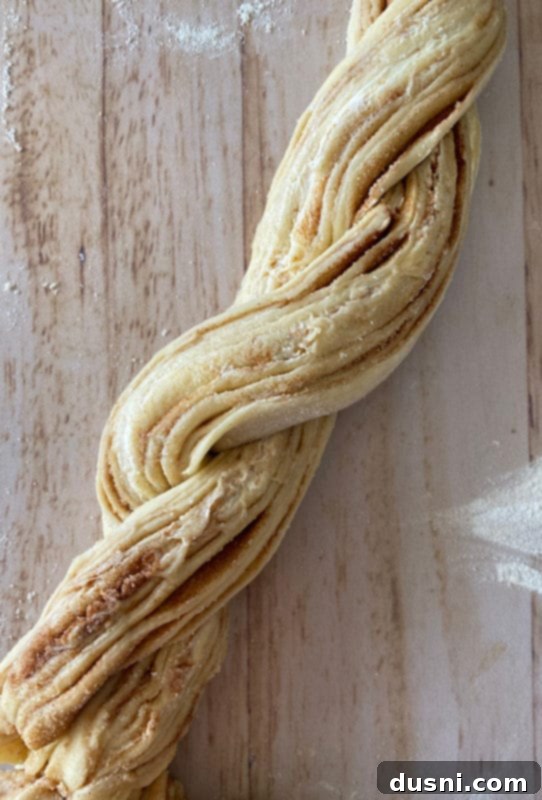
Then, pinch the bottom ends of the two strands firmly together to secure them. Once joined, carefully begin crossing one side over the other, creating a gentle twist. Continue twisting the two strands around each other until you reach the top, ensuring the cut, exposed layers remain facing outwards for maximum visual impact.
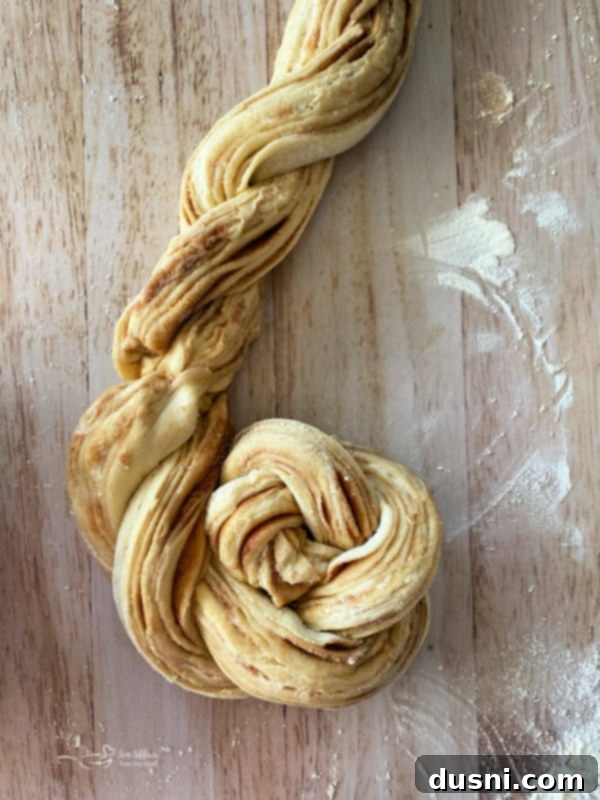
Once your twisted dough is complete, gently coil the twist into a circular wreath shape, tucking the ends underneath to create a continuous, seamless “rose” design. Take your time with this step to maintain the beautiful twist and shape.
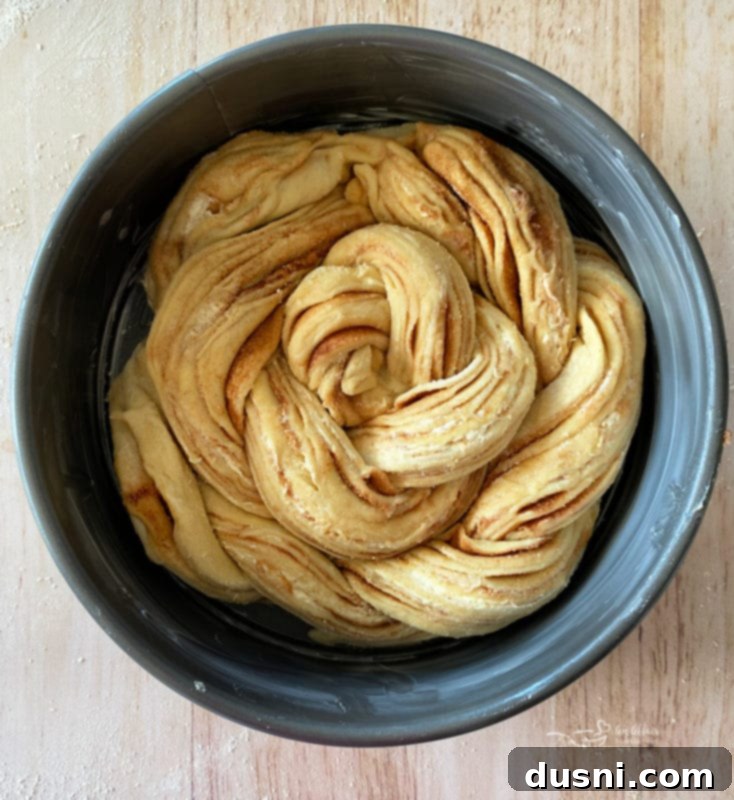
In the meantime, prepare your baking vessel. Generously grease the bottom and the sides of a 9-inch springform pan. This will ensure your beautiful bread releases easily after baking.
Next, carefully place the coiled bread into the prepared springform pan. Here’s a helpful tip: rather than trying to lift the delicate dough into the pan, first remove the sides of the springform pan. Then, gently “slide” the bottom of the pan underneath the dough, and finally, replace and secure the sides. This method is much easier and prevents any distortion of your carefully crafted rose shape.
Cover the pan with a slightly dampened kitchen towel and allow it to undergo a final proof, letting it rise for another 30 minutes or so in a warm place. This second rise will make the bread even lighter and fluffier.
While your bread is proofing, preheat your oven to 375° Fahrenheit. This ensures the oven is at the correct temperature when the bread goes in, promoting an even bake.
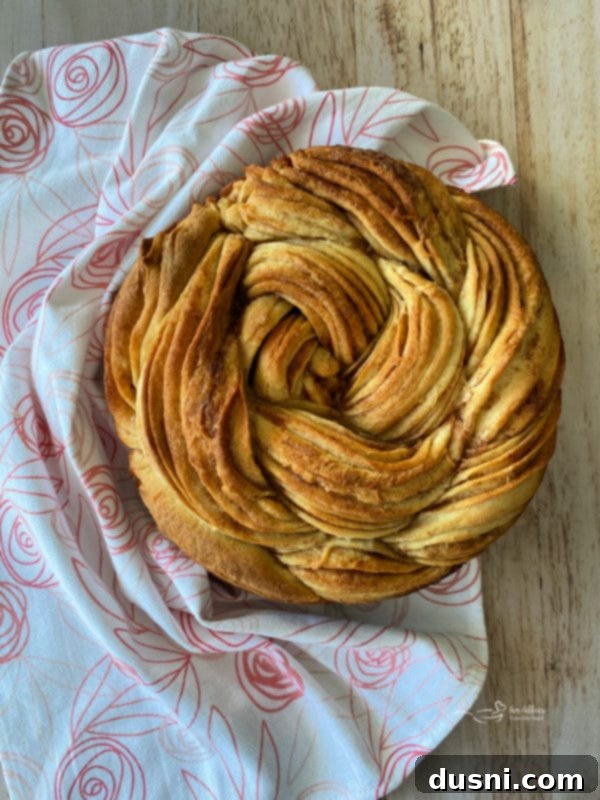
Once the oven is preheated and the bread has had its final rise, carefully place the springform pan into the hot oven. Bake the bread for approximately 25-30 minutes, or until the center is fully baked through and the top has achieved a beautiful, rich golden-brown color. You can test for doneness by inserting a wooden skewer into the center – if it comes out clean, the bread is ready.
Finally, remove the bread from the oven and allow it to cool on a baking rack for at least 15-20 minutes before attempting to remove it from the springform pan. This allows it to set. Before serving, if desired, dust generously with powdered sugar for that signature sweet finish.
Essential Notes and Tips for Flawless Cinnamon Bread
- Temperature Precision is Paramount: The success of your yeast bread heavily relies on accurate temperatures for both the water and milk used in proofing the yeast. Invest in a reliable kitchen thermometer to ensure your milk remains precisely between 105°F-115°F and your water is exactly at 105°F. Temperatures outside this range can either kill the yeast (too hot) or fail to activate it (too cold), resulting in a dense, unrisen dough.
- Scald Your Milk for Best Texture: Taking the extra step to scald your milk on the stovetop helps denature proteins, which can otherwise interfere with gluten development and a soft crumb. After scalding to 170°F (just before boiling), allow it to cool thoroughly to the specified lukewarm temperature before adding it to your yeast mixture.
- Recognize Properly Proofed Yeast: You’ll know your yeast is fully active and ready to use when, after dissolving it in warm water and letting it sit for about 5 minutes, a distinct creamy, frothy foam layer forms on the surface. This bubbly appearance is your visual cue that the yeast is alive and working effectively.
- Smart Storage for Lasting Freshness: Once baked and cooled, store your Russian Rose Bread in an airtight container at room temperature for up to 2-3 days to maintain its softness. If you won’t be enjoying it within a few days, it freezes beautifully! Wrap the cooled bread tightly in plastic wrap, then in aluminum foil, and store in the freezer for up to 2-3 months. Thaw at room temperature and warm gently in the oven for a “freshly baked” experience.
- Don’t Over-knead or Under-knead: Proper kneading develops the gluten, which gives bread its structure and chewiness. Over-kneading can make the dough tough, while under-kneading will result in a crumbly, dense loaf. Aim for a dough that is smooth, elastic, and passes the “windowpane test” (you can stretch a small piece thin enough to see light through it without tearing).
- Warm Environment for Rising: Yeast loves warmth! Find a cozy, draft-free spot for your dough to rise. This could be a slightly warm oven (turned off, with just the light on), near a sunny window, or on top of a warm appliance. A consistent warm temperature ensures a steady and robust rise.
LOVE IT? PIN IT!
Don’t forget to pin this delightful Russian Rose Bread recipe to your Pinterest board! Save it for later inspiration and share the joy of homemade baking with your friends and followers.
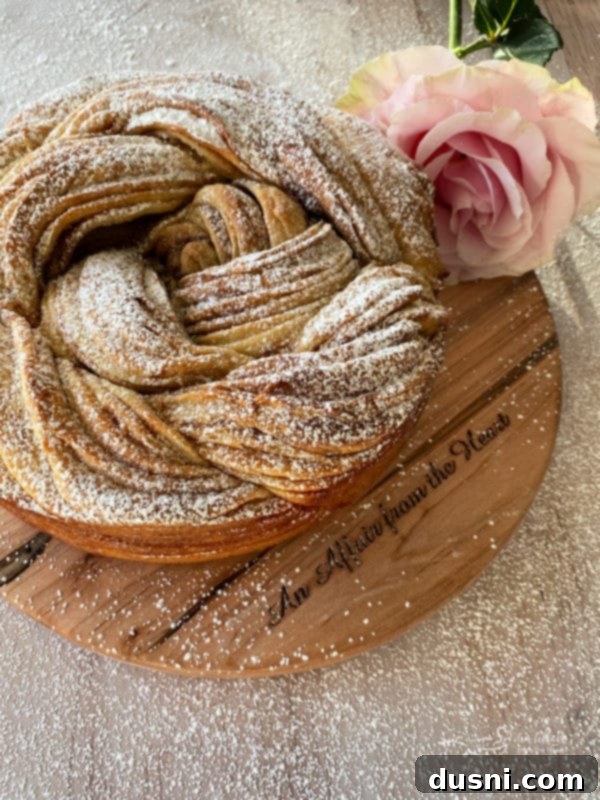
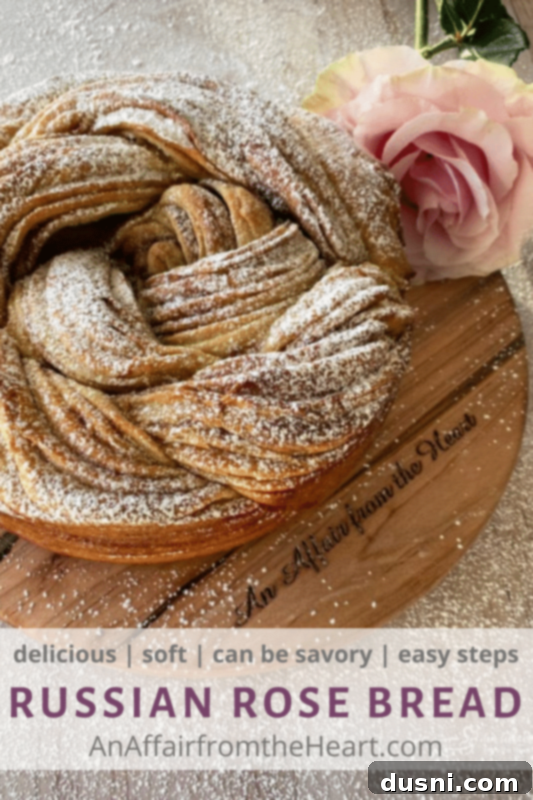
Isn’t this wooden board absolutely lovely? It was a thoughtful gift from my dear friend, Julie, over at Hostess at Heart!
 Celebrating a Decade: Our 10th Anniversary Giveaway!
This delightful Russian Rose Bread recipe is proudly featured as part of my special 10th Anniversary celebration! This particular recipe perfectly embodies my deep affection for fresh flowers, which truly are one of my favorite things in life. The beautiful rose shape of this bread serves as a heartfelt homage to that passion.
During the challenging COVID-19 lockdown last year, like many, I grappled with a significant period of depression. I found immense comfort and a tiny spark of joy in a simple ritual: on my weekly grocery trips, I started buying myself a small bouquet of fresh flowers. Keeping these vibrant blooms on my kitchen counter became a constant source of cheer.
As the flowers would eventually dry out, I couldn’t bear to part with their beauty. Instead, I carefully picked them apart, saving the petals and sprigs I could, and repurposed them into small vases throughout my home. This practice of preserving beauty and adding cheer to my surroundings is one I’ve diligently maintained for nearly a year now, a testament to the power of small joys.
The Joy of Floral Delivery: Bouqs Co.
When it comes to sending flowers to loved ones, my go-to has always been Bouqs Co. From the very first bouquet I received from them, I was completely captivated. Their flowers are always freshly cut and delivered straight to your door via FedEx, ensuring peak freshness and beauty. I particularly adore the thoughtful little card included with each delivery, which introduces you to the farmer who lovingly grew them and shares their origin story. This connection to the source makes the gift feel even more special.
It’s why, for this anniversary giveaway, I knew I had to share my profound love of fresh flowers with one lucky winner.
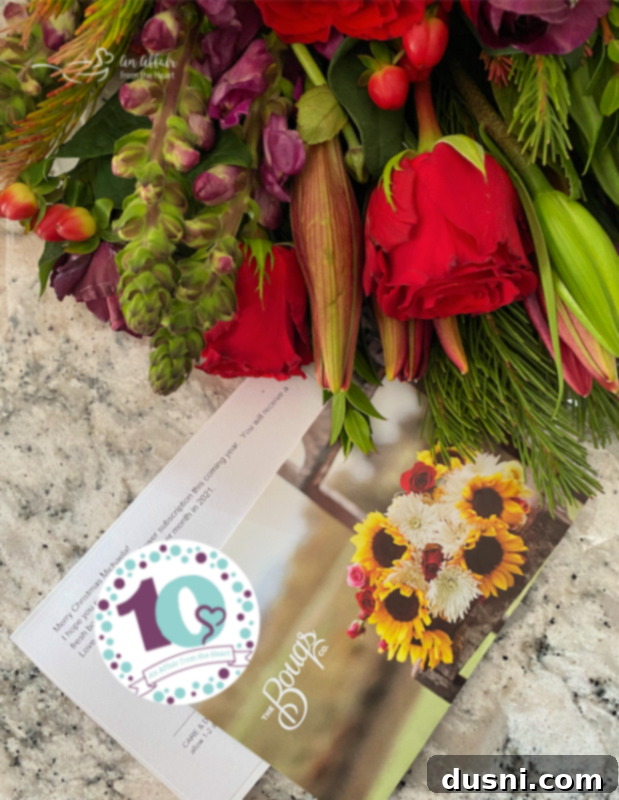
The fortunate winner will receive a stunning Bouqs bouquet of fresh flowers, shipped directly to their home from me, designed to brighten their living space and infuse joy into their surroundings. (Please note: the actual flowers delivered will differ from those pictured above, but they will be equally beautiful and thoughtfully chosen!) The winner will also receive one of my exclusive, limited-edition t-shirts!
In total, I am giving away 11 incredible gifts, with a combined value exceeding $1500, including a highly coveted KitchenAid mixer! You can read all the exciting details about the gifts and enter to win here on this blog post, or simply enter using the widget below!
ENTER TO WIN ALL of the PRIZES HERE!

a Rafflecopter giveaway
More Delicious Baked Creations You’ll Adore
- Lemon Sweet Rolls (pictured above)
- Polish Donuts (Pączki)
- Dorothy’s Cheesy Bacon Pull-Apart Bread
- Cinnamon Pull-Apart Bread
- No-Knead Crusty Dutch Oven Bread
I can almost smell the warm cinnamon and fresh-baked goodness! What are you waiting for? Let’s bake some incredible Russian Rose Bread and fill your home with its irresistible aroma and flavor! 
LIKE THIS RECIPE?
Don’t forget to give it a ⭐️⭐️⭐️⭐️⭐️ star rating and
leave a comment below the recipe!

Print Recipe
Russian Rose Bread
Equipment
-
Glass Batter Bowl
-
Nordic Ware Leakproof Springform Pan, 10 Cup, 9 Inch
-
Rubber Spatulas
-
Kitchenaid Stand Mixer
Ingredients
- FOR THE DOUGH
- 1 package 1.4 ounce dry active yeast
- 1/2 cup lukewarm milk between 105 and 115 degrees F ** SEE Notes
- 1/2 cup warm water 110 degrees F
- 1/3 cup butter softened
- 1/3 cup sugar
- 1/2 teaspoon salt
- 1 egg room temperature, slightly beaten
- 4 cups flour divided
- powdered sugar for dusting if desired
- FOR THE FILLING
- 1 stick 1/2 cup butter, softened
- 1/2 cup sugar
- 1 Tablespoon cinnamon
Instructions
-
Heat milk in a saucepan. Scald the milk, don’t burn. Remove from heat and cool until lukewarm.
-
Dissolve the yeast in warm water in a large bowl. Whisk to combine, and let proof for at least 5 minutes.
-
Add in sugar, salt, butter warm milk and egg. Mix in 2 cups of the flour, mixing until smooth.
-
Mix in the remaining 2 cups of flour, until dough is combined and easy to handle. (you can do this by hand or use the dough hook attachment of your mixer, which is what I did. It took about 5 minutes)
-
The Dough will be smooth and elastic-like. Coat the bowl with a bit of oil, Place the dough ball in the bowl, turning it over a few times to makes sure it’s coated in oil.
-
Cover the bowl and let the dough rise in a warm place until it’s doubled in size. (about 90 minutes)
-
On a large surface, dusted with flour, roll the dough into a large rectangle.
-
Using a rubber spatula, spread the butter over the top of the entire rectangle. Mix sugar and cinnamon together and dust over the top of the butter.
-
Starting at one of the long sides of the rectangle, roll the dough, pinwheel style into one long tube.
-
Using a sharp knife, slice the “tube” lengthwise all of the way through, and turn the cut edges outward, exposing the layers inside.
-
Pinch the bottom ends together and carefully begin crossing the sides over one another to create the twist.
-
Coil the twist into a circle.
-
Grease the bottom and the sides of a springform pan.
-
Place bread into the springform pan. (tip: remove the sides of the pan and “slide” the bottom under the dough, then replace the sides. It’s so much easier than trying to lift it.)
-
Cover the pan with a slightly damp towel and let it rise for another 30 minutes or so.
-
Preheat oven to 375 degrees.
-
Bake for about 25-30 minutes, or until the center is baked and the top is golden brown.
-
Cool on a baking rack. Dust with powdered sugar before serving, if desired.
 Celebrating a Decade: Our 10th Anniversary Giveaway!
