Delicious “No-Fry” Fried Ice Cream Pie: Your Easy Mexican Restaurant Dessert at Home
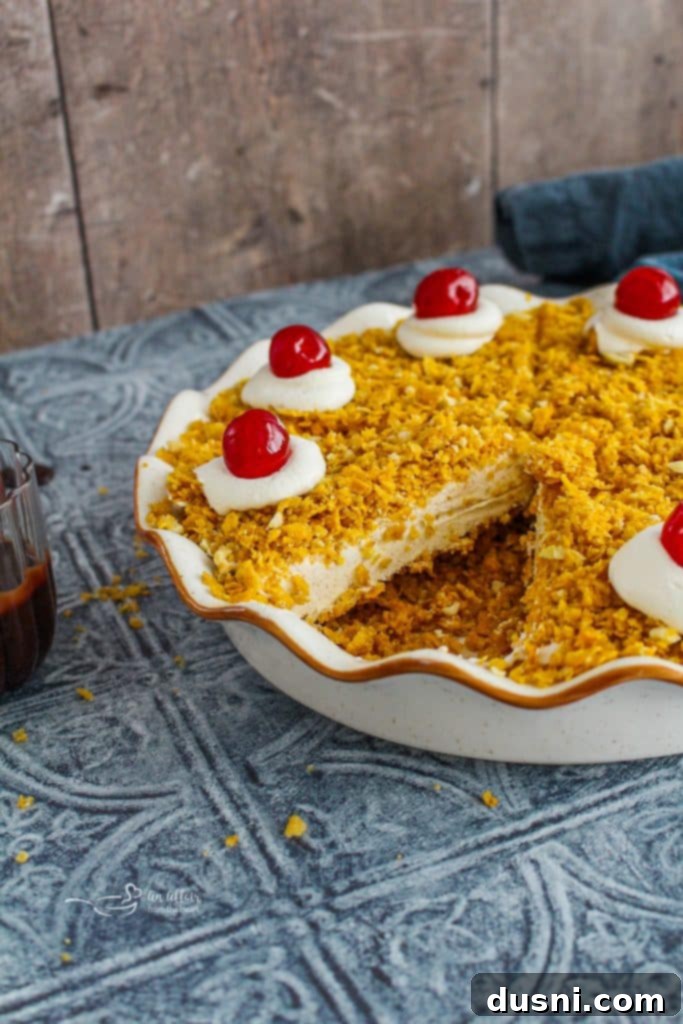
Imagine the irresistible taste of classic fried ice cream from your favorite Mexican restaurant, but without the hassle, the hot oil, or the mess. This “fried” ice cream pie is a magical dessert that delivers exactly that! It’s a no-bake wonder where simple ingredients come together to perfectly mimic the crunchy, creamy, cinnamon-spiced delight you love. Easy to prepare and utterly delicious, this impressive dessert is ideal for any celebration, making it an absolute showstopper for Cinco de Mayo, birthdays, or just a special weeknight treat.
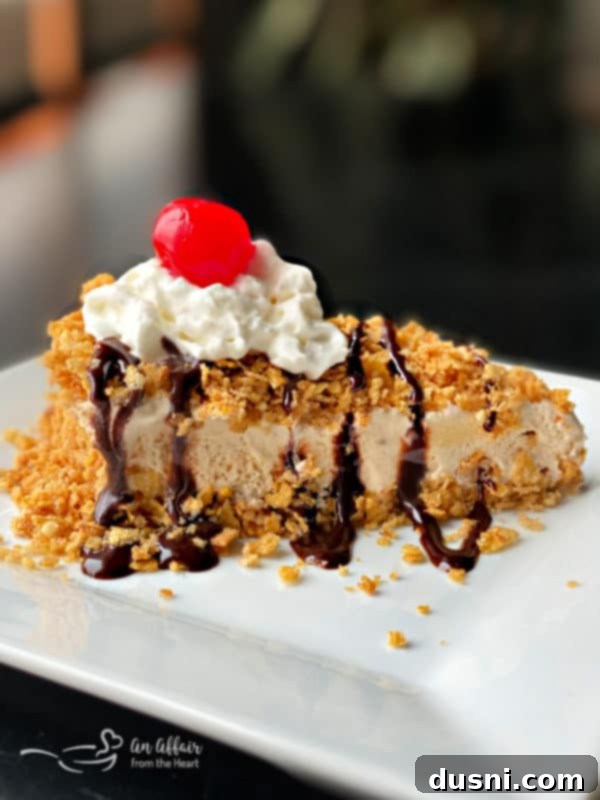
When I first heard about a “fried ice cream pie” that didn’t involve any actual frying, I’ll admit I was more than a little skeptical. How could a no-bake dessert possibly capture the unique texture and flavor of its deep-fried counterpart? But curiosity got the better of me, and I decided to give it a try. What happened next completely blew me away! The first bite was an explosion of familiar flavors and satisfying textures, transporting me straight back to my favorite Mexican eatery, but from the comfort of my own kitchen.
The resemblance to authentic fried ice cream is so striking that my family immediately fell in love. After savoring their slices, many of them declared, “I want this for my birthday next year!” That’s how good it is. This dessert doesn’t just taste similar; it perfectly replicates the experience, making it a guaranteed crowd-pleaser and a new family favorite. It’s truly a testament to how creative adaptations can often be even better than the original, especially when they simplify the process without compromising on flavor.

The Magic of a “No-Fry” Fried Ice Cream Pie
At first glance, the concept of “fried ice cream pie” seems almost contradictory, much like traditional fried ice cream itself. The idea of dropping a perfectly frozen scoop of ice cream into searing hot oil sounds like a recipe for a melted disaster. Yet, somehow, the culinary genius behind traditional fried ice cream manages to create an unforgettable dessert with a warm, crispy shell and a perfectly chilled, creamy interior. This no-bake version embraces that same delightful paradox, offering all the textural and flavor contrasts without the intimidating deep-frying process.
The beauty of this particular fried ice cream pie is that it achieves the exact same taste and sensory experience as its deep-fried cousin, but with none of the stress or mess associated with hot oil. We all love the idea of homemade desserts, but deep-frying can be daunting. It requires special equipment, careful temperature management, and a significant cleanup effort. This pie completely bypasses those challenges, making an iconic dessert accessible to home cooks of all skill levels. It’s a dessert that proves that sometimes the most brilliant ideas are the simplest ones, and that convenience doesn’t have to mean compromising on flavor or fun.

The Fascinating Origins of Fried Ice Cream
The true invention story of fried ice cream is a bit of a culinary mystery, with several tantalizing theories. Some food historians suggest it made its grand debut at the 1893 Chicago World’s Fair, an event renowned for introducing many groundbreaking foods to the American public. Others point to Japanese tempura restaurants as its birthplace, where the technique of quickly frying battered foods was already perfected. Regardless of its exact origin, one thing is certain: fried ice cream found enduring popularity in the United States, becoming a beloved staple, especially on the menus of Mexican-American restaurants like the iconic Chi-Chi’s.
Fried ice cream represents a fusion of culinary traditions and a bold exploration of temperature and texture. Its unique appeal lies in the dramatic contrast between the warm, crispy exterior and the cold, smooth ice cream within. Our “no-fry” fried ice cream pie is a clever evolution of this beloved classic. It takes that nostalgic concept and brilliantly simplifies it, capturing the very same crunchy, creamy contrast without the logistical challenges of deep-frying. This adaptation isn’t just about convenience; it’s a smart and delicious homage to a dessert that has always been a delightful surprise, proving that you can honor tradition while innovating for modern kitchens.
Unveiling the Secret to the Perfect “No-Fry” Fried Ice Cream Pie
Achieving the authentic taste and texture of fried ice cream without a deep fryer might seem like magic, but it’s surprisingly simple with a clever combination of everyday ingredients. The key lies in creating a crumb topping that perfectly mimics the buttery crunch of a fried pastry shell. This is accomplished using crushed cornflakes and finely ground cashews. The cornflakes provide that essential crispiness, while the natural fats from the cashews add a rich, nutty, almost fried-like flavor that is incredibly close to what you’d find in a traditional Mexican restaurant dessert.
What makes this recipe truly revolutionary is the elimination of hot oil. There’s no splattering, no intense heat to manage, and absolutely no worrying about your ice cream melting into a liquid mess before the crust can cook. This means a safer, cleaner, and far more enjoyable cooking experience. The most challenging part of this entire recipe is simply the waiting game – allowing the pie enough time to set perfectly in the freezer. While patience is required, the reward of sinking your spoon into this perfectly balanced, crunchy, and creamy dessert makes every minute of that waiting period absolutely worth it. It’s a testament to simple ingredients creating extraordinary results.

Essential Ingredients for Your “No-Fry” Fried Ice Cream Pie
Crafting this incredible dessert requires just a handful of readily available ingredients, transforming them into a taste sensation. For a complete list of quantities and detailed instructions, remember to scroll down to the full printable recipe card at the bottom of this post.
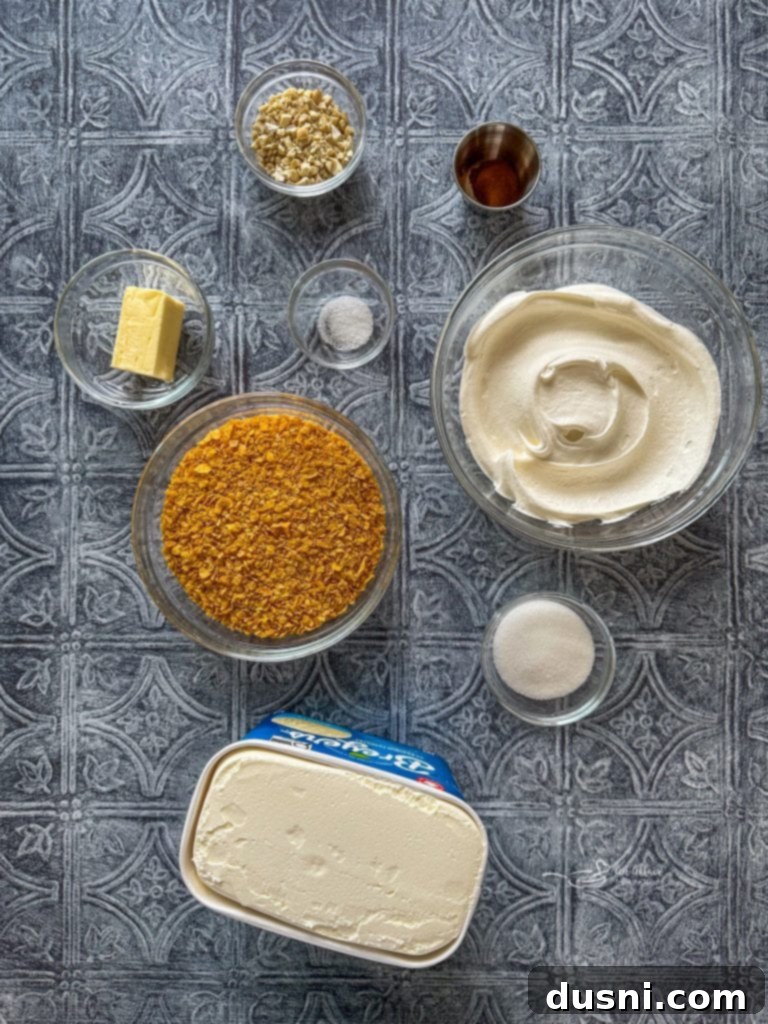
- Vanilla Bean Ice Cream: The creamy base of our pie. High-quality vanilla bean ice cream provides the best flavor, but you can also substitute your favorite frozen yogurt for a lighter option. Ensure it’s slightly softened for easy mixing.
- Cool Whip®: This adds an extra layer of lightness and creamy texture when folded into the ice cream. Feel free to use low-fat or fat-free versions if you prefer.
- Ground Cinnamon: A crucial spice that gives the pie its signature “fried ice cream” flavor, adding warmth and depth to the dessert.
- Corn Flakes: Crushed corn flakes are the star of the crunchy topping, providing the perfect crispness that mimics a fried crust.
- Butter: Salted or unsalted butter works equally well to bind the cornflake mixture and add richness.
- Granulated Sugar: Sweetens the crunchy topping, balancing the other flavors.
- Salt: A pinch of salt enhances all the flavors in the topping, preventing it from tasting flat.
- Cashews or Almonds: Finely chopped cashews provide a buttery, nutty depth and contribute to the authentic fried texture. Almonds can be used as a delicious alternative.
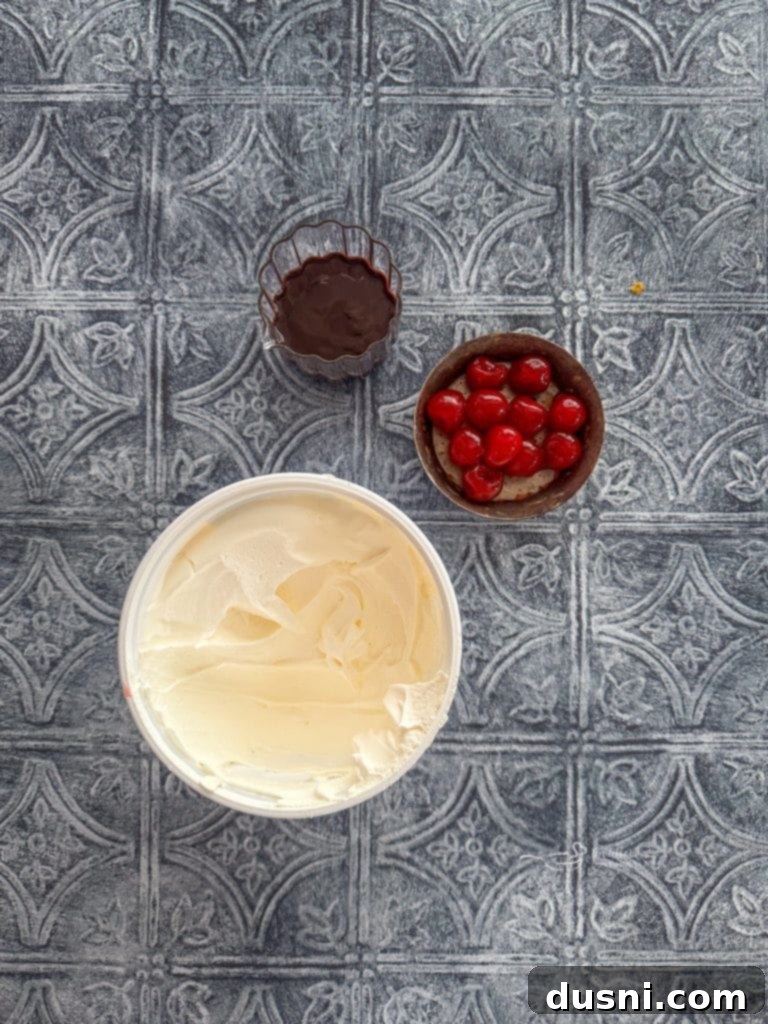
- Maraschino Cherries: For a vibrant pop of color and classic garnish on each slice.
- Chocolate Syrup: A luscious drizzle of chocolate syrup adds decadence and visual appeal.
- Redi-Whip or Fresh Whipped Cream: A dollop of whipped cream is the perfect finishing touch, adding a light, airy contrast to the rich pie.
As you continue reading, you’ll discover valuable tips, potential ingredient substitutions, and answers to common questions about this delightful “No-Fry” Fried Ice Cream Pie recipe, ensuring your dessert is a spectacular success every time!
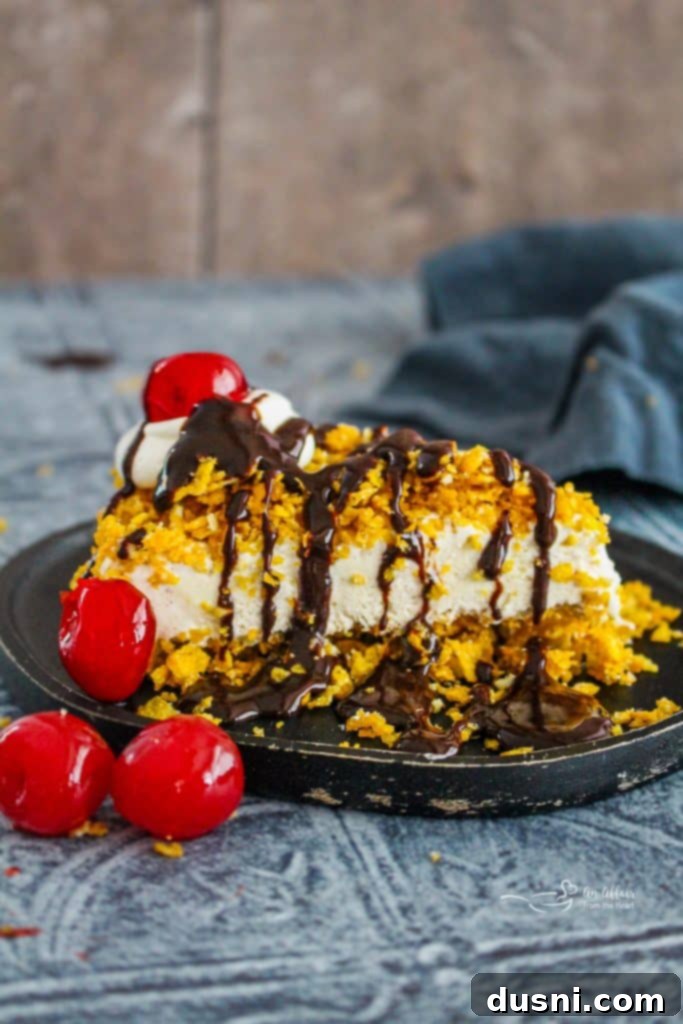
Crafting Your Easy “No-Fry” Fried Ice Cream Pie
This “fried” ice cream pie is incredibly straightforward to assemble. The most challenging part, by far, is mustering the patience to let it properly freeze! But trust me, the wait is absolutely worth it for this delightful dessert.
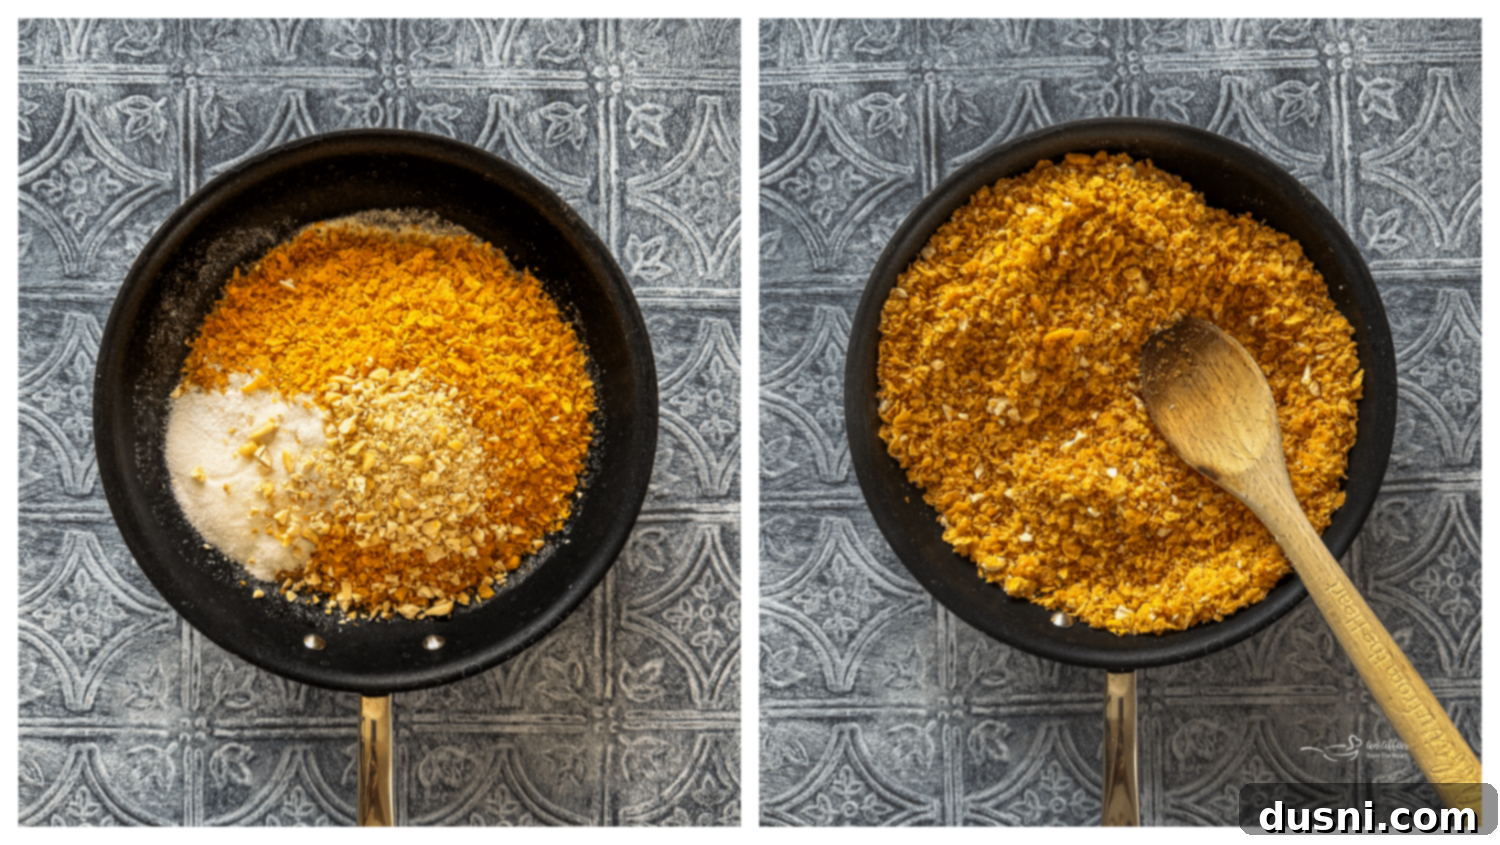
Step 1: Prepare the Crunchy Topping. Begin by melting the butter in a small skillet over medium heat. Once the butter has melted and is gently bubbling, add the crushed cornflakes, finely chopped cashews (or almonds), granulated sugar, and a pinch of salt. Stir these ingredients continuously until they are thoroughly combined and lightly toasted, typically for about 3-5 minutes. This quick toasting step enhances the nutty flavor and crisp texture, which is crucial for mimicking the fried exterior. Remove the skillet from the heat and allow the mixture to cool completely to room temperature. This prevents the warmth from melting the ice cream later.
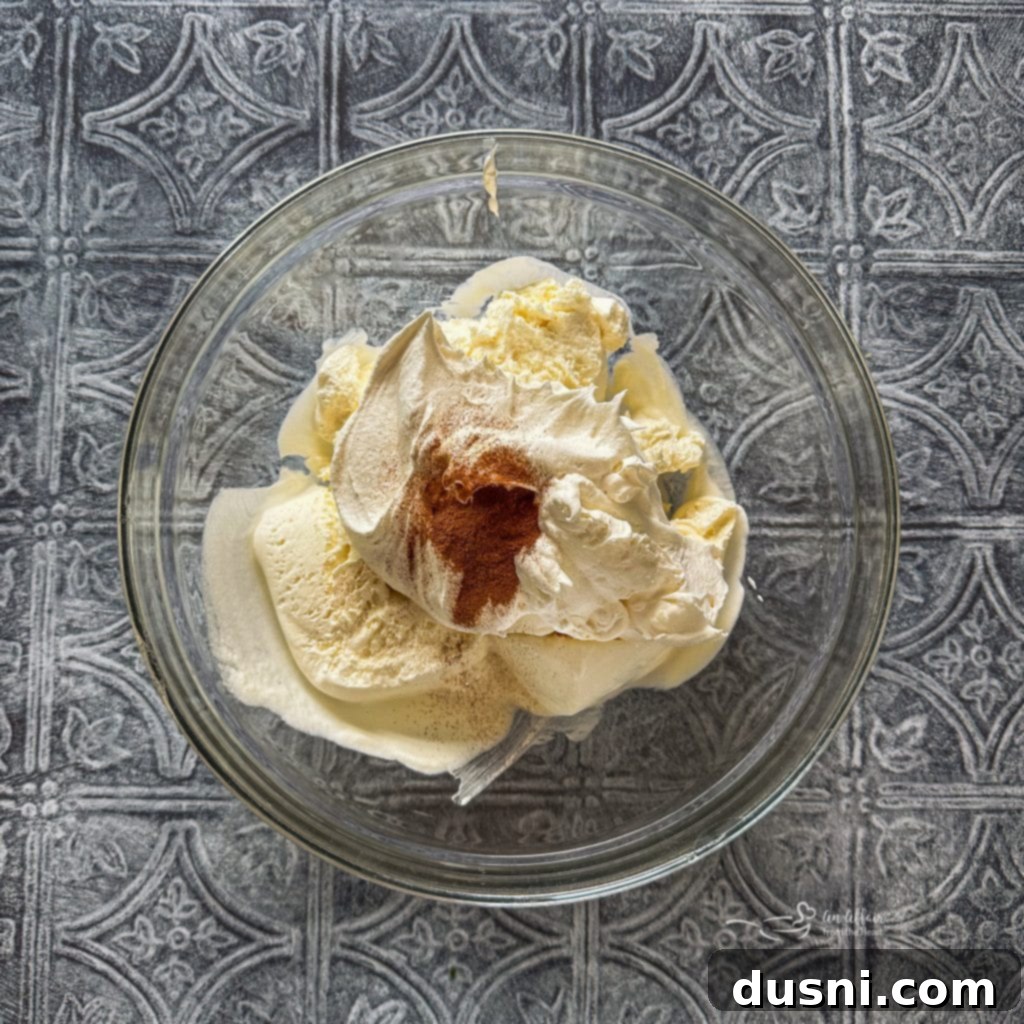
Step 2: Prepare the Ice Cream Mixture. Take your vanilla ice cream out of the freezer and let it soften slightly at room temperature for about 10-15 minutes. It should be pliable enough to stir but not completely melted. Once it reaches the desired consistency, transfer it to a large mixing bowl. Gently fold in the Cool Whip and ground cinnamon until they are evenly incorporated. Be careful not to overmix, as this can introduce too much air or melt the ice cream further. The goal is a smooth, light, and uniformly spiced ice cream base.
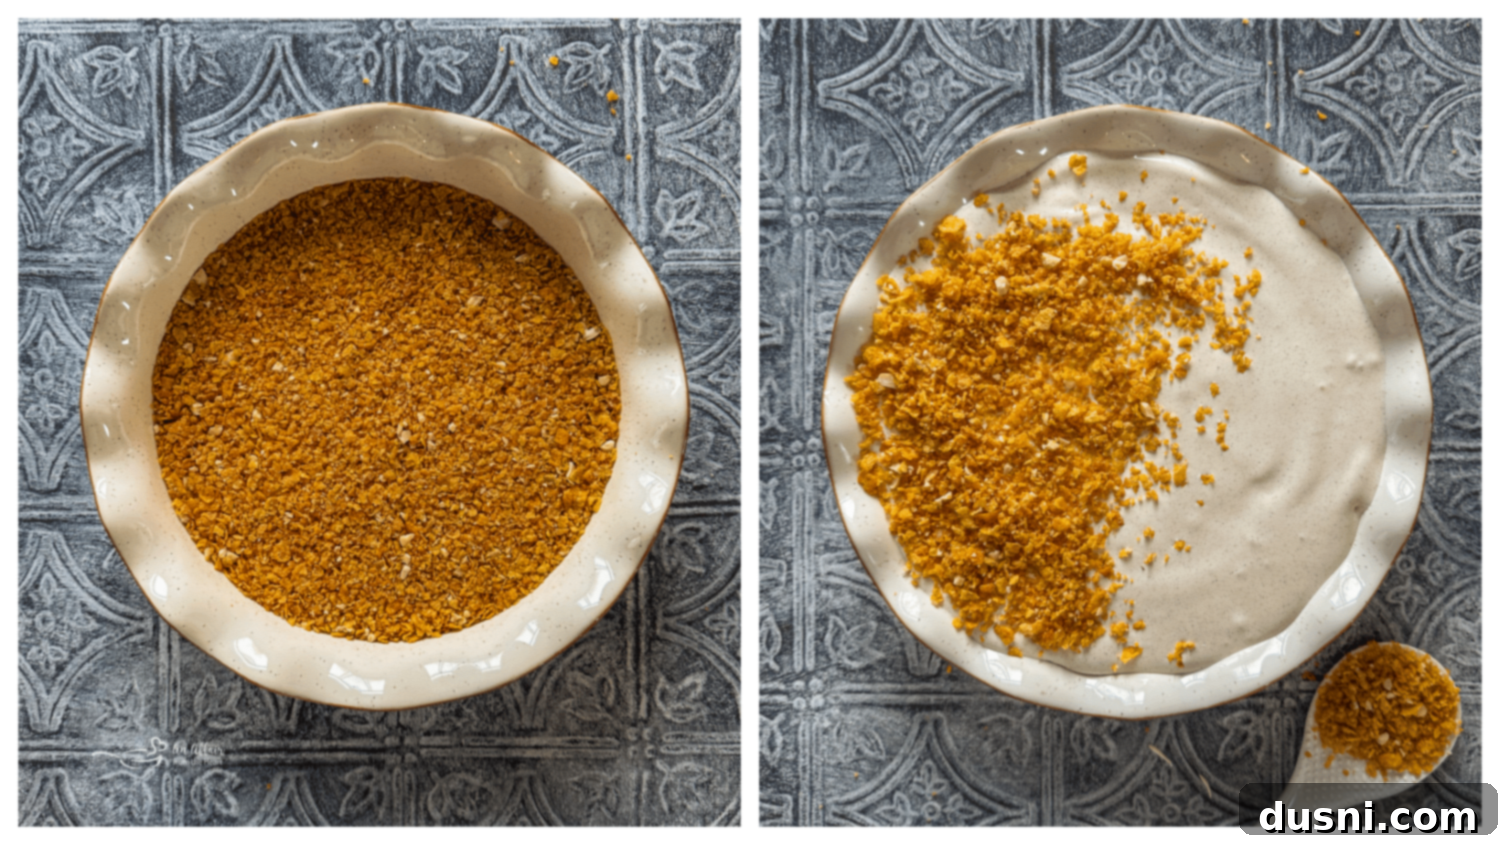
Step 3: Assemble the Pie. In a deep-dish 9-inch pie plate, sprinkle half of your cooled cornflake and cashew crumb mixture evenly across the bottom. Gently pat it down to form a compact, even layer. This will be the base of your pie. Next, carefully spread the prepared ice cream mixture over this crumb layer, smoothing the top with a spatula. Finally, sprinkle the remaining half of the crumb mixture over the ice cream, creating a delightful crunchy top layer.
Step 4: Freeze. Once assembled, cover the pie plate tightly with plastic wrap. This is crucial to prevent freezer burn and keep the ice cream fresh. Place the pie in the freezer until it is completely firm. For best results and optimal texture, freezing it overnight is highly recommended. This allows all the layers to set properly and ensures the ice cream is perfectly scoopable when served.
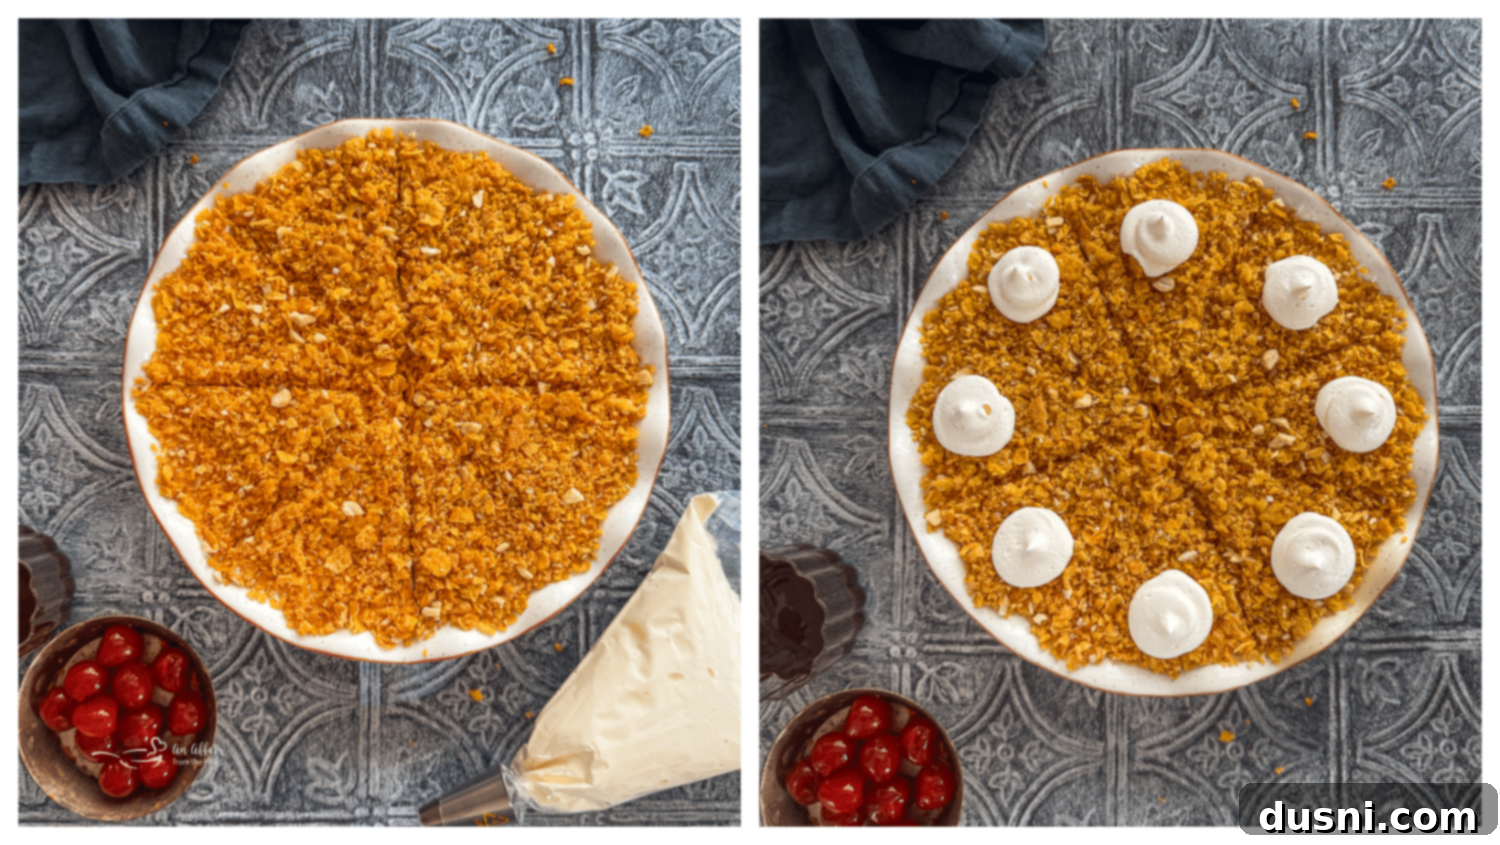
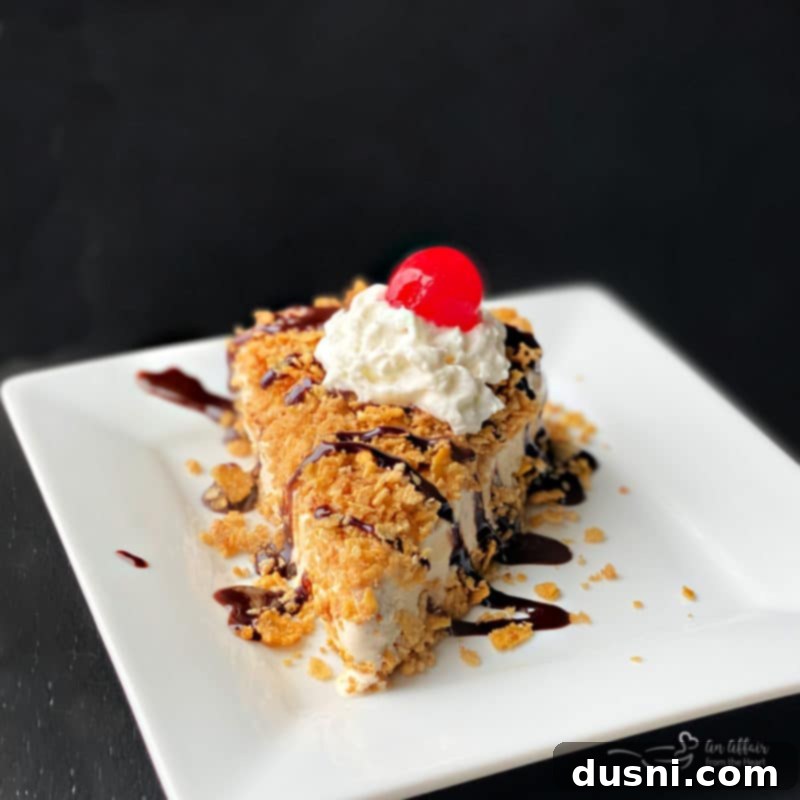
Step 5: Garnish and Serve. Before serving, take the pie out of the freezer and let it sit at room temperature for a few minutes to slightly soften, making it easier to cut. Slice the pie into 8 generous portions. For each slice, add a festive dollop of Redi-Whip or freshly whipped cream and crown it with a bright red maraschino cherry. A decadent drizzle of chocolate syrup over the top completes the presentation. Serve immediately and watch it disappear!

Any leftover slices can be stored in an airtight container in the freezer for up to 3 months. This makes it a fantastic make-ahead dessert for entertaining or simply enjoying a sweet treat whenever the craving strikes.

Love this “No-Fry” Fried Ice Cream Pie? Pin it for Later!
Don’t let this incredible “No-Fry” Fried Ice Cream Pie recipe get lost in the shuffle! Make sure you save it to your favorite Pinterest board so you can easily find it whenever you’re ready to whip up this crowd-pleasing dessert. It’s perfect for Mexican night, summer parties, or just a sweet escape!
Pro Tips and Handy Tools for the Best “No-Fry” Fried Ice Cream Pie
Achieving a perfect “Fried” Ice Cream Pie is simple, especially with a few helpful tips and the right tools:
- I found my 9-inch deep-dish ceramic pie plate worked wonders for this recipe, allowing for generous layers and a beautiful presentation. A deep-dish plate is essential to accommodate all the delicious layers.
- For perfectly chopped cashews, my KitchenAid Mini Chopper is a lifesaver. It makes quick work of nuts, ensuring an even consistency without over-processing. If you don’t have one, a sharp knife or even a food processor (pulsing carefully) will work.
- When transferring softened ice cream to a larger bowl, an ice cream scoop is incredibly useful. For folding in the Cool Whip and cinnamon, a heavy-duty rubber spatula works perfectly. For even quicker and easier mixing, especially if you’re making a larger batch, consider using the paddle attachment on your KitchenAid Mixer. Just be sure to use the lowest setting to fold everything together gently, taking care not to let the ice cream melt too much. The key is to mix just until combined for the best creamy texture.
- Don’t Over-Soften the Ice Cream: While softening is necessary for mixing, don’t let the ice cream become too liquid. It makes it harder to spread and prolongs freezing time.
- Chill Your Pie Plate: For an extra edge against melting, pop your pie plate into the freezer for 15-20 minutes before you begin assembling.
- Press the Crust Firmly: When patting down the bottom crumb layer, make sure it’s compact and even. This creates a sturdy base for your pie.
- Get Creative with Garnishes: While Redi-Whip, cherries, and chocolate syrup are classic, consider other toppings like a dusting of extra cinnamon, a sprinkle of toasted coconut, or a drizzle of caramel sauce for an added touch.
- Portioning Tip: For perfectly clean slices, dip your knife in hot water and wipe it clean between each cut. This helps glide through the frozen pie smoothly.
Explore More Irresistible Ice Cream Dessert Ideas
If you adore ice cream and frozen treats as much as we do, you’re in for a delightful journey! This “No-Fry” Fried Ice Cream Pie is just the beginning. Our collection of family-tested and proven winner dessert ideas guarantees a sweet success every time. It can sometimes be tough to decide which delectable dessert to create, but don’t fret – there’s always another occasion and another chance to celebrate with a fantastic frozen treat!
Here are some of my personal favorite frozen desserts you simply must try:
- Dairy Queen Apple Pie Blizzard: Recreate the iconic, comforting flavors of a warm apple pie blended into a chilly, creamy treat right at home.
- Homemade Chocolate Chip Cookie Dough Ice Cream Cake (pictured): A dream come true for cookie dough lovers, combining rich ice cream with chunks of edible cookie dough in a delightful cake form.
- Copy Cat Baskin Robbins Daiquiri Ice: A refreshing, tangy, and vibrant sorbet-like dessert that’s perfect for a hot day or a fun adult-friendly treat.
- Pineapple Dole Whip: Experience the magic of Disney’s famous soft-serve, a creamy, sweet, and tropical pineapple treat that’s surprisingly easy to make.
- Coffee & Donuts Ice Cream Cake: Indulge in the perfect marriage of two breakfast favorites, transformed into an decadent, layered ice cream cake.
- Chocolate Waffle Cookie Dessert: A unique and crispy dessert featuring delicious chocolate waffle cookies, perfect for creative presentations.
- Shirley Temple Float: A nostalgic and fizzy drink transformed into a fun, family-friendly float with ice cream, ideal for celebrations.
- Margarita Pie: A zesty and refreshing pie that captures all the vibrant flavors of a margarita in a creamy, chilled dessert.
My mouth is already watering just thinking about these!
Now, let’s get to the star of the show – the full recipe for this irresistible “No-Fry” Fried Ice Cream Pie!

LIKE THIS RECIPE?
Don’t forget to give it a ⭐️⭐️⭐️⭐️⭐️ star rating and
leave a comment below the recipe!

Print Recipe
“No-Fry” Fried Ice Cream Pie
Ingredients
- 1/2 container of 1.5 quart vanilla ice cream can substitute reduced calorie or frozen yogurt
- 4 oz. Cool Whip® can substitute low fat or fat free
- 1/2 teaspoon ground cinnamon
- 2 1/2 cups crushed corn flakes
- 4 Tablespoons butter
- 3 Tablespoons granulated sugar
- 1/4 teaspoon salt
- 1/4 cup chopped cashews or almonds
- 8 maraschino cherries for garnish
- chocolate syrup for garnish
- Redi-Whip for garnish (or can substitute cool whip)
Instructions
-
In a small skillet, melt the butter over medium heat. Add in the crushed cornflakes, cashews, sugar and salt. Mix well to combine. Cool completely to room temperature.
-
Allow vanilla ice cream to soften for about 10-15 minutes. When soft enough to easily stir, fold in the Cool Whip and ground cinnamon until combined.
-
In a deep dish 9″ pie plate, pour half the cooled crumb mixture on the bottom. Pat firmly to an even layer. Spread the ice cream mixture over the crumbs. Top the ice cream mixture with the remaining crumbs.
-
Cover the pie tightly with plastic wrap and place in the freezer until completely frozen. (Freezing overnight is highly recommended for best results).
-
Before serving, let the pie sit at room temperature for a few minutes to soften slightly. Cut into 8 slices. Garnish each slice with Redi-Whip or fresh whipped cream and a maraschino cherry. Drizzle generously with chocolate syrup. Serve immediately.
Notes
Nutrition
This delightful recipe was originally shared on May 15th, 2015. It has since been updated and re-shared on April 28, 2025, to enhance user experience and provide even more helpful tips.
