Decadent Hot Chocolate Thumbprint Cookies: Your Ultimate Recipe for Cozy Winter Treats
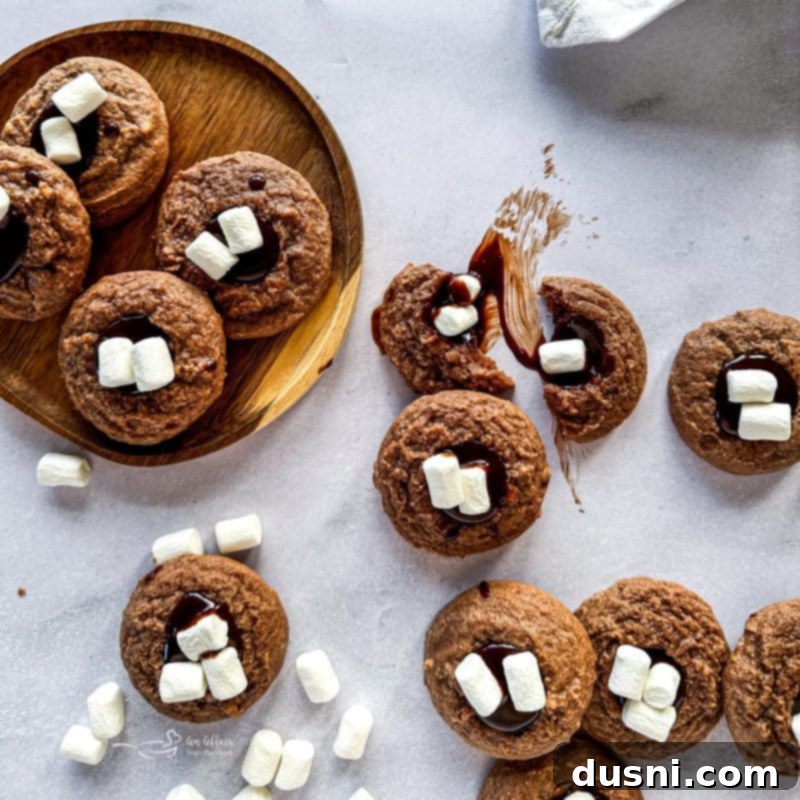
Prepare to indulge in the pure decadence of these Hot Chocolate Thumbprint Cookies. These delightful treats capture the heartwarming essence of a classic cup of hot chocolate, transformed into a perfectly bite-sized cookie. Each one boasts a rich, fudgy chocolate base, crowned with an intensely decadent chocolate ganache center, and finished with a fluffy mini marshmallow topping. The result is a truly irresistible cookie that’s bursting with the comforting flavors of winter.
Unwrap the Magic of Hot Chocolate Thumbprint Cookies
These Hot Chocolate Thumbprint Cookies are more than just a dessert; they’re an experience. Imagine a chilly evening, a crackling fireplace, and the comforting taste of hot cocoa. Now, imagine that warmth and flavor captured in a soft, chewy cookie. That’s exactly what these thumbprint cookies deliver. They are remarkably simple to prepare, yet yield a gourmet-level treat that tastes just like a luxurious mug of homemade hot cocoa. The secret lies in their intensely rich chocolate ganache center, crafted from a harmonious blend of Cool Whip and semi-sweet chocolate, all elevated by that signature gooey marshmallow topping.
While the process itself is straightforward, the hardest part might just be the waiting game as the dough firms up in the refrigerator. But trust us, every minute of that wait is absolutely worth it. This crucial chilling step ensures your cookies maintain their perfect shape and texture, preventing them from spreading too much in the oven. The reward? A batch of beautifully rich, chocolatey cookies ready to be devoured.
The Perfect Treat for Any Occasion: Hot Chocolate Thumbprints
Whether you’re celebrating the festive holiday season, participating in a lively cookie exchange, preparing for an elementary school party, or simply craving a delightful chocolate treat, these hot chocolate cookies are the ideal choice. Their charming appearance and delightful flavor make them a crowd-pleaser for all ages. They’re also wonderfully versatile; feel free to customize them with your favorite additions like extra chocolate chips in the dough or a sprinkle of festive decorations to make them truly your own.
If you find yourself falling in love with this recipe for Hot Chocolate Thumbprint Cookies, you’ll surely enjoy exploring other variations of this classic cookie style. Consider trying our Snickerdoodle Thumbprint Cookies for a cinnamon-sugar twist, or these elegant Almond Raspberry Shortbread Thumbprint Cookies for a fruity delight.
Understanding Hot Cocoa Thumbprints Cookies
For those unfamiliar, thumbprint cookies are a beloved type of cookie characterized by a small indentation on top. This little “thumbprint” serves as a perfect cavity for holding a variety of delicious fillings. Historically, jams and jellies were common, but the possibilities are endless! You can fill them with nut butter, different types of chocolate, chopped nuts, fresh fruit, or, in this case, a luscious chocolate ganache and mini marshmallows. They are known for being a fun and relatively easy cookie to prepare, making them a fantastic baking project for families or beginner bakers.
The key to achieving the perfect thumbprint cookie, especially these hot chocolate delights, is allowing the dough to chill properly in the refrigerator. An hour might seem like a long wait, but it is absolutely essential. This step firms up the dough significantly, which in turn prevents the cookies from spreading too much during baking. The result is a beautifully shaped, rich chocolate cookie that holds its form and filling perfectly, ready to be enjoyed with every satisfying bite.
Essential Ingredients for this Delicious Chocolate Thumbprint Cookies Recipe
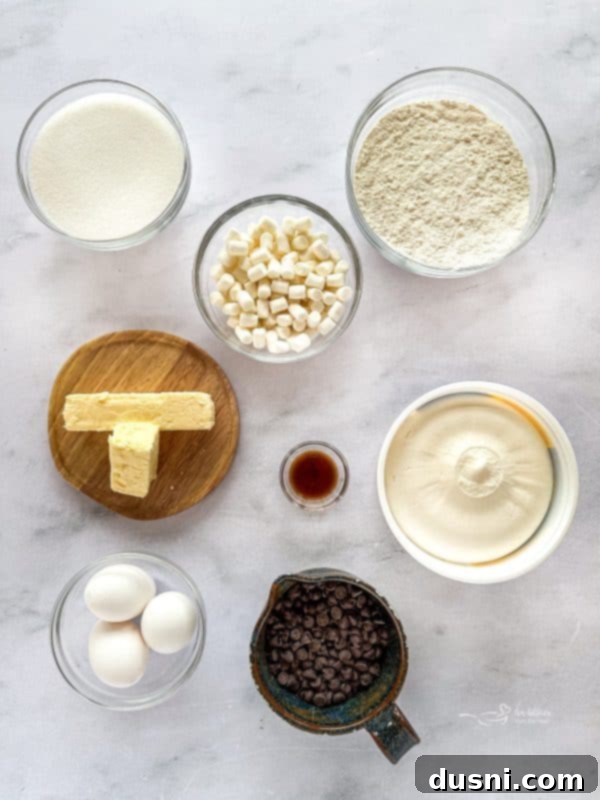
Crafting these amazing hot chocolate thumbprint cookies requires a handful of simple, readily available ingredients. For a comprehensive list of all ingredients and detailed instructions, please scroll down to the bottom of this post where you’ll find the full printable recipe card. Here’s a closer look at what you’ll need and why each component is important:
- Butter: Both salted or unsalted butter will work beautifully in this recipe. Butter provides richness and helps create that tender, melt-in-your-mouth cookie texture. If using unsalted, you might want to add a pinch more salt to the dough.
- Semi-Sweet Chocolate: This recipe calls for chocolate in two crucial places: within the cookie dough itself for a deep chocolate flavor, and in the luscious ganache filling. Semi-sweet chocolate provides a balanced sweetness that complements the cocoa notes perfectly.
- Sugar: Granulated sugar is used to sweeten the cookie dough, contributing to its structure and browning. It provides the perfect level of sweetness to balance the richness of the chocolate.
- Eggs: Essential for binding the ingredients together, adding moisture, and giving the cookies their tender crumb. Make sure your eggs are at room temperature for optimal mixing and a smoother dough.
- Vanilla extract: Always opt for real vanilla extract. It enhances the chocolate flavors and adds a warm, inviting aroma to the cookies.
- Flour: All-purpose flour forms the structural backbone of these thumbprint cookies, giving them their characteristic chewiness and preventing them from becoming too crumbly.
- Cool Whip: This ingredient is key to achieving the incredibly smooth and decadent ganache filling in the thumbprint. Its light and airy texture helps create a ganache that’s both rich and easy to spoon.
- Marshmallows: Mini marshmallows are the perfect topping, melting slightly on the warm cookie to create that iconic hot chocolate experience. Their sweet, gooey texture is simply irresistible.
Step-by-Step Guide: How to Make Chocolate Filled Thumbprint Cookies
Making these delightful hot chocolate thumbprint cookies is a surprisingly straightforward process. Follow these easy steps, and you’ll have a batch of cozy, chocolatey treats in no time!

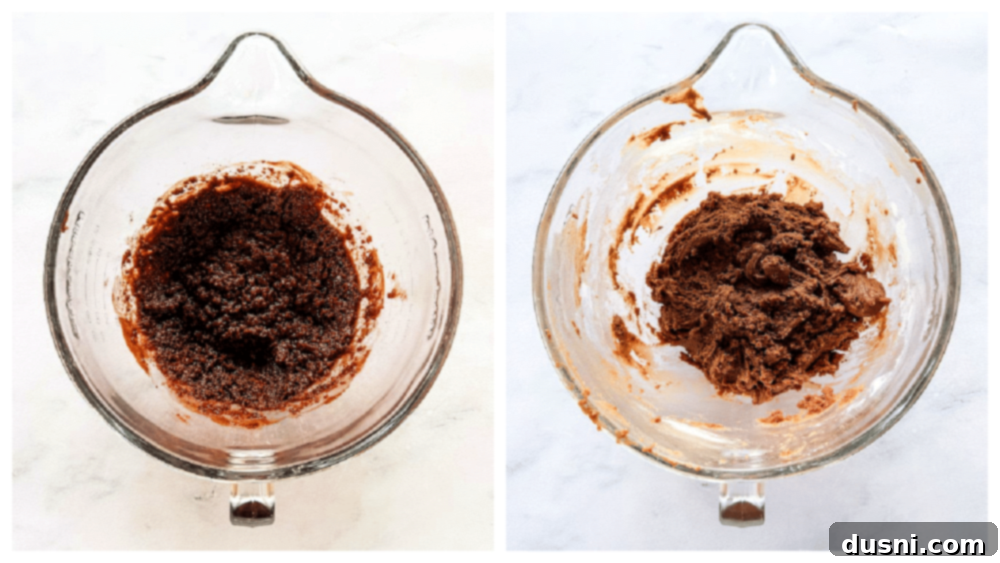
- **Prepare the Chocolate Base:** In a large, microwave-safe bowl, combine your butter and 4 ounces of semi-sweet chocolate. Microwave on high for approximately 1 minute, or until the butter is completely melted and you can stir the chocolate into a smooth, glossy consistency. Be careful not to overheat. Allow this mixture to cool slightly to prevent cooking the eggs in the next step.
- **Combine Wet Ingredients:** Add the granulated sugar and vanilla extract to the cooled chocolate mixture. Mix until well combined. Then, one at a time, beat in the eggs until they are fully incorporated and the mixture is smooth.
- **Add Dry Ingredients & Chill:** Gradually add the all-purpose flour to the wet ingredients, mixing until just combined. Be careful not to overmix, as this can lead to tough cookies. Once the dough comes together, cover the bowl and refrigerate the dough for at least one hour. This chilling step is vital for preventing the cookies from spreading too much during baking, ensuring they hold their distinct thumbprint shape.
- **Preheat Oven & Prepare Baking Sheets:** While the dough is chilling, preheat your oven to 350 degrees F (175 degrees C). Line your baking sheets with parchment paper for easy cleanup and to prevent sticking.
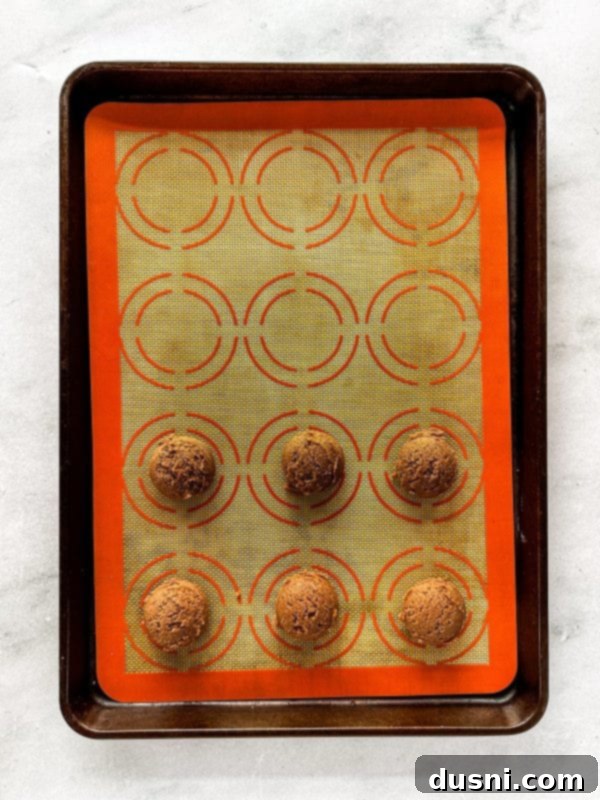
- **Form Cookie Balls:** Once the dough is sufficiently chilled, roll it into 64 small, 1-inch balls. Place these dough balls about 2 inches apart on your prepared parchment paper-lined cookie sheets.
- **Bake to Perfection:** Bake the cookies in the preheated oven for approximately 8 minutes, or until the centers are just set and the edges are slightly firm. Avoid overbaking to keep them soft and fudgy.
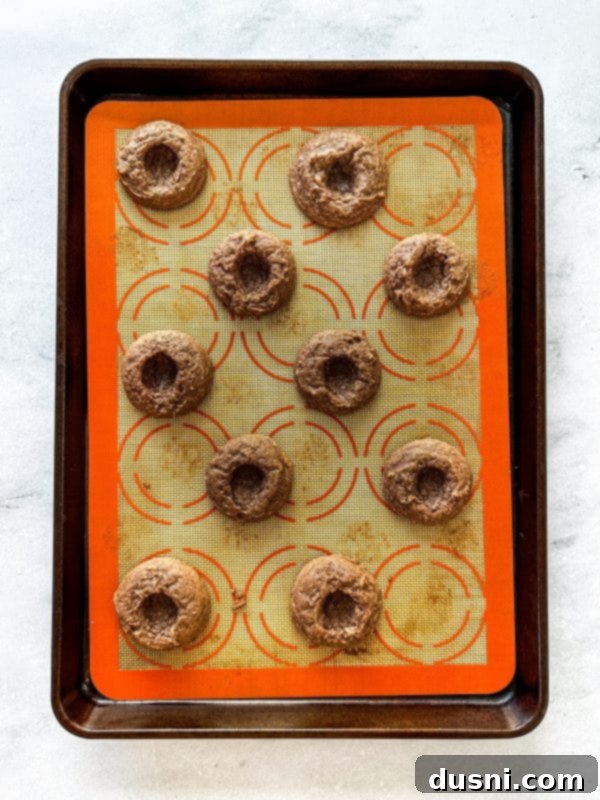
- **Create the Thumbprints:** Immediately after removing the cookies from the oven, while they are still warm and soft, use your thumb or the handle of a wooden spoon to gently press an indentation into the middle of each cookie. Be careful not to press all the way through.
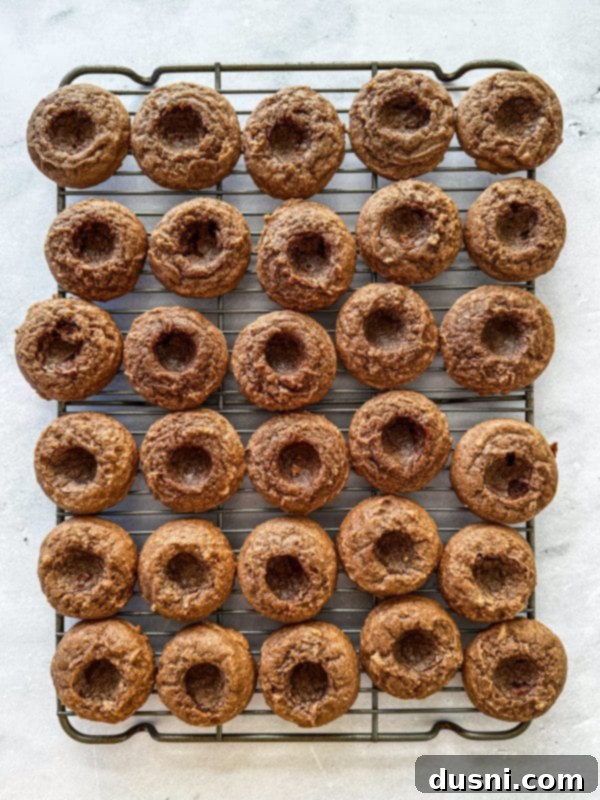
- **Cool Completely:** Allow the cookies to cool on the baking sheet for about two minutes before carefully transferring them to a wire rack to cool completely. This prevents them from breaking and ensures they are firm enough for the filling.
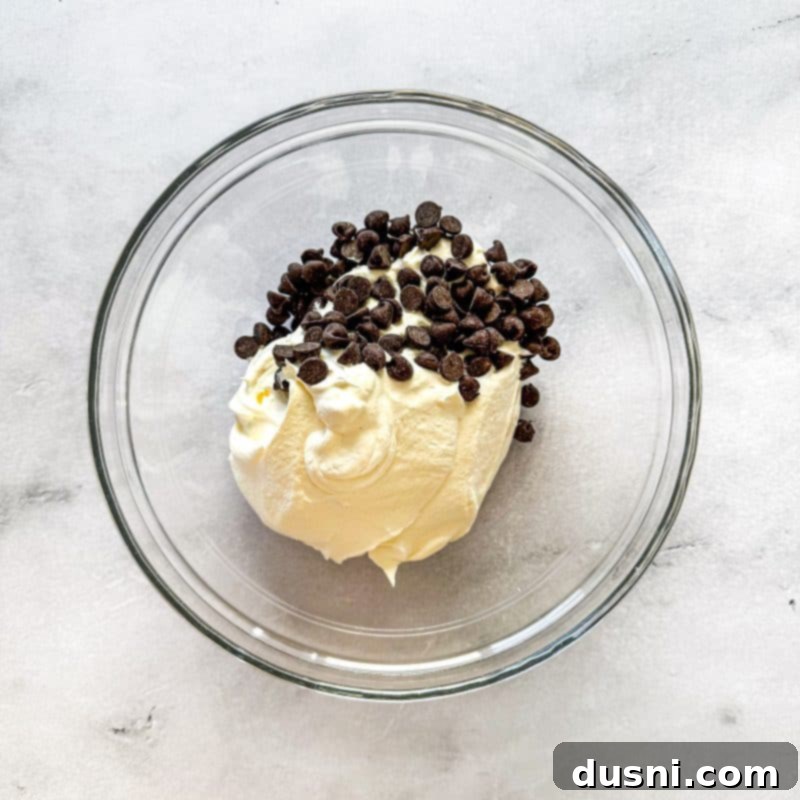
- **Prepare the Ganache Filling:** In a separate microwave-safe bowl, combine the Cool Whip and the remaining 2 ounces of semi-sweet chocolate. Microwave for one minute, then stir until the chocolate is completely melted and the mixture is smooth and glossy, forming a delectable ganache.
- **Fill the Cookies:** Using a small spoon or a piping bag, carefully spoon the warm chocolate ganache into the indentation in the center of each cooled cookie.
- **Add Marshmallow Topping:** While the ganache is still soft, gently place a mini marshmallow or two on top of the chocolate filling of each cookie. The warmth from the ganache will slightly soften the marshmallows, creating that perfect hot cocoa effect.
- **Allow to Set:** Place the finished cookies on a wire rack and let them stand at room temperature until the chocolate ganache is completely set. This might take a couple of hours, or you can speed up the process by refrigerating them for about 30 minutes.
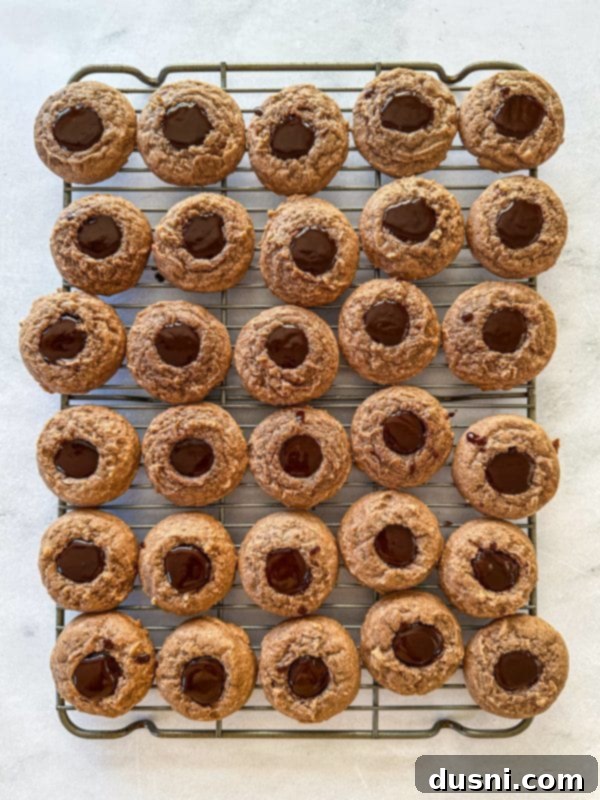
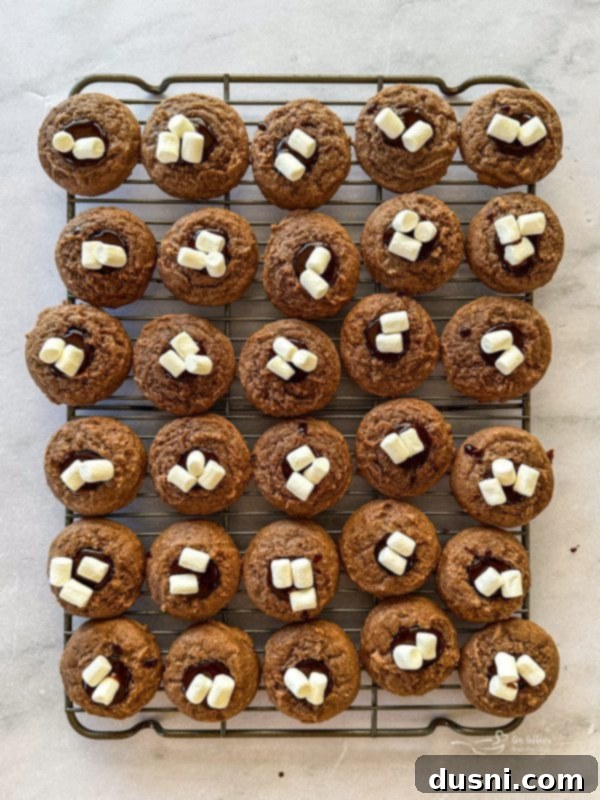
Once set, your Hot Chocolate Thumbprint Cookies are ready to be enjoyed! Leftovers can be stored in an airtight container on the kitchen counter for up to 3 days, though they rarely last that long!
Show Your Love: Pin This Recipe!
If you adore this Hot Chocolate Thumbprints Cookies Recipe as much as we do, don’t let it get lost in the depths of the internet! Be sure to pin it to your favorite Pinterest recipe board before you navigate away. It’s the perfect way to save it for your next baking session or to share it with friends and family!

Are you a true hot chocolate enthusiast? We absolutely LOVE it! If you are, you simply must try our Homemade Hot Cocoa Mix. It’s incredibly easy to make, offers rich, authentic flavor, and makes for a wonderfully thoughtful gift during the colder months.
FAQs About This Chocolate Thumbprint Cookie Recipe
Here are some common questions and helpful answers to ensure your hot chocolate thumbprint cookies turn out perfectly every time:
- Why did my Thumbprint cookies spread? Thumbprint cookies often spread or flatten if the dough hasn’t been sufficiently refrigerated. Chilling the dough is critical as it solidifies the butter, making the dough firmer and less likely to spread out rapidly when exposed to the oven’s heat. Always ensure your dough chills for the recommended time.
- Why did my thumbprint cookies flatten? Beyond insufficient chilling, another common culprit for flattened cookies is an oven that’s too hot. If the oven temperature is too high, the butter in your cookie dough will melt too quickly before the flour and eggs have a chance to set the cookie’s structure. This leads to a rapid collapse and a flatter cookie. Using an oven thermometer can help verify your oven’s accuracy.
- How do you keep thumbprint cookies from cracking? Several factors contribute to cracking. First, ensure your leavening agents (baking soda and baking powder, if used in other recipes) are fresh and not expired. Second, make sure your oven is preheated to the correct temperature. Overbaking can also cause dryness and cracking. Lastly, sometimes a slightly softer dough (e.g., using room temperature butter and eggs) can be more pliable and less prone to cracking when making the indentation.
- How do you keep thumbprint cookies from spreading? The most effective way to prevent thumbprint cookies from spreading is through adequate refrigeration of the dough. A cold dough enters the oven and slowly melts, allowing the cookie to set before it spreads too much. You can also try chilling the cookie balls again briefly after forming them, just before baking.
- Why are they called thumbprint cookies? The name “thumbprint cookies” comes from their distinctive feature: the small, circular indentation made on the top of each cookie. This depression is traditionally created by gently pressing a thumb or finger into the center of the dough ball before baking, creating a perfect spot for fillings like jam, chocolate, or marshmallows.
Creative Substitutions for Your Hot Chocolate Thumbprint Cookies
One of the joys of baking is the freedom to customize and experiment! These hot chocolate thumbprint cookies are quite forgiving, allowing for delightful substitutions to suit your taste or what you have on hand:
-
For a truly festive and eye-catching presentation, consider swapping out the mini marshmallows for crushed candy canes. The minty crunch offers a wonderful contrast to the rich chocolate.
-
If mini marshmallows aren’t available, don’t fret! Simply purchase larger marshmallows and use kitchen shears or a knife to cut them into smaller, more manageable pieces that fit neatly into the thumbprint.
-
While semi-sweet chocolate is recommended for its balanced flavor, feel free to experiment with other varieties. For a more intense, robust chocolate experience, try using dark chocolate. If you prefer a sweeter, creamier profile, milk chocolate can also be a delicious alternative.
-
Instead of solid marshmallows, you can use marshmallow cream or fluff for a smooth, gooey topping that perfectly mimics melted marshmallows.
Always remember that when it comes to making substitutions in recipes, you don’t need to be afraid to get creative. Use ingredients that suit your personal taste preferences and any dietary needs. Make this recipe truly your own and enjoy the process!

This delightful recipe is proudly part of The Sweetest Season, an annual virtual cookie swap. This wonderful initiative is lovingly co-hosted by Erin of The Speckled Palate and Susannah of Feast + West. Every year, a community of talented food bloggers comes together to share innovative and heartwarming new holiday cookie recipes, perfect for baking, gifting, and sharing joy.
Beyond sharing delicious recipes, this year, we are once again dedicated to raising vital funds for Cookies 4 Kids’ Cancer. This organization is a recognized 501(c)3 non-profit entirely devoted to funding research for new, innovative, and critically less-toxic treatments for childhood cancer. Their work is truly life-changing.
Since its inception in 2008, Cookies for Kids’ Cancer has generously granted nearly $18 million towards pediatric cancer research. This funding has supported over 100 research grants to leading pediatric cancer centers across the country. From these grants, over 35 new treatments have emerged, becoming available to children bravely battling cancer today. Every cookie, every share, and every donation makes a tangible difference.
Join us in this crucial mission to raise money for this incredibly important cause! You can contribute directly through our dedicated fundraising page. Your support means the world to these children and their families.
An exciting opportunity awaits: Cookies for Kids’ Cancer is currently in a matching window with their generous friends at OXO. This means that OXO will match every dollar raised through the end of 2023, up to an incredible $100,000! Whatever money we manage to raise through our efforts will automatically be doubled on our fundraising page, maximizing the impact of every contribution.
Expert Tips & Tricks for Perfect Hot Chocolate Thumbprint Cookies
Achieving bakery-quality hot chocolate thumbprint cookies is easier than you think with these expert tips:
-
**Avoid Overmixing:** When combining the dry ingredients with the wet, resist the urge to overmix the dough. Overmixing develops the gluten in the flour too much, which can result in tough, dense cookies. Mix until just combined for a tender crumb.
-
**Boost Chocolate Flavor:** For an even more intense chocolate experience, consider folding in a handful of your favorite chocolate chips (mini or regular) into the cookie batter before chilling. This adds extra pockets of molten chocolate in every bite.
-
**Seasonal Flavor Twist:** During the holidays, stir in a touch of peppermint extract (start with ¼ teaspoon and add more to taste) to the cookie dough or even a drop to the ganache for a festive batch of hot chocolate peppermint thumbprint cookies.
-
**Effortless Mixing:** While a hand mixer works well, for easier and more consistent mixing, transfer your dough ingredients to the bowl of a stand mixer fitted with the paddle attachment. This ensures all ingredients are thoroughly blended without overworking the dough.
-
**Stovetop Alternative:** If you prefer not to use a microwave, you can easily melt the chocolate and butter together in a small saucepan over low heat on the stovetop. Stir constantly until smooth and combined, then remove from heat and let cool slightly before proceeding.
-
**Uniform Cookies:** For perfectly uniform cookie balls, which lead to even baking and a beautiful presentation, use a cookie scoop. A 1-inch scoop (or small melon baller) is ideal for achieving consistent sizing.
-
**Keep Marshmallows Fresh:** If your marshmallows feel a bit stale or firm, microwave them for 5-10 seconds on a microwave-safe plate before placing them on the cookies. This will make them softer and more pliable.
More Delicious Recipes to Love
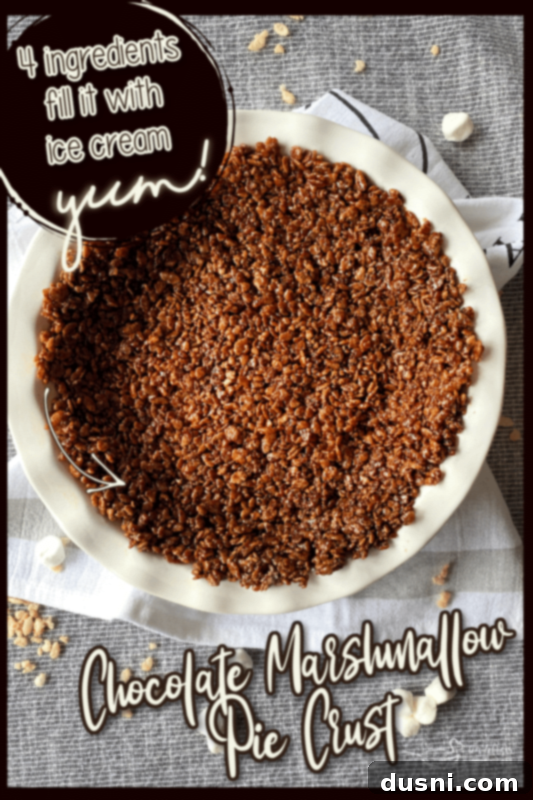
The combination of rich chocolate and sweet marshmallows is a match made in heaven! If you can’t get enough of this duo, you’ll absolutely love our Chocolate Marshmallow Pie Crust recipe – it’s an unexpectedly delightful base, especially when filled with creamy vanilla ice cream.
For all you cookie enthusiasts out there, we have a treasure trove of other delicious cookie recipes waiting for you to explore and enjoy:
-
Malted Chocolate Chip Cookies: A classic elevated with a malty twist.
- Iced Maple Sugar Cookies: Sweet, soft, and perfect for fall or any time of year.
- Brown Sugar Cookies: Chewy, rich, and incredibly satisfying.
-
Cherry Wink Cookies: A nostalgic holiday favorite with a fruity, nutty crunch.
-
Cowboy Cookies: Hearty, loaded with good stuff, and made even better with brown butter.
-
Old Fashioned Iced Molasses Cookies: Spiced, soft, and topped with a delicate icing.
-
Pecan Butter Cookies: Simple, buttery, and bursting with pecan flavor.

These Hot Chocolate Thumbprint Cookies are truly like receiving a warm, comforting hug on a brisk winter’s day. Their rich chocolate flavor, decadent ganache, and sweet marshmallow topping create a unique and unforgettable treat. Don’t wait to bake up a batch for yourself, your family, and all the chocolate lovers in your life today!

LIKE THIS RECIPE?
Don’t forget to give it a ⭐️⭐️⭐️⭐️⭐️ star rating and
leave a comment below the recipe!

Print Recipe
Hot Chocolate Thumbprint Cookies
Equipment
-
Kitchenaid Stand Mixer
-
KitchenAid Hand Mixer
-
Rubber Spatulas
-
Glass Batter Bowl
-
Cuisinart Chef’s Classic Nonstick 1-Quart Saucepan with Lid
-
13×18 Half Sheet Pan
-
Wilton Stainless Steel Cookie Scoop
-
15 x 10 x 1-Inch Cookie/Jelly Roll Pan
Ingredients
- ¾ cup butter
- 6 ounces Semi-Sweet Chocolate divided
- 1 ¾ cups sugar
- 3 eggs
- 1 teaspoon vanilla extract
- 2 ½ cups flour
- 1 ½ cups Cool Whip
- 1 cup miniature marshmallows
Instructions
-
Microwave butter with 4 ounces of chocolate for about 1 minute or until butter is melted and you are able to stir the chocolate smooth. Cool slightly.
-
Add in sugar and vanilla. Mix in eggs.
-
Add in flour and mix well to combine.
-
Refrigerate for one hour.
-
Preheat oven to 350 degrees F.
-
Form cookie dough into 64 1” balls. Place 2” apart on a parchment-lined cookie sheet.
-
Bake for 8 minutes or until the centers of the cookies are just set.
-
Cool on a baking sheet for two minutes. Press a thumbprint indentation into the middle of the cookie and transfer the cookies to a cooling rack to cool completely.
-
Microwave cool Whip and remaining 2 ounces of chocolate for one minute, or until chocolate is completely melted when stirred.
-
Spoon chocolate into the indentation of each cookie.
-
Top each cookie with a marshmallow or two.
-
Let stand until the chocolate is completely set.
Nutrition
