Irresistibly Easy Chocolate Marshmallow Pie Crust: Your New Go-To Ice Cream Pie Base
Get ready to discover the simplest, most delightful pie crust you’ve ever made – and it’s perfectly designed for your favorite ice cream creations! This **Chocolate Marshmallow Pie Crust** is a whimsical, no-bake wonder that comes together in mere minutes with just four everyday ingredients. Forget complicated pastry techniques or waiting for dough to chill; this recipe offers a delicious, unique foundation for any frozen dessert, transforming an ordinary scoop of ice cream into an extraordinary treat. Its playful texture and rich chocolate flavor make it an instant family favorite, perfect for impromptu gatherings or a quick sweet fix.

Discovering the Magic of This Unique Pie Crust Recipe
Every so often, a recipe comes along that feels like a hidden treasure. For me, that treasure was unearthed thanks to my wonderful friend, Gail. She stumbled upon an old cookbook at a local thrift store, a charming relic from 1981 aptly titled “Cooking with Love & Cereal.” Knowing my passion for unique dessert ideas and baking, she kindly passed it on to me. The moment I held it, I knew I was in for a treat. The very first evening, I eagerly thumbed through its pages, marking countless recipes that piqued my interest. But among all the intriguing suggestions, one recipe immediately jumped out: this incredible **Chocolate Marshmallow Pie Crust**.
It promised simplicity and a distinctive flavor profile, and I was hooked from the first glance. There’s something truly special about old cookbooks, isn’t there? They offer a glimpse into the culinary past, often presenting innovative ideas that have stood the test of time or have been forgotten in the rush of modern cooking. This crust is a testament to that timeless appeal. It’s a reminder that sometimes the best recipes are the ones with the fewest ingredients and the most straightforward steps.
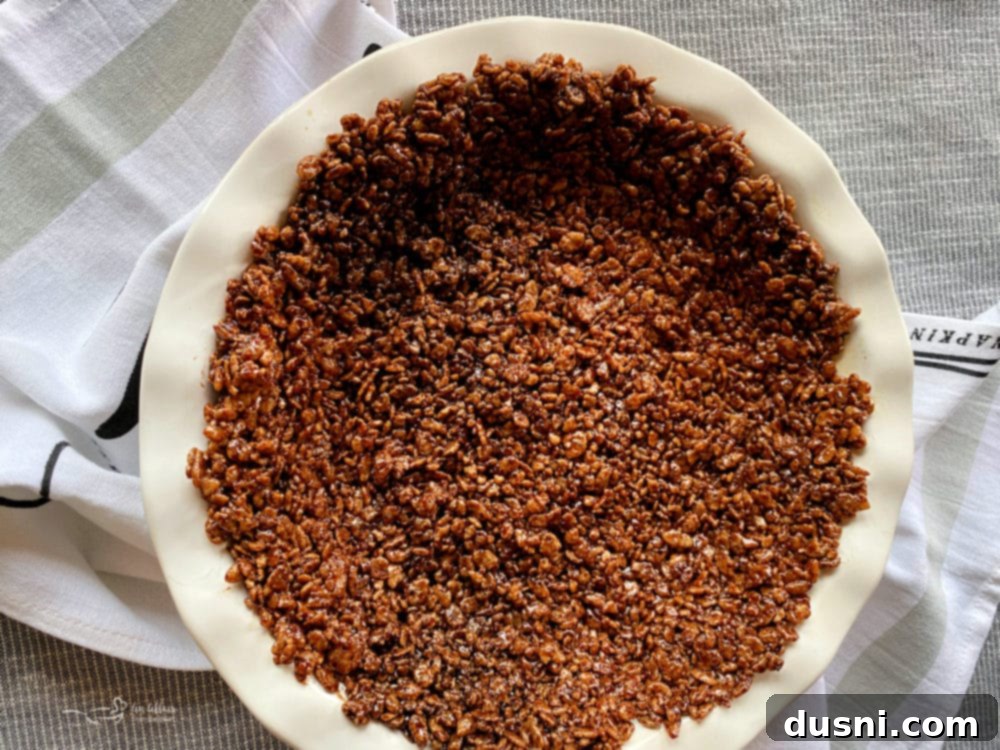
When you first glimpse this rich, dark chocolate crust, your mind probably jumps to cocoa-flavored cereals like Cocoa Krispies, doesn’t it? I certainly would have thought the same thing! However, the secret to its deep, authentic chocolate flavor doesn’t come from cocoa cereal at all. The real magic happens with a generous amount of classic Hershey’s Chocolate Syrup. This humble ingredient is what truly elevates this **marshmallow pie crust** from good to absolutely amazing!
Imagine closing your eyes and savoring the sweet, unmistakable taste of chocolate syrup – that’s precisely the indulgent flavor profile you’ll experience in every bite of this pie crust. Paired with the delightful crispness and chewiness reminiscent of a Rice Krispie treat, it creates an irresistible combination that is both nostalgic and exciting. The syrup not only imparts a vibrant chocolate taste but also contributes to the crust’s perfect balance of sweetness and rich depth, making it an ideal companion for a wide variety of ice cream flavors. This **easy chocolate crust** isn’t just a base; it’s a flavor experience in itself.
SOME OF THE ITEMS BELOW CONTAIN AFFILIATE LINKS; I AM A PARTICIPANT IN THE AMAZON SERVICES LLC ASSOCIATES PROGRAM, AN AFFILIATE ADVERTISING PROGRAM DESIGNED TO PROVIDE A MEANS FOR US TO EARN FEES BY LINKING TO AMAZON.COM AND AFFILIATED SITES. I AM ALSO AN AFFILIATE FOR OTHER BRANDS. HOWEVER, I ONLY PROMOTE THINGS THAT I LOVE AND THINK YOU WILL LOVE, TOO. FOR MY ENTIRE DISCLOSURE POLICY PLEASE CLICK HERE.
Essential Ingredients for Your Simple Chocolate Marshmallow Pie Crust
One of the most appealing aspects of this **no-bake pie crust** is its incredible simplicity, requiring just four fundamental ingredients. This means less shopping, less fuss, and more time to enjoy your delicious dessert! To create this phenomenal **chocolate cereal crust**, you will need:
- Butter: Essential for richness and helping the mixture come together smoothly. Use unsalted butter for better control over the sweetness.
- Miniature Marshmallows: These are the binding agent, creating that wonderful chewy texture similar to a classic Rice Krispie treat. They melt beautifully and provide the necessary stickiness to hold the cereal together.
- Rice Krispies Cereal: The star of the show for texture! These crispy rice puffs provide the delightful crunch and structure to the crust. Their neutral flavor allows the chocolate to truly shine.
- Hershey’s Chocolate Syrup: This is the secret ingredient for intense chocolate flavor. Unlike cocoa powder, which can sometimes be bitter or require more sugar, chocolate syrup offers a smooth, sweet, and unmistakable chocolate taste that beautifully permeates the entire crust.
Beyond these ingredients, no fancy kitchen gadgets or specialized baking skills are required. You’ll only need a few basic tools that you likely already have on hand: a sturdy saucepan for melting the sticky base, a reliable 9-inch deep dish pie plate to shape your crust, and a heat-resistant rubber spatula for mixing. That’s it! Gather these items, and you’re well on your way to creating a fantastic homemade ice cream pie crust.
Crafting Your Perfect Chocolate Marshmallow Pie Crust: Step-by-Step
Making this **easy ice cream pie crust** is as simple as it sounds, requiring minimal effort for maximum deliciousness. Follow these straightforward steps to create a perfect base for your frozen dessert masterpiece:
Step 1: Melt the Marshmallow Base
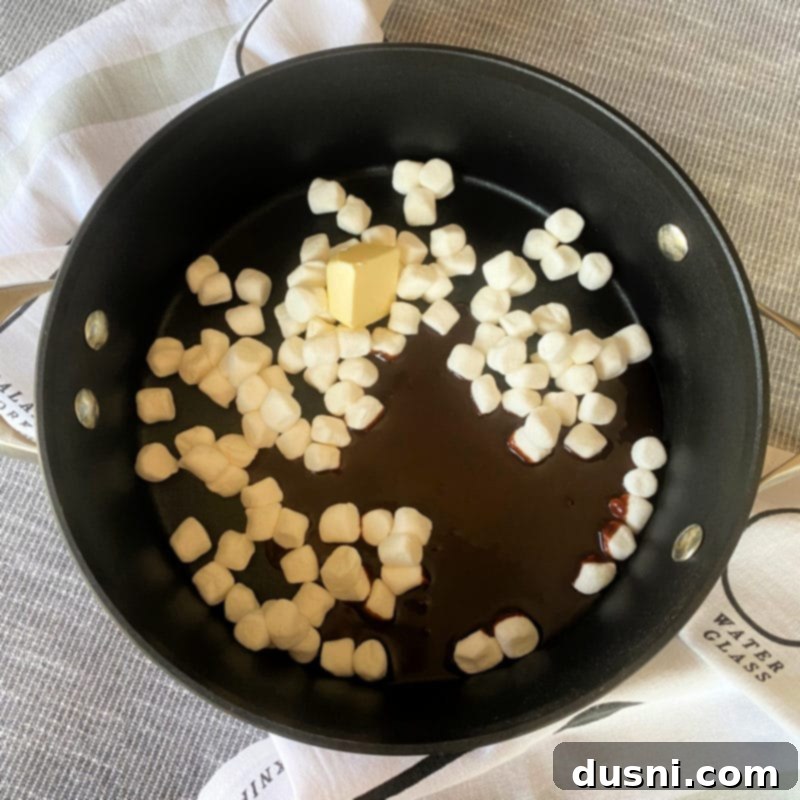
Begin by combining the miniature marshmallows, butter, and chocolate syrup in a medium-sized saucepan. Place the saucepan over low heat. The key here is *low heat* – you want the ingredients to melt slowly and evenly without scorching the marshmallows or separating the butter. Stir frequently with your rubber spatula, ensuring everything is constantly moving in the pan. As the butter melts and the marshmallows soften, they will begin to incorporate with the chocolate syrup, transforming into a glossy, sticky, and wonderfully fragrant mixture. Continue stirring until the marshmallows are completely melted and the mixture is smooth and cohesive. There should be no lumps of marshmallow visible.
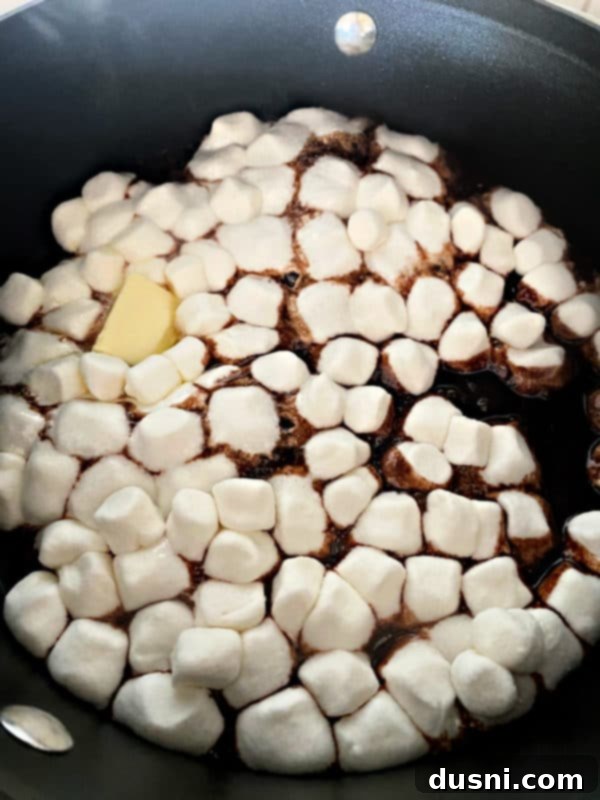
Once the mixture reaches a beautifully smooth and thick consistency, where all the marshmallows have fully dissolved and integrated with the butter and chocolate syrup, you’re ready for the next step. The mixture should be thick enough to coat the back of your spatula evenly.
Step 2: Incorporate the Cereal
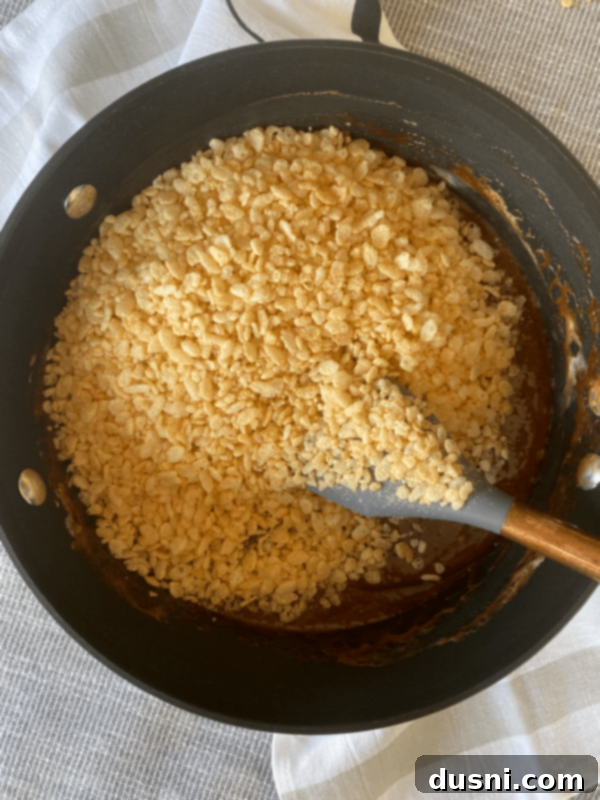
Immediately remove the saucepan from the heat. It’s important to take it off the heat before adding the Rice Krispies to prevent them from becoming stale or overcooked. Quickly pour the Rice Krispies cereal into the warm marshmallow and chocolate mixture. Use your rubber spatula to gently but thoroughly stir everything together. Continue mixing until every single crispy rice cereal puff is completely coated in the luscious, sticky chocolate marshmallow mixture. Ensure there are no dry spots; an even coating is key for a uniform and delicious crust. The mixture will be sticky, so work quickly but carefully to achieve full coverage.
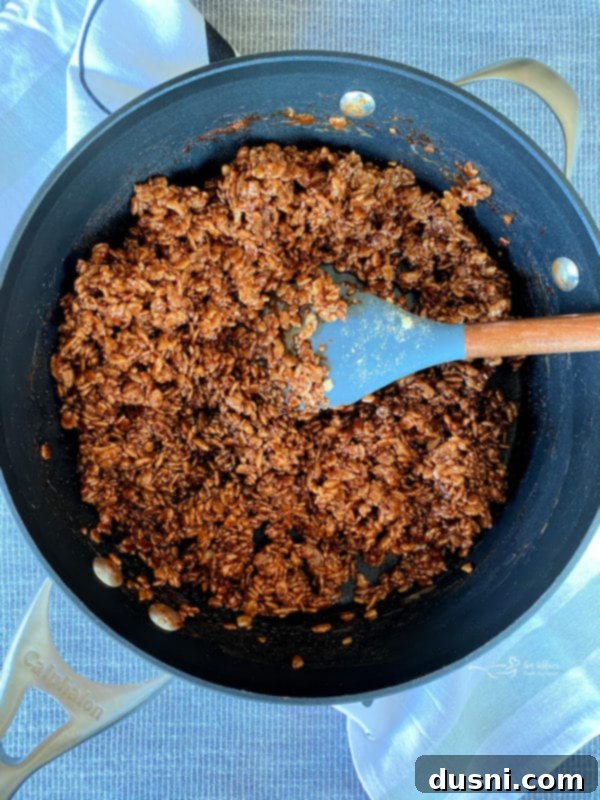
Once all the cereal is evenly coated, you’ll have a wonderfully fragrant and appealing mixture ready for your pie plate. The sticky, sweet coating will perfectly bind the cereal, ensuring a stable and delicious crust.
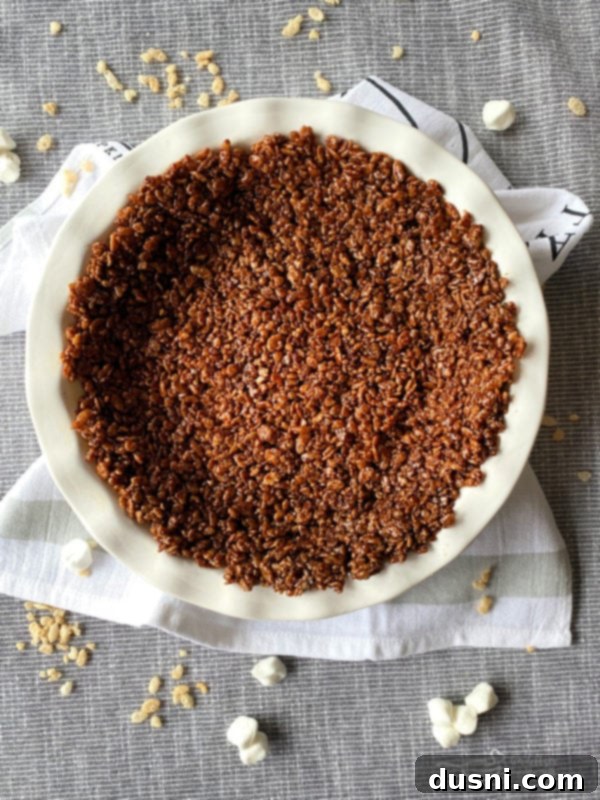
Step 3: Press and Chill
Before you begin, lightly butter your 9-inch deep dish pie plate. This crucial step prevents the sticky crust from adhering to the pan, ensuring easy removal later. Transfer the chocolate marshmallow cereal mixture into the prepared pie plate. Using the back of your buttered spatula or your fingers (lightly buttered to prevent sticking), press the mixture firmly and evenly into the bottom and up the sides of the pie plate. For an extra touch of visual appeal and texture, consider reserving about 1/4 cup of the mixture to sprinkle on top of your finished ice cream pie as a garnish. Once pressed, place the pie plate in the freezer for approximately 30 minutes. This chilling time is vital for the crust to firm up and set, creating a stable base that will hold its shape beautifully once filled.

Step 4: Fill and Garnish
Once your **marshmallow cereal crust** is firm, it’s time for the best part – filling it! Generously scoop about 1 to 1.5 quarts of your favorite ice cream into the chilled crust. Smooth the top with the back of a spoon or an offset spatula. For an even more impressive presentation, sprinkle the reserved crust mixture over the ice cream as a delicious garnish. You can also drizzle a bit more chocolate syrup on top for an extra layer of chocolatey goodness. Return the filled pie to the freezer for at least 1.5 hours, or until the ice cream is firm enough to slice easily. Before serving, let the pie rest on the counter for about 10 minutes; this slight softening will make slicing much simpler and ensure perfect portions. Enjoy your quick, easy, and undeniably delicious **chocolate ice cream pie**!
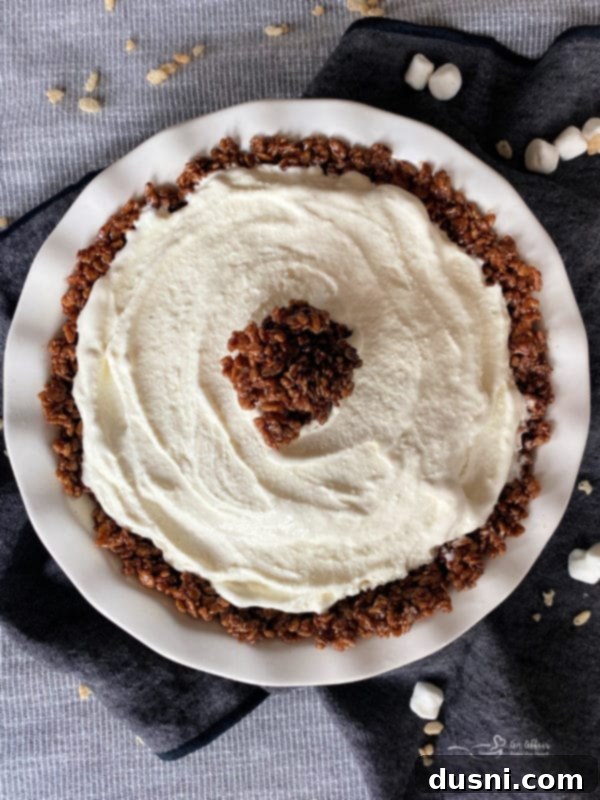
This versatile crust isn’t just for ice cream! You could fill it with no-bake cheesecakes, pudding, or even layers of fresh fruit and whipped cream. The possibilities for this simple yet sensational base are truly endless.
Love this Easy No-Bake Crust? Pin it for Later!
Don’t let this fantastic **chocolate marshmallow pie crust recipe** slip away! It’s such a simple and versatile base for so many desserts. Make sure to pin it to your favorite recipe board on Pinterest so you can easily find it whenever you’re craving a quick, delicious, and impressive dessert. Share the love and inspire others to try this delightful no-bake crust for their next ice cream pie!
Elevate Your Desserts with a Versatile Ice Cream Pie Crust
My website is a treasure trove of frozen treats, and I absolutely adore making homemade ice cream. The sheer variety of flavors you can create is truly boundless, offering endless opportunities for culinary creativity! Just as there are countless homemade ice cream variations, this simple yet ingenious pie crust can also be adapted with an array of flavor twists. The beauty of this recipe lies in its adaptability: all you need to do is experiment with different flavored syrups instead of, or in addition to, the traditional chocolate syrup.
Imagine the possibilities: switching to a rich caramel syrup, a buttery butterscotch, a vibrant strawberry or raspberry syrup, or even a creamy peanut butter ice cream syrup. Each of these simple substitutions will completely transform this **marshmallow pie crust**, imparting a brand new flavor profile and opening up a world of endless options for your ice cream fillings. This simple tweak allows you to craft a custom-tailored pie crust that perfectly complements any ice cream flavor you choose, making every dessert a truly unique experience. It’s the ultimate **no-bake dessert crust** for endless creativity!
Inspiring Crust & Filling Combinations
Just thinking about the potential combinations makes my mind buzz with exciting ideas! For this particular **chocolate marshmallow pie crust**, I chose to fill it with classic vanilla bean ice cream, a pairing that never disappoints, offering a perfect balance of rich chocolate and creamy vanilla. However, this chocolate base would also be utterly amazing filled with more adventurous flavors like my homemade Grape Nut Ice Cream, a delightful Cherry Chocolate Chip, or a decadent Vanilla Caramel Swirl. Each of these offers a unique textural and flavor contrast that would be heavenly.
But let’s think beyond chocolate! A strawberry-flavored marshmallow crust, made with strawberry syrup, would be absolutely divine when filled with bright and tangy Lemon Ice Cream or the sweet, summery essence of Peach Ice Cream. The fruity notes would dance together in perfect harmony. For those who love a rich, warm flavor, a butterscotch marshmallow crust would be an ideal match for a cozy No-Churn Pumpkin Ice Cream, especially during the fall season, or even a hint of cinnamon ice cream. Alternatively, a vibrant raspberry marshmallow crust would create an exquisite contrast with classic Chocolate Ice Cream, pairing the tartness of the berry with the sweetness of the chocolate.
For peanut butter lovers, imagine a peanut butter marshmallow crust. This would be over-the-top delicious when filled with a creamy Peanut Butter Fudge Ripple Ice Cream, creating an ultimate peanut butter experience. Or, for a sophisticated twist, how about a rich caramel marshmallow crust? This would pair exquisitely with Almond Nougat Ice Cream, offering a nutty, chewy delight, or perhaps a comforting Cinnamon Vanilla Bean ice cream for a warm, spiced treat. The beauty of this **cereal pie crust** is its blank canvas potential.
Truly, when it comes to combining this easy-to-make marshmallow cereal crust with various ice cream fillings and flavored syrups, **the ideas are absolutely endless!** Let your imagination run wild and create your own signature ice cream pies.
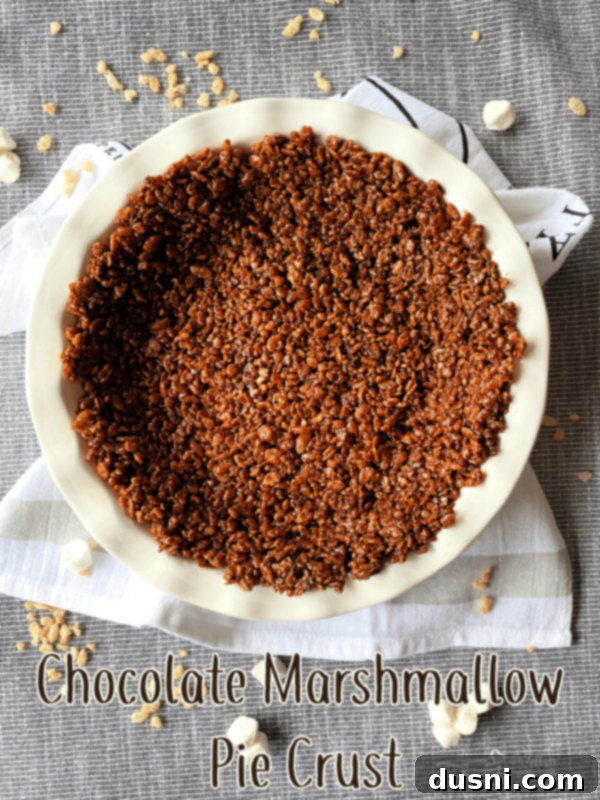
Now that you’ve explored the simplicity and versatility of this delightful **Chocolate Marshmallow Pie Crust**, it’s time to see the full recipe for yourself. You’ll truly appreciate just how straightforward and quick it is to prepare this fantastic base for your next **homemade ice cream pie**. Get ready to impress your family and friends with minimal effort!

LIKE THIS RECIPE?
Don’t forget to give it a ⭐️⭐️⭐️⭐️⭐️ star rating and
leave a comment below the recipe!
Print Recipe
Chocolate Marshmallow Pie Crust
Equipment
-
Cuisinart Chef’s Classic Nonstick 1-Quart Saucepan with Lid
-
Rubber Spatulas
-
Ceramic Pie Dish, 10-Inch
Ingredients
- 1 cup miniature marshmallows
- 1/2 cup Hershey’s Chocolate Syrup
- 1 Tablespoon butter
- 3 cups Rice Krispies Cereal
Instructions
-
Lightly butter one 9-inch deep dish pie plate to prevent sticking.
-
In a medium-sized saucepan, combine marshmallows, chocolate syrup, and butter. Place over low heat and stir frequently with a rubber spatula until the marshmallows and butter are completely melted and the mixture is smooth and well combined.
-
Remove the saucepan from the heat. Add the Rice Krispies cereal to the warm mixture and stir quickly and thoroughly until all the cereal is evenly coated.
-
Transfer the mixture to the prepared pie plate. Press it firmly and evenly into the bottom and up the sides of the pie plate. If desired, reserve about 1/4 cup of the mixture for topping later.
-
Place the pie crust in the freezer for about 30 minutes to allow it to set and firm up.
-
Once the crust is set, fill it with approximately 1 to 1.5 quarts of your favorite ice cream. Top with the reserved cereal mixture (if using) or drizzle with extra chocolate syrup, if desired. Return the filled pie to the freezer for about 1.5 hours, or until the ice cream is firmly set.
-
Before serving, let the pie rest on the counter for about 10 minutes. This will make slicing easier and ensure perfect, smooth portions.
