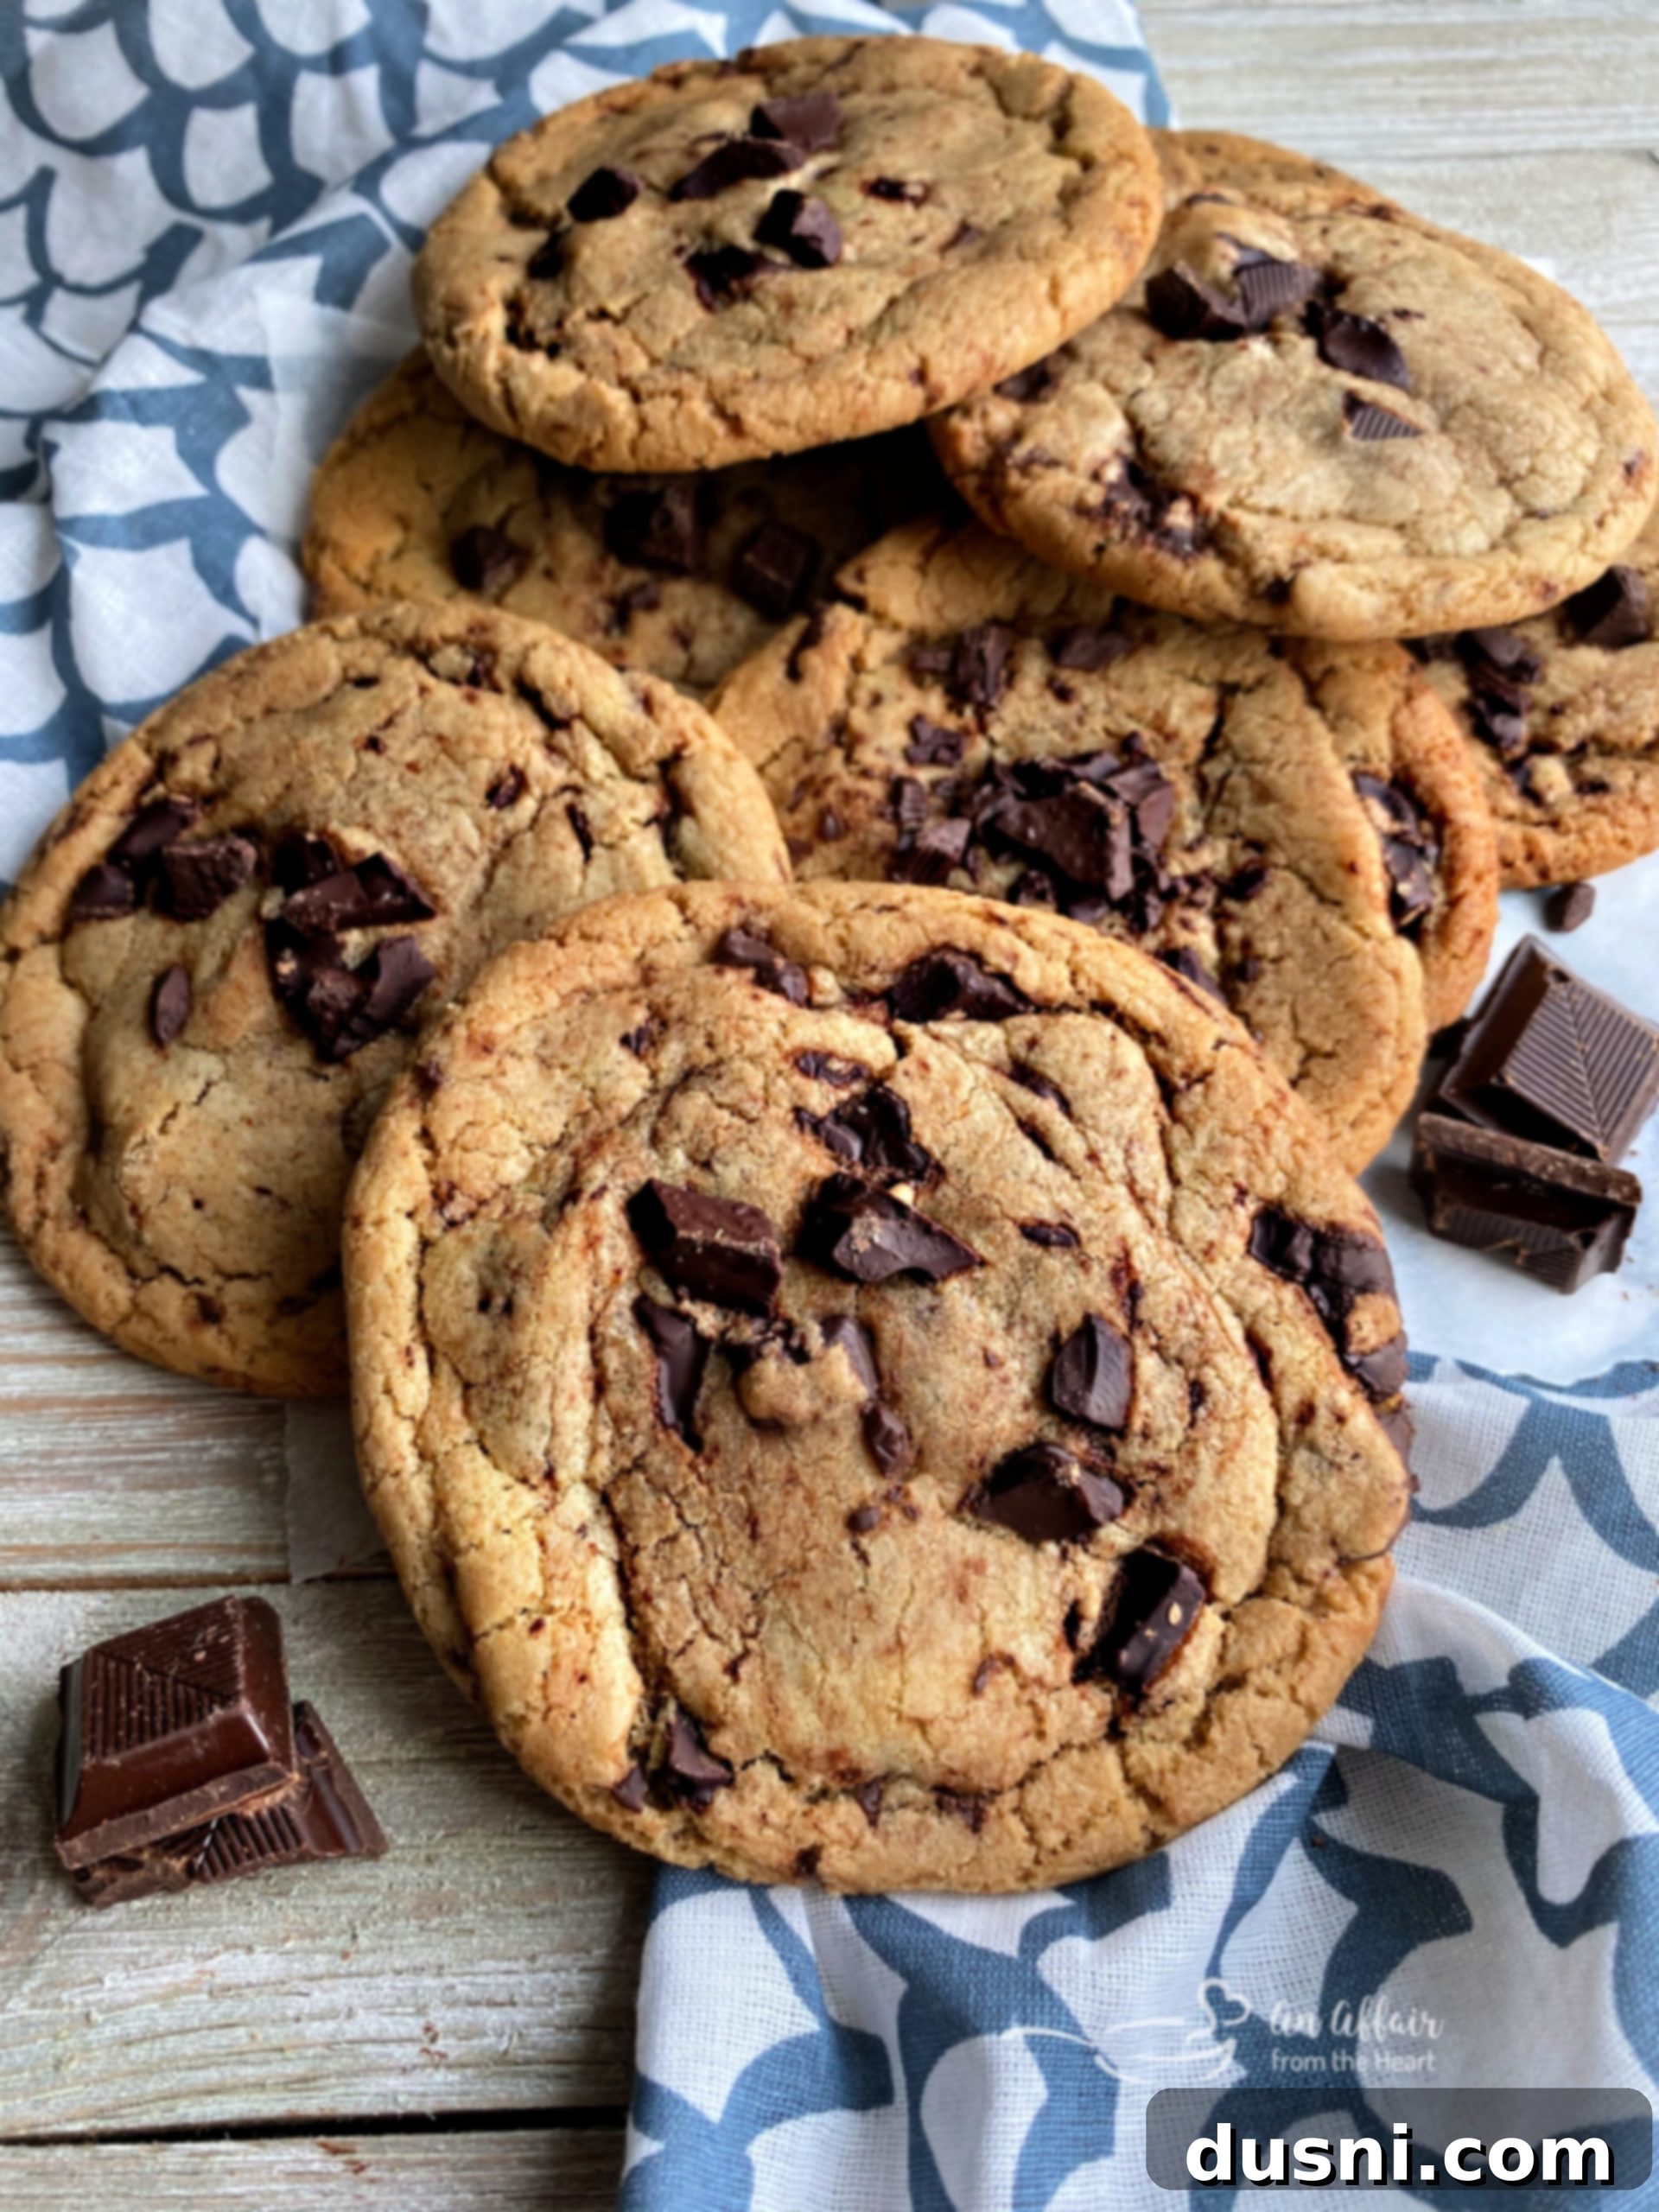
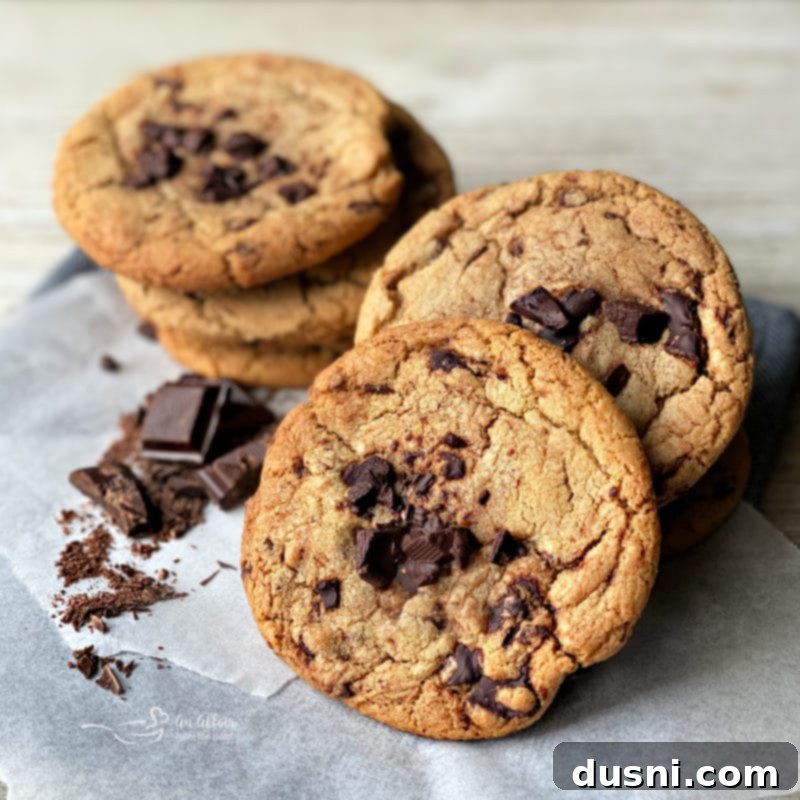
Ultimate Bakery-Style Brown Butter Chocolate Chunk Cookies: A Delectable Recipe
Prepare to discover your new favorite cookie! These magnificent, bakery-style chocolate chunk cookies are infused with the incredible depth of brown butter, complemented by a generous amount of rich dark chocolate chunks. The result is a truly unforgettable treat that promises to elevate your cookie experience to a whole new level of deliciousness.
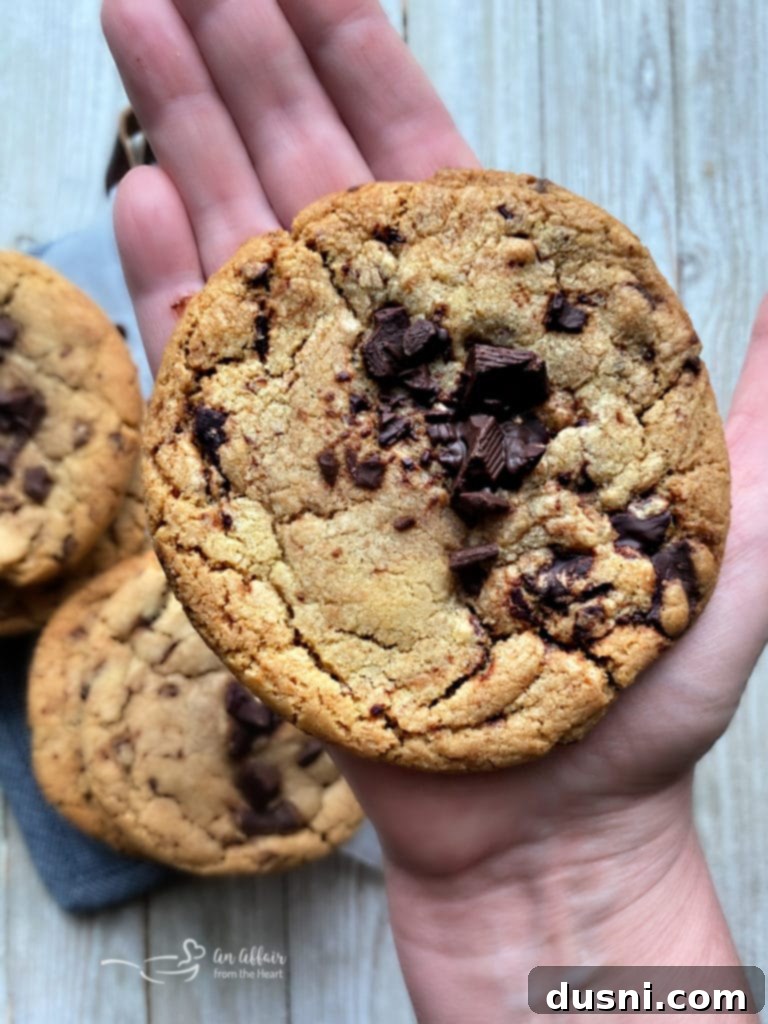
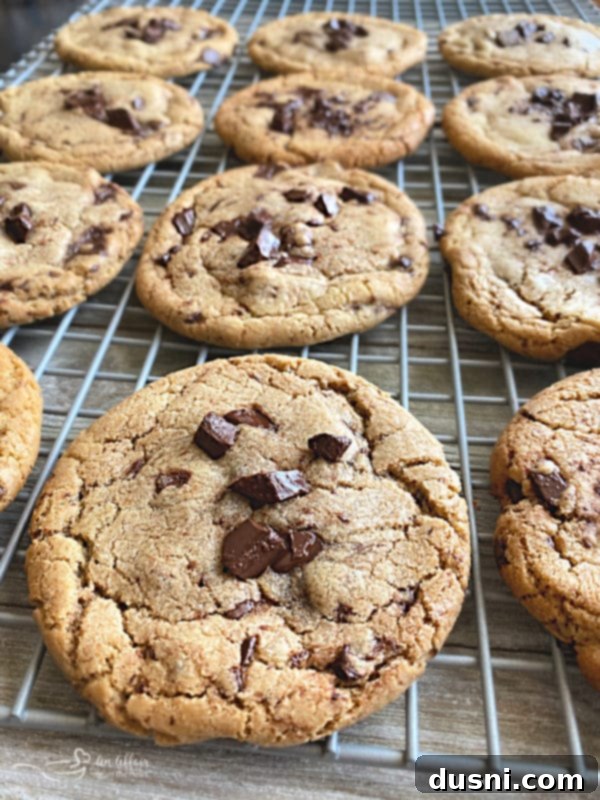
Just one glance at these enormous Brown Butter Chocolate Chunk Cookies is enough to make your mouth water. Their impressive size, perfectly golden-brown edges, and tantalizingly melted chocolate chunks hint at the deliciousness within. But don’t just admire them from afar – I genuinely hope that once you read all about their irresistible qualities, you’ll be inspired to bake a batch yourself and experience their magical flavor firsthand!
For a very long time, I’ve been a passionate advocate for recipes that incorporate brown butter, and these cookies are a stellar example of why. The way browned butter transforms the flavor profile of these cookies is nothing short of extraordinary. It adds a nutty, caramelized depth that truly makes them a glorious treat for your taste buds, turning a simple chocolate chip cookie into something profoundly special, sophisticated, and utterly addictive.
Confession time: when I finally got around to baking these incredible cookies myself, it wasn’t my first encounter with their deliciousness. I’m incredibly fortunate to have a wonderful friend and fellow food blogger named Julie, who lives right here in Omaha. Before the recent circumstances had us all a bit more confined to our homes, we made an effort to meet for coffee or lunch every couple of months. Those were always delightful opportunities to catch up, share ideas, and, of course, sample each other’s latest culinary creations!
These days, our catch-ups are mostly virtual, through messenger, text, or phone calls, and we regularly connect with our Mastermind Group via video chat once a month. It was during one of our in-person meetups, a cherished memory now, that Julie generously brought me two of these very cookies. As you can see from the photos, these are not small, unassuming treats; they are substantial and utterly tempting! My initial, noble plan was to share them with my family – my husband and the kiddos – when I got home. However, as often happens with truly irresistible baked goods, those plans quickly changed once I took the first bite. Let’s just say, sharing didn’t quite make it into the equation that day!

Embracing the Fun of Freaky Friday Recipes: A Blogger Tradition
Fast forward a few months from that memorable first bite of Julie’s magnificent cookie, and here we are today. But this isn’t just any ordinary Friday – it’s a “Freaky Friday!” For those unfamiliar, Freaky Friday is a delightful and long-standing blog hop event I participate in about five times a year with a group of my amazing blogger friends. The premise is simple yet incredibly exciting: each of us is secretly assigned another member’s blog from which to choose a recipe to make and share. The element of surprise is a huge part of the fun!
The reveal day is always filled with so much fun and anticipation. We all eagerly await to discover who had our blog and which delicious recipe they decided to feature. For this particular round, I was absolutely thrilled to be assigned Julie’s wonderful blog, Hostess at Heart. Knowing her stellar reputation for incredible baking and her diverse range of recipes, I was excited to dive into her archives and find the perfect dish to recreate and share with my own audience.
Exploring Hostess at Heart: A Culinary Treasure Trove of Breads and Desserts
While it might not be entirely accurate to say I knew *exactly* what I would choose immediately, Julie’s brown butter chocolate chip cookies were definitely at the forefront of my mind from the very start. I remembered that irresistible flavor experience vividly! However, Julie is truly a queen when it comes to all things bread and baked goods. I recently had the distinct pleasure of making her Double Chocolate Muffins, which were utterly divine – moist, rich, and perfectly chocolatey! They were a testament to her skill in crafting comforting and delicious baked treats.
Given her undeniable expertise in that area, I seriously contemplated selecting something from her extensive collection of homemade breads, rolls, or muffins. Her blog boasts an impressive array of recipes that are both approachable for home bakers and incredibly rewarding to make. But then, my eyes wandered (perhaps a little too easily!) to her dessert section, and I found myself lingering there, utterly captivated, for a little too long!
The choices within her dessert category were almost overwhelmingly tempting: a luxurious Salted Caramel Butterscotch Budino? A decadent Black Russian Cake with Kahlua Filling? Or perhaps a comforting and rich Peanut Butter Coffee Cake? It was genuinely hard to decide where to even begin! Ultimately, I narrowed my choice down to these irresistible brown butter cookies and her equally tempting Creamy Angel Food Pie, which I vowed to make soon after. In fact, by the time you’re reading this, I’ve likely already baked that pie, too, as it was too good to pass up!
But the cookies took priority for Freaky Friday. Once I baked them, they vanished with remarkable speed – a clear sign that I absolutely had to share this exceptional recipe and my love for brown butter cookies with all of you! They are truly a must-try.
Crafting Your Own Brown Butter Chocolate Chunk Cookies: Tips for Perfection
When I recreated Julie’s original recipe for these cookies, I found it to be exceptionally well-written and straightforward, requiring very few modifications from my end. There was one minor detail I initially overlooked in her instructions, where a portion of the butter was meant to be melted while the rest remained solid. However, in my baking, melting all of the butter at once worked perfectly fine, yielding equally delicious results and simplifying the process slightly!
Julie’s original recipe thoughtfully calls for chocolate chips, which are always a convenient and delicious choice. However, I happened to have a personal stash of high-quality bittersweet and semi-sweet chocolate squirreled away in my pantry. These premium chocolate bars were practically begging to be transformed into luscious chunks for these cookies. Using roughly chopped chocolate chunks, rather than uniform chips, provides a more varied texture and delightful bursts of intense, gooey chocolate flavor in every single bite, which I find truly elevates the cookie experience.
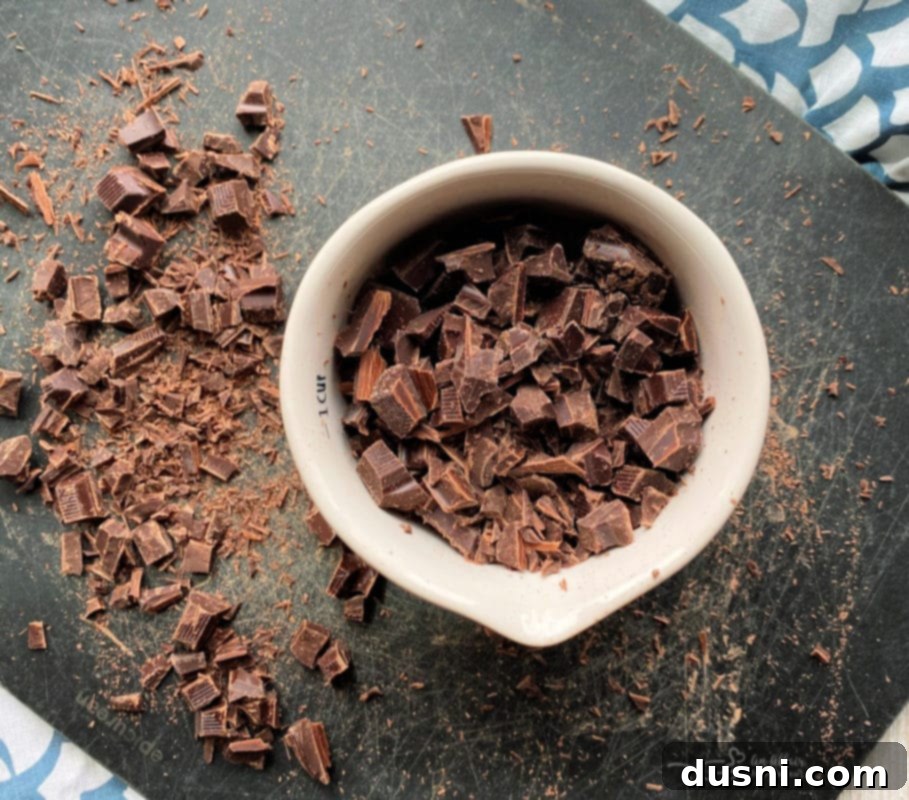
For this particular batch, I opted for a combination that I adore: half 70% cocoa bittersweet chocolate and half 55% cocoa semi-sweet baking chocolate. This blend offers a beautiful balance of rich, deep chocolate notes with just enough sweetness to prevent any bitterness. While you can certainly use chocolate chips if that’s what you have on hand, I wholeheartedly recommend investing in good quality chocolate chunks or bars that you can chop yourself. The superior flavor and melting properties of premium chocolate truly complement the exquisite taste of the brown butter cookie batter, creating a harmonious and indulgent experience that takes these cookies from great to utterly phenomenal. Trust me, these brown butter cookies truly *deserve* good quality chocolate!
If you’re a devoted fan of milk chocolate, please feel free to use it – baking is all about personal preference! However, I personally gravitate strongly towards darker chocolate – for me, the richer and more intense, the better! Therefore, the bittersweet and semi-sweet chocolate combination was an absolute no-brainer for my taste, providing that perfect deep chocolatey goodness that I crave in a truly exceptional cookie.
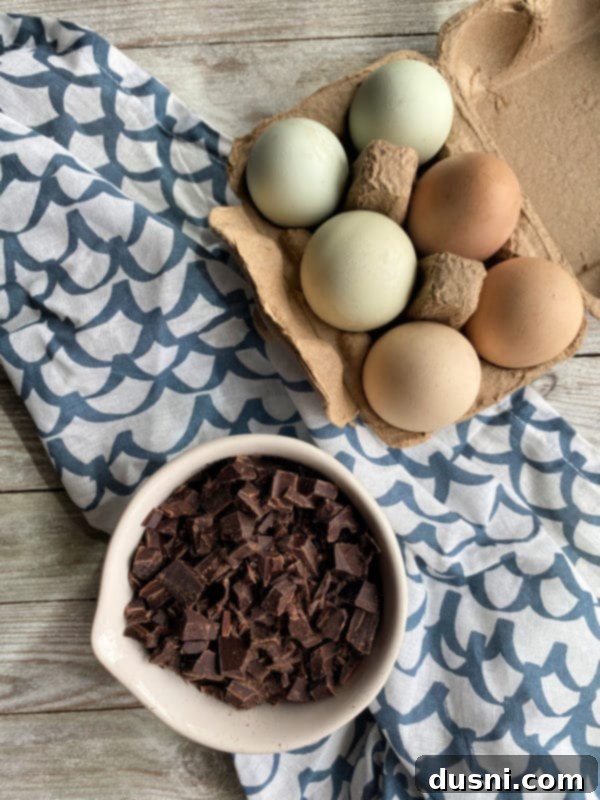
The day I whipped up these cookies was particularly special because I hit the jackpot with fresh ingredients. My wonderful niece, bless her heart, dropped off a dozen incredibly fresh eggs straight from her farm. Just look at how beautiful and vibrant those yolks are! Using farm-fresh eggs always adds an extra touch of richness, better color, and a subtle depth of flavor to any baked good, making these cookies even more special.
Demystifying Browned Butter: Your Essential Questions Answered
If you’re new to the wonderful world of brown butter, whether in cooking or baking, you might be wondering what all the fuss is about and why it’s such a beloved ingredient among chefs and home bakers alike. Let me do my best to address your most common questions here, explaining why this simple ingredient transformation yields such incredible results. Should I miss anything, please don’t hesitate to ask, and I’ll be happy to provide further clarification!
FAQ’s: The Magic of Brown Butter
- What exactly does brown butter mean? Brown butter, also elegantly known by its French name “beurre noisette,” translates literally to “hazelnut butter.” It’s a culinary technique where unsalted butter is gently cooked over medium heat until its milk solids toast to a beautiful golden-brown color. This process releases a distinct nutty aroma and flavor, transforming ordinary butter into an extraordinary ingredient. This incredible ingredient is remarkably versatile, appearing in both savory dishes like rich vegetable sauces and pasta, and in a multitude of sweet creations such as delicate French pastries, glazes, and, of course, these magnificent cookies.
- How do I brown butter effectively on the stovetop? Browning butter is a straightforward process that yields impressively complex flavor. Begin by adding real unsalted butter to a light-colored saucepan or small skillet; a light color is helpful as it allows you to easily monitor the browning progress. Melt the butter over medium heat, swirling the pan occasionally to ensure even cooking. The butter will first become foamy as the water content evaporates. Then, as it continues to cook, it will transition from a pale lemon-yellow to a deeper golden hue, eventually reaching a rich, toasty brown color with small, browned bits at the bottom. It’s crucial not to over-brown it, as it can quickly burn and develop a bitter taste. You’ll know it’s perfectly ready not only by its lovely toasted brown appearance but also by its wonderfully rich, hazelnut-like aroma. This process typically takes about 3 to 5 minutes on your stovetop, depending on the heat and quantity.
- Can I brown butter using a microwave? Yes, you absolutely can! While browning butter on the stovetop is simple enough, the microwave offers a convenient alternative, especially for smaller quantities or when you’re short on time. The key to success is to cook the butter in short increments (e.g., 30-60 seconds at a time) on a medium power setting, stirring thoroughly between each interval, to prevent it from burning. Keep a close eye on it as it can go from perfect to burnt very quickly. Generally, from prep to finish, browning butter in the microwave can take around 10 minutes, depending on the quantity and your microwave’s power.
- Is it possible to brown margarine if I don’t have real butter? Unfortunately, no. You will not achieve the distinctive and desired brown butter effect with margarine. This is because margarine does not contain the crucial milk solids found in real butter. It’s precisely these milk solids that caramelize and toast during the heating process, creating that signature nutty flavor and aroma. As the milk solids brown, stirring or swirling the pan helps ensure they cook evenly. Some bakers prefer to strain the darker bits (the toasted milk solids) from the butter before using it, but this is entirely a personal preference. Many believe those tiny, flavorful bits actually intensify the rich, complex taste and should be included for maximum flavor.
- What does brown butter taste like? The unique and profound taste of brown butter is a direct result of the Maillard reaction, a complex chemical process that occurs when amino acids and reducing sugars react upon heating. Similar to how searing a steak enhances its flavor and creates a delicious crust, this reaction in butter develops hundreds of new flavor compounds. I find brown butter’s flavor is best described as a rich, nutty, and slightly sweet taste, strongly reminiscent of toasted hazelnuts, pecans, or even a buttery toffee or caramel. It possesses a delightful balance of both sweet and savory notes, with an intoxicating caramel-like aroma that instantly elevates any dish it touches.
- How does brown butter elevate the taste of these chocolate chunk cookies? The addition of brown butter imbues these chocolate chunk cookies with a significantly deeper, richer, and far more intense flavor profile compared to cookies made with regular melted or softened butter. From the very first bite, you will immediately notice the profound butteriness and the delightful toasted, nutty undertones. It introduces layers of complexity – a warmth and depth that complement the chocolate beautifully. It transforms a standard cookie into a gourmet experience, adding sophistication and an irresistible, addictive quality that makes them utterly superior to cookies made with un-browned butter.
The Process: Making Your Brown Butter Chocolate Chunk Cookies from Scratch
Beyond the star ingredients of brown butter and your chosen high-quality dark chocolate chunks, you’ll need a few common pantry staples to create these delectable, bakery-style cookies. Gather your all-purpose flour, baking soda for lift, a pinch of salt to balance the sweetness, both rich brown sugar and classic granulated white sugar for that perfect texture and sweetness, pure vanilla extract for warmth, and those lovely farm-fresh eggs (or good quality store-bought ones).
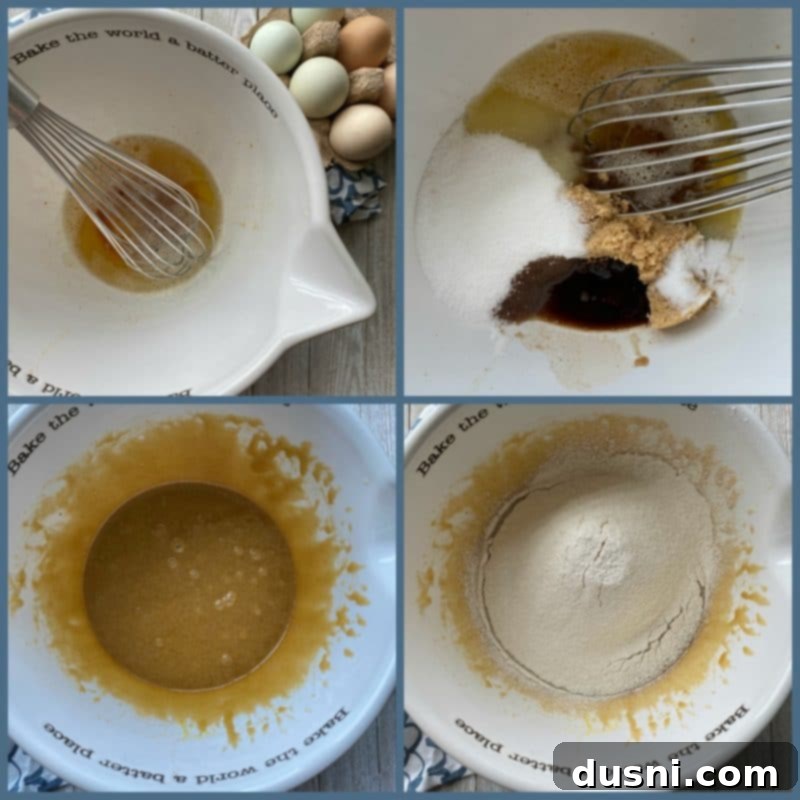
Once your butter is beautifully browned and has had a moment to cool slightly (you don’t want it scorching your other ingredients), pour it into your mixing bowl. To this, add your carefully measured brown sugar, granulated sugar, salt, and vanilla extract. Whisk these ingredients together until they are thoroughly combined, creating a smooth and wonderfully fragrant base for your cookie dough.
Next, incorporate one whole large egg and one large egg yolk into the mixture. The extra egg yolk is a secret weapon here, contributing significantly to a chewier, richer, and more tender cookie. Whisk this combination vigorously for 30 seconds. This is a crucial step for developing the desired texture! Then, let the batter rest for 3 minutes. Repeat this whisking for 30 seconds followed by a 3-minute rest two more times, for a total of three whisking/resting cycles. This unique process helps to develop the gluten and creates an incredibly silky-smooth batter, which translates directly into wonderfully tender, chewy, and bakery-worthy cookies.
After the final rest, sift your all-purpose flour and baking soda directly into the wet mixture in the mixing bowl. Sifting ensures there are no unsightly lumps and that the dry ingredients are perfectly and evenly distributed throughout the batter. Gently stir until just combined, being very careful not to overmix, as overmixing can lead to tough, dense cookies.
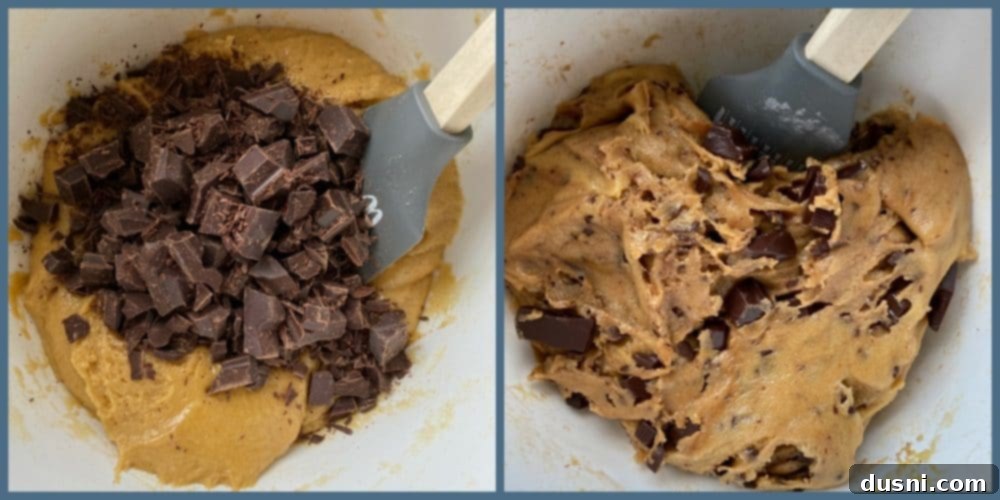
Now for arguably the best part: the chocolate! Fold the majority of your prepared dark chocolate chunks into the cookie batter. Make sure to reserve a small handful of chunks – these will be strategically used to stud the tops of your cookie dough balls just before baking, ensuring those gorgeous, inviting pools of melted chocolate are prominently visible on the finished cookies, giving them that irresistible bakery-style appeal.
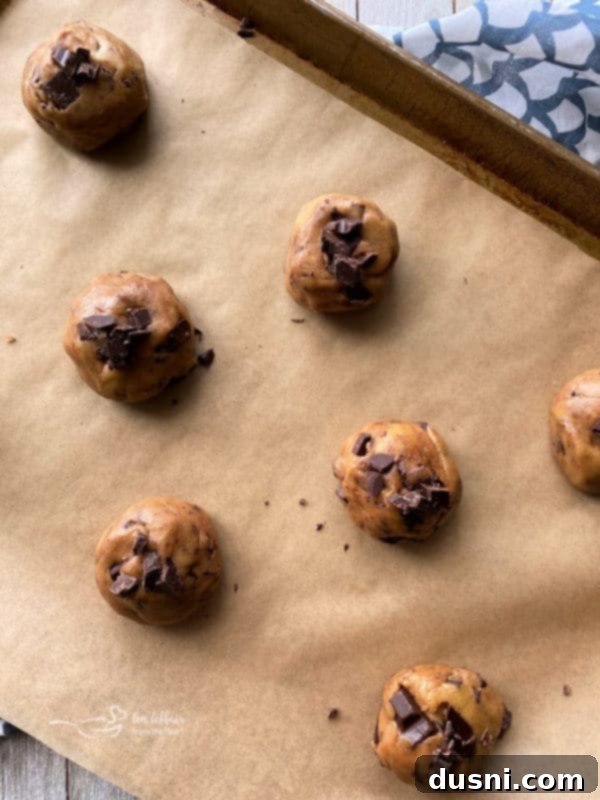
As I mentioned earlier, these are not delicate, wimpy cookies; they are designed to be substantial, satisfying, and truly bakery-sized! Each individual dough ball should be approximately 3 tablespoons in size. I typically bake about 8 cookies at a time on a parchment-lined cookie sheet. This gives them ample space to spread out evenly without running into each other, allowing for those perfect crispy edges and chewy centers. Don’t forget that final touch: press a few of those reserved chocolate chunks onto the top of each dough ball for that truly professional, bakery-worthy finish!
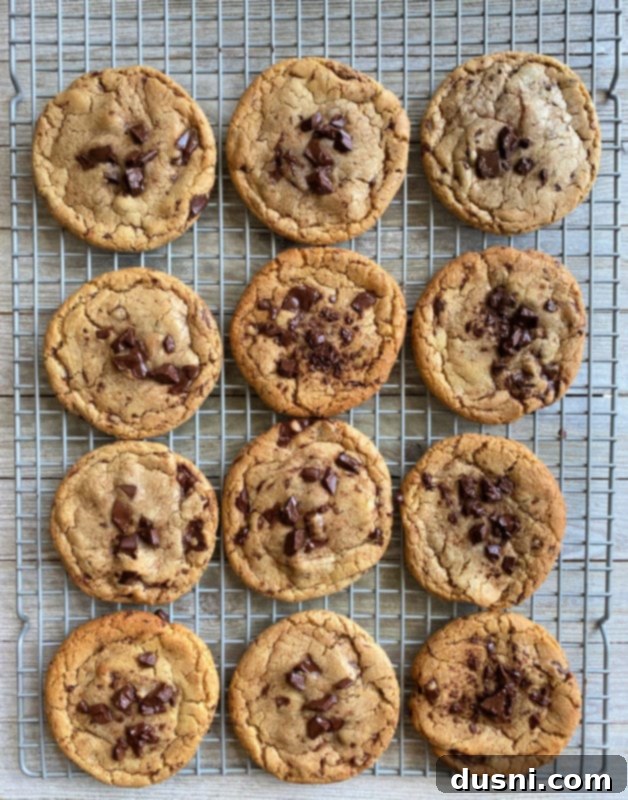
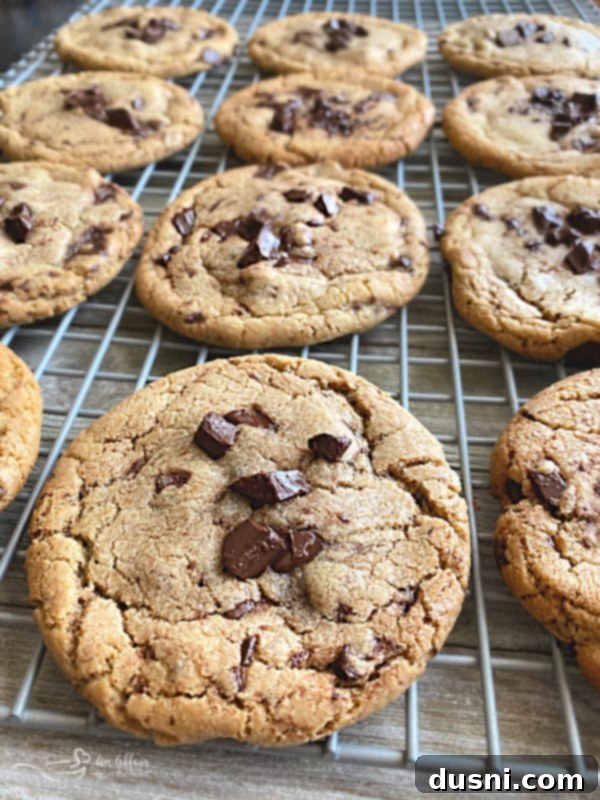
Once baked to a perfect golden-brown with slightly crispy edges and soft, chewy centers, allow the cookies to rest on the hot cookie sheet for about 5 minutes. This brief resting period is crucial as it helps them set up and prevents them from breaking or crumbling when you transfer them. After 5 minutes, carefully move them to a wire cooling rack to cool completely. This final step ensures they maintain their perfect chewiness and texture and prevents any sogginess on the bottom.
Julie mentioned that her recipe typically yields 16 cookies. In my kitchen, this batch produced 13 generous cookies – a true baker’s dozen! I suspect I either made my cookies slightly larger than planned, or perhaps I indulged in a bit more of that irresistible cookie dough than I initially realized while baking. Either way, every single one of those 13 cookies was pure perfection and vanished remarkably quickly!
Love This Recipe? Pin It for Later!
Don’t let this incredible Brown Butter Chocolate Chunk Cookie Recipe get lost in the endless scroll of your favorite recipes! Make sure to save it to your favorite Pinterest board so you can easily find it whenever a serious cookie craving strikes. Sharing is caring, and this exceptional recipe is definitely worth sharing with fellow baking enthusiasts!
A huge thank you once again to my dear friend Julie at Hostess at Heart for this truly amazing and inspiring recipe! It’s undoubtedly a keeper in my recipe collection, and I know it will be in yours too.
Explore More: 2020 Freaky Friday Spring Edition Recipes
Curious to see what other delicious creations came out of our Freaky Friday event? Take a moment to explore the fantastic recipes shared by my talented blogger friends from the 2020 Spring Edition. There’s a wide array of culinary inspiration waiting for you!
- An Affair from the Heart – Brown Butter Chocolate Chunk Cookies (That’s this delightful recipe you’re enjoying!)
- Aunt Bee’s Recipes – Homemade Loaded Queso
- Bowl Me Over – Crispy Smashed Potatoes
- Hostess at Heart – Chocolate Coffee Cake
- House of Nash Eats – Asian Lettuce Wraps
- Lemoine Family Kitchen – Easy Homemade Flour Tortillas
- Life, Love & Good Food – Italian Grilled Burgers
- Lisa’s Dinnertime Dish – Lemon Garlic Brussels Sprout Linguine
- Or Whatever You Do – Air Fryer Shrimp
- Take Two Tapas – Fried Mac and Cheese Balls
- The Foodie Affair – Strawberry Bread
- The Speckled Palate – Chicken Pesto Pasta
- West Via Midwest – Loaded Baked Potato Skins – Air Fryer Recipes
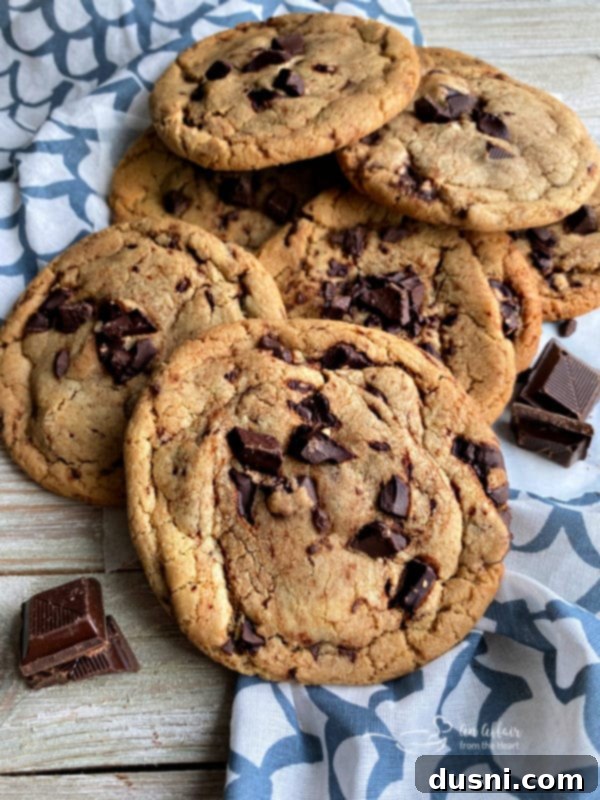
My mouth is practically watering again just thinking about these incredible cookies! So, what are we waiting for? Let’s get to baking and fill our homes with the irresistible aroma of brown butter and chocolate – you won’t regret it! Enjoy every delicious bite!

Brown Butter Chocolate Chunk Cookies Recipe
Like this recipe? Don’t forget to give it a ⭐️⭐️⭐️⭐️⭐️ star rating and leave a comment below after you’ve baked these delightful cookies! Your feedback is always appreciated.

5 from 21 votes
Print Recipe
Brown Butter Chocolate Chunk Cookies
These big, beautiful, bakery-style cookies have the most amazing flavor from the addition of brown butter and of course a large amount of dark chocolate chunks! These Brown Butter Chocolate Chunk Cookies may just be your new favorite cookie!
Prep Time: 20 mins
Cook Time: 10 mins
Total Time: 30 mins
Course: Cookies
Cuisine: American
Keyword: bakery style, BIG cookies, bittersweet chocolate, brown butter, chocolate chunk, cookies, how to make chocolate chip chunk cookies with brown butter, semi-sweet chocolate
Servings: 13 BIG cookies
Calories: 385kcal
Author: Michaela Kenkel
Equipment
- 13×18 Half Sheet Pan
Ingredients
- 1 3/4 cups all-purpose flour
- 1/2 teaspoon baking soda
- 14 Tablespoons unsalted butter
- 3/4 cup brown sugar
- 1/2 cup white granulated sugar
- 1 teaspoon salt
- 2 1/2 teaspoons vanilla extract
- 1 large egg
- 1 large egg yolk
- 1 1/4 cups dark chocolate chunks (I used a combination of half 70% bittersweet and half 55% semi-sweet chocolate)
Instructions
- Preheat oven to 375°F (190°C). Prepare two baking sheets with parchment paper. Set aside.
- Melt butter in a 10-inch skillet over medium heat, swirling the pan until butter is golden brown and fragrant. Be careful not to burn it.
- Pour browned butter into a mixing bowl. Add brown sugar, white sugar, salt, and vanilla extract. Whisk until completely combined.
- Add in one large egg and one large egg yolk. Whisk for 30 seconds. Let batter rest for 3 minutes. Whisk for another 30 seconds. Let rest for 3 minutes. Whisk for 30 seconds and let rest a final time for 3 minutes. The mixture will become silky smooth.
- Sift flour and baking soda into the wet mixture. Stir gently until just combined; do not overmix.
- Fold in the majority of the chocolate chunks, reserving a small amount to top the cookies with.
- Form cookies by scooping approximately 3 tablespoons of dough per cookie and rolling them into balls. Place them on the prepared cookie sheet, ensuring enough space for them to spread. Bake about 8 cookies at a time.
- Top each dough ball with a few of the reserved chocolate chunks for an appealing finish.
- Bake, one sheet at a time, in the center of your preheated oven, until the edges are golden brown and the centers are set but still slightly soft, typically 8-10 minutes. Rotate the baking sheet halfway through for even baking.
- Let cookies rest on the baking sheet for 5 minutes before carefully transferring them to a wire cooling rack to cool completely.
- Store cooled cookies in an airtight container at room temperature. They also freeze exceptionally well for future enjoyment.
Notes
Nuts can be added to the dough if desired for an extra layer of flavor and texture. This recipe has been lovingly adapted from Hostess at Heart.
Nutrition
Serving: 1 cookie | Calories: 385kcal | Carbohydrates: 45g | Protein: 4g | Fat: 21g | Saturated Fat: 12g | Polyunsaturated Fat: 7g | Cholesterol: 77mg | Sodium: 233mg | Fiber: 2g | Sugar: 29g
