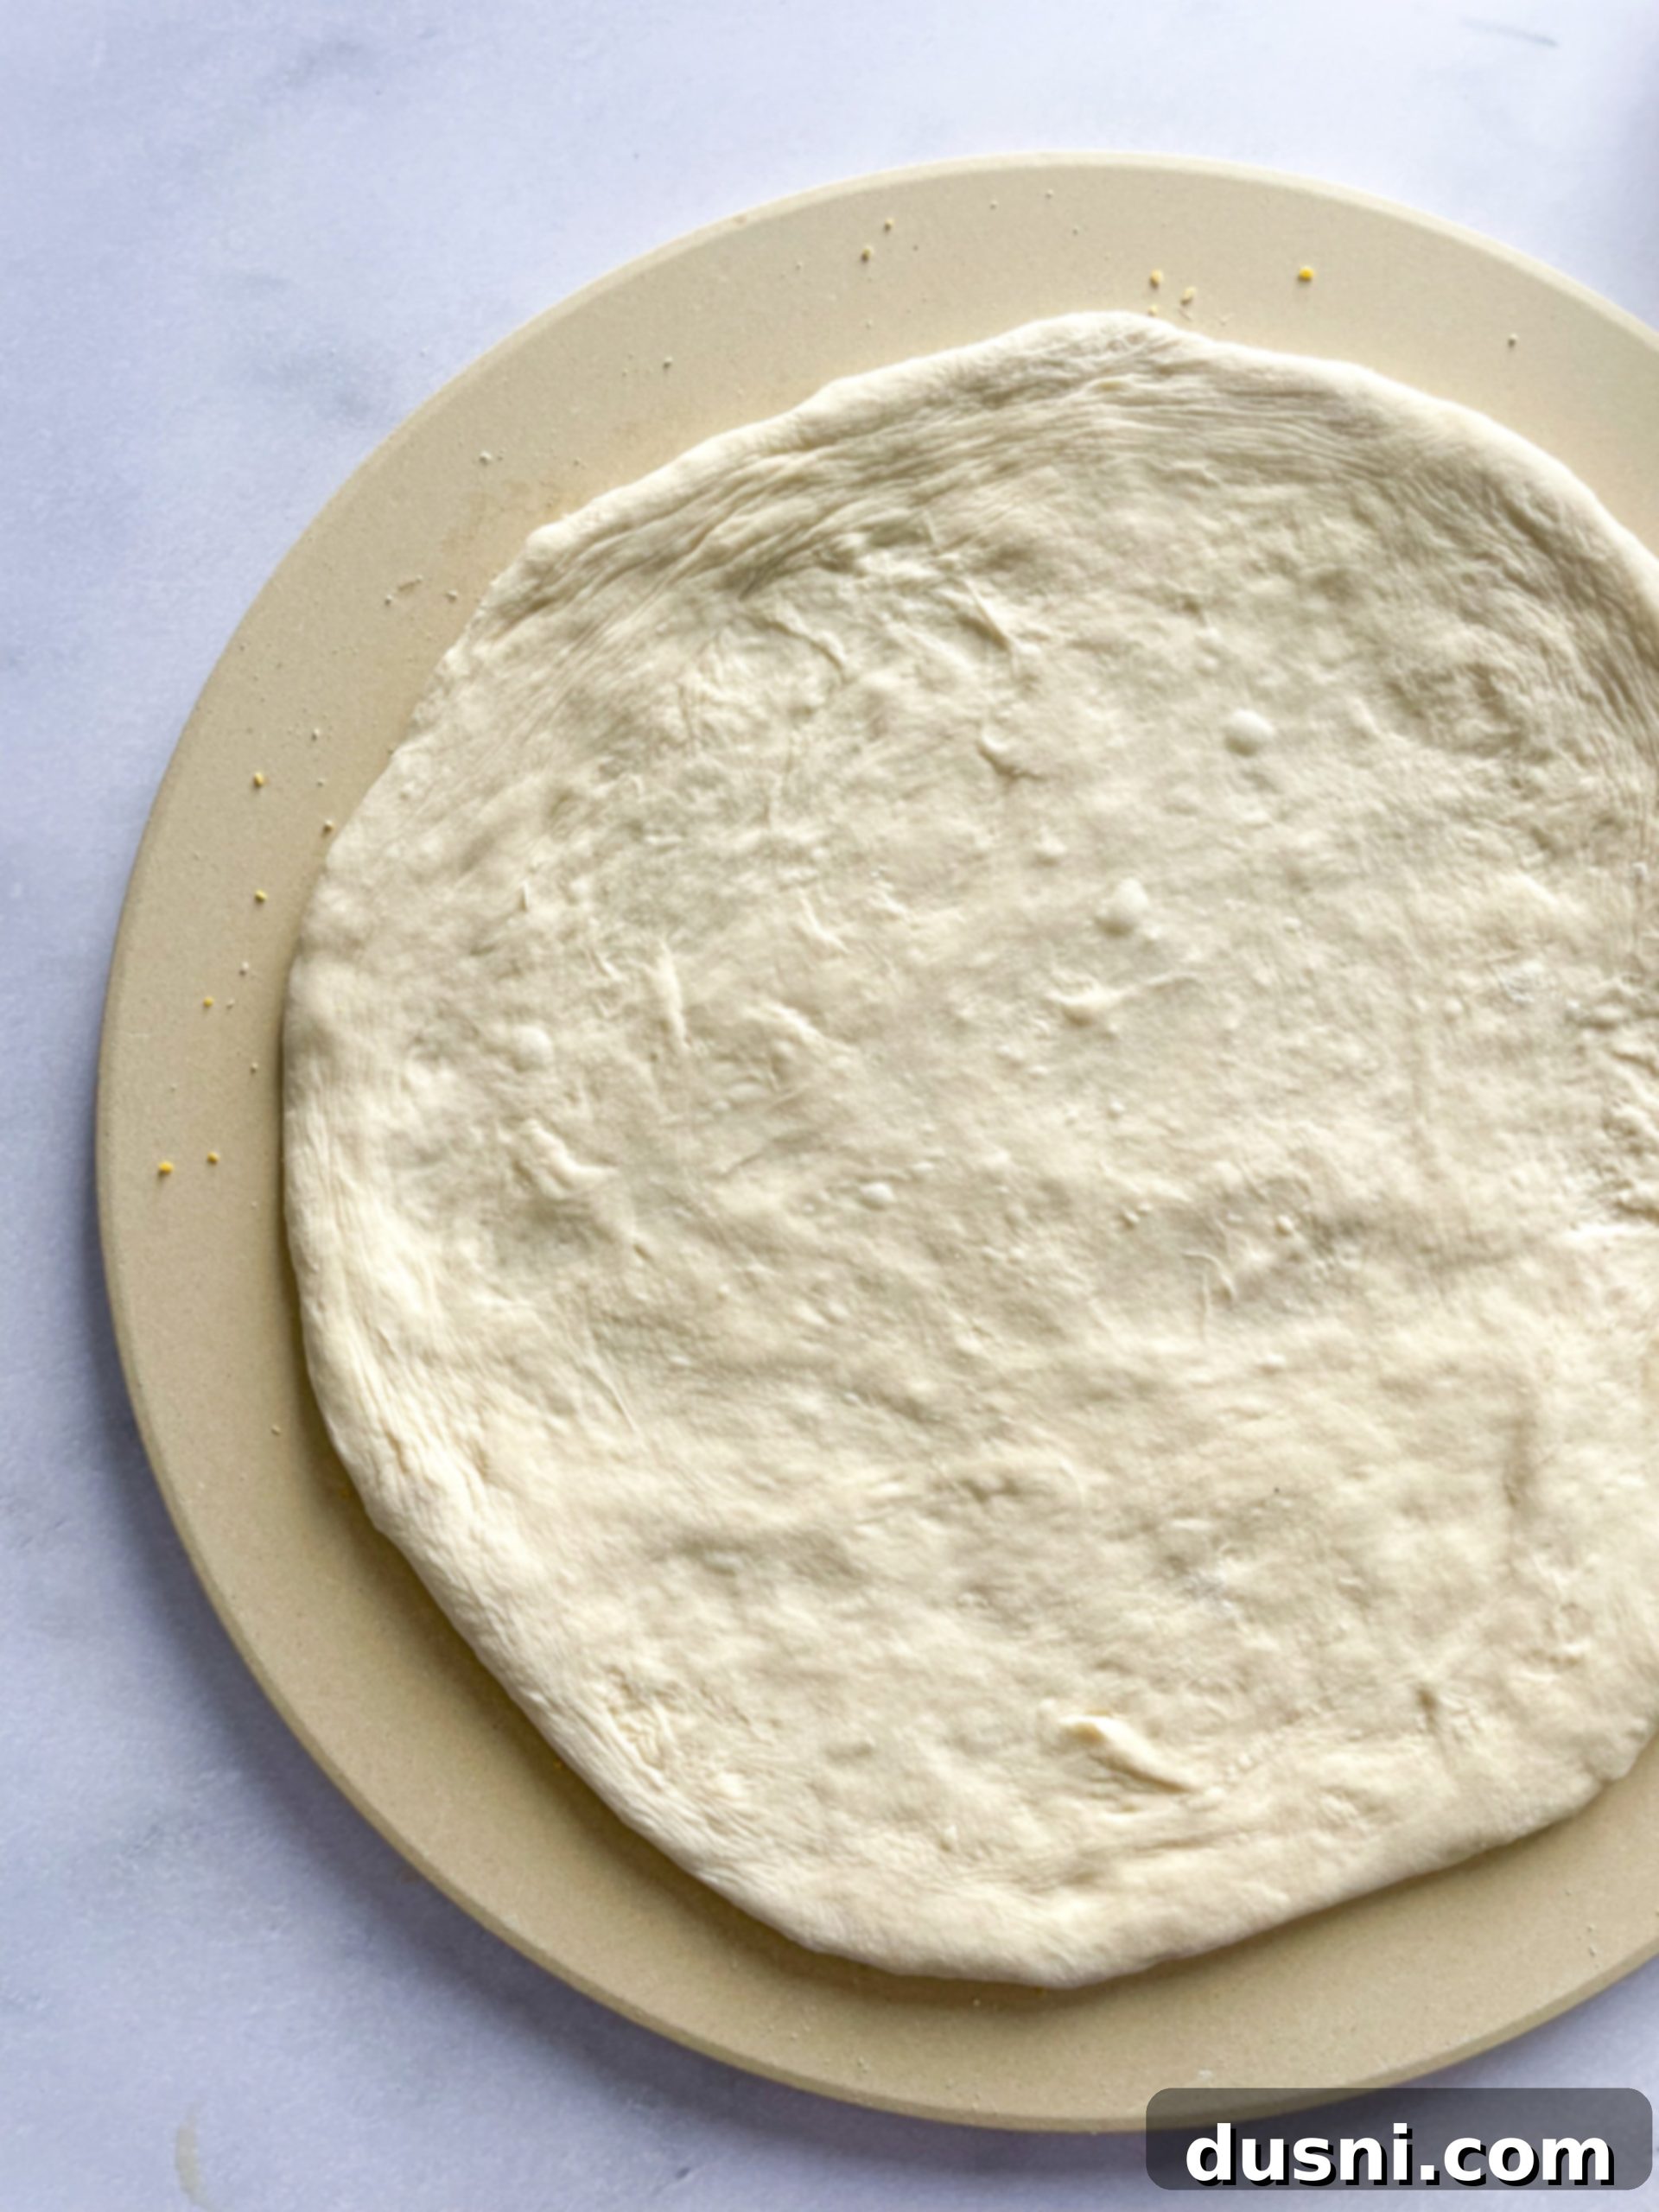
The Ultimate Easy Homemade Pizza Dough Recipe for Perfect Crust Every Time
There’s nothing quite like the aroma of freshly baked pizza filling your home, and the satisfaction of biting into a slice made with your very own homemade pizza dough. If you share a passion for authentic, delicious pizza, then mastering your own dough is the ultimate game-changer. Forget those store-bought crusts and Jiffy mixes – this comprehensive guide will equip you with a foolproof recipe and method for crafting the best pizza dough you’ve ever tasted, right in your kitchen.
This recipe ensures a consistently excellent pizza, whether you prefer a light, crisp thin crust or a satisfyingly chewy, epic thick crust. Your favorite pizza toppings are about to get an upgrade, transforming every pizza night into an extraordinary culinary experience with truly homemade pizza dough.
The Journey to Authentic Homemade Pizza
For many years, my family and I called our pizzas “homemade” simply because they weren’t ordered from a local shop. However, the truth was, I relied heavily on refrigerated crusts or pre-packaged mixes. While these options offered convenience, they never quite delivered the exceptional flavor, texture, and overall satisfaction of truly artisanal pizza. That was until I stumbled upon this game-changing recipe and method for a genuine homemade pizza crust. This discovery revolutionized our pizza nights, transforming them from a quick meal into a beloved culinary adventure.
Learning to make pizza dough from scratch might seem daunting at first, but the rewards are immense. Not only do you gain complete control over the ingredients, ensuring a wholesome and fresh product, but you also unlock a depth of flavor and a perfect crust texture that pre-made options simply cannot replicate. This particular recipe has been refined over time to be incredibly approachable for home cooks, guaranteeing a successful and delicious outcome every time you bake.
Why You Will Love This Easy Recipe for Homemade Pizza Dough
It’s easy to assume that exceptional pizza-making is a skill reserved for professionals. However, I am here to tell you that you are perfectly capable of creating incredible pizza in your own kitchen! This is not just any recipe; it’s the best pizza dough recipe, meticulously designed to guide you through each step, ensuring a consistently delicious homemade pizza. While it requires patience due to several hours of crucial proofing time – a non-negotiable step for developing complex flavors and a superior texture – the actual hands-on work is surprisingly simple, relying on just four fundamental ingredients.
Beyond making incredible pizzas, this versatile dough opens up a world of culinary possibilities. You can easily transform it into savory calzones, delightful breadsticks, crusty baguettes, or even sweet and indulgent cinnamon rolls. For a fantastic savory snack or appetizer, be sure to give this Pepperoni Pizza Bread a try using a portion of your freshly made dough!
Pizza is always a welcome treat, whether it’s the centerpiece of a casual family dinner, a crowd-pleasing appetizer for gatherings, or the star of your game day feast. Once you master the art of making your own pizza dough, you’ll discover a newfound appreciation for this beloved dish, and you’ll undoubtedly find yourself saying goodbye to store-bought crusts forever. The deep satisfaction of creating something so delicious from scratch is truly unmatched.
Essential Ingredients for Your Perfect Pizza Dough Recipe
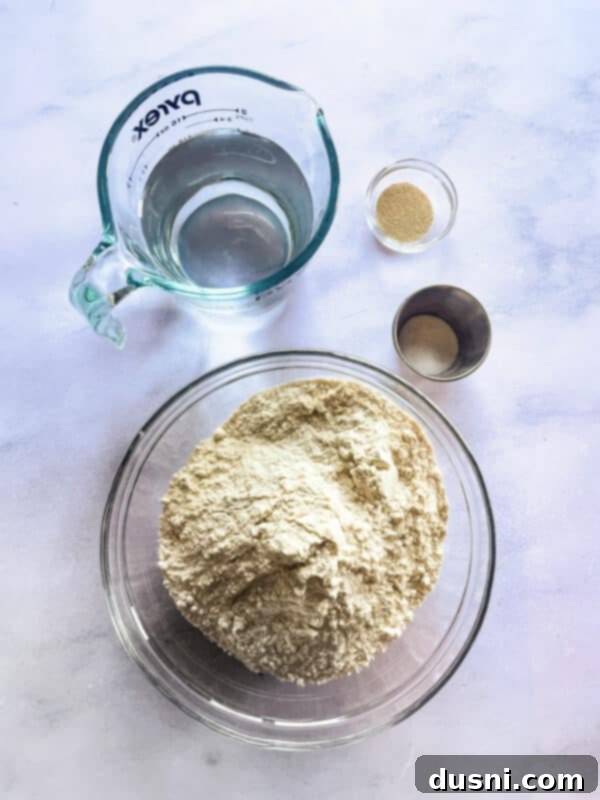
The secret to exceptional homemade pizza dough lies in using high-quality ingredients and understanding their individual roles. Below are the key components you’ll need, with detailed explanations to help you achieve the best results. You will find the complete measurements and step-by-step instructions in the printable recipe card at the bottom of this post.
- Bread Flour: For the most superior results, especially if you desire a chewy, airy, and well-structured pizza crust, bread flour is highly recommended. Its higher protein content (typically 12-14%) promotes greater gluten development, which is crucial for the dough’s elasticity and ability to trap gases, leading to a lighter and more resilient crust. While all-purpose flour can be used as a substitute in a pinch, it will yield a slightly less robust and chewy crust due to its lower protein content. If your preference is for an extra-crispy, thin crust, all-purpose flour might actually be your preferred choice, but for a versatile and satisfying crust, bread flour is king.
- Water: The temperature of your water is absolutely critical for successful yeast activation and dough development. Always use room temperature water, ideally within the range of 78-81 degrees Fahrenheit (25-27 degrees Celsius). Water that is too cold will significantly slow down yeast activity, extending proofing times, while water that is too hot can kill the yeast, preventing the dough from rising altogether. To ensure your water is at the optimal temperature, let it sit out at room temperature for at least 15-30 minutes, or use a food thermometer for precise measurement.
- Active Dry Yeast: This recipe specifically calls for active dry yeast. This type of yeast needs to be “proofed” or activated in a small amount of warm water before being fully incorporated into the dough. This step is essential as it confirms the yeast is alive and ready to leaven your dough, ensuring a proper rise. If you have instant yeast (also known as rapid rise or quick-rise yeast) on hand, you can substitute it, but you’ll need to use approximately 25 percent less than the amount specified for active dry yeast (e.g., if the recipe calls for 1 gram of active dry, use 0.75 grams of instant). Instant yeast does not require proofing and can be added directly to your dry ingredients.
- Salt: More than just a flavor enhancer, salt plays a crucial role in controlling yeast fermentation and strengthening the gluten structure of the dough. It helps to tighten the gluten network, resulting in a more resilient and elastic dough, and also balances the flavors of the flour and yeast. This recipe specifies sea salt, but fine Himalayan pink salt or standard table salt are perfectly acceptable alternatives. Ensure it’s thoroughly distributed throughout the dough for even flavor and optimal dough development.
- Oil: A small amount of oil, ideally extra virgin olive oil, is used to lightly coat the mixing bowl during the proofing process. This prevents the dough from sticking to the bowl as it rises and also contributes to the dough’s overall flavor and tenderness.
Grams vs. Cups for Making Dough: The Precision Advantage
For optimal consistency and professional-quality results in baking, especially when it comes to delicate processes like dough making, measuring ingredients by weight (grams) rather than by volume (cups) is a widely adopted practice among professionals. While volumetric measurements are provided in this recipe for convenience, you will consistently achieve superior outcomes if you measure your ingredients, particularly flour and water, using a digital food scale.
The fundamental difference lies in precision. Volume measurements, such as cups, are inherently less accurate because the density and compaction of ingredients can vary significantly. For instance, a “cup” of flour can weigh differently depending on how it’s scooped and leveled – whether it’s spooned into the cup or directly scooped, and factors like humidity. These variations, though seemingly small, can critically affect the dough’s hydration level, leading to inconsistencies in texture, elasticity, and overall bake quality.
Weighing your ingredients in grams eliminates this variability entirely. It ensures that you use the exact same quantity of each ingredient every single time, creating a consistent dough formula that is reliably replicable. This precision is why professional bakers and pizzaiolos exclusively use scales; it guarantees consistent results that can be perfectly replicated by anyone following the exact weight specifications. This method is particularly vital for the flour and water ratios, which are central to the dough’s structure. However, for those without a food scale, volumetric measurements have been thoughtfully provided.
How to Make This Easy Recipe for Homemade Pizza Dough: Step-by-Step
Follow these detailed instructions to create a masterful pizza dough that will impress everyone. Patience is key, especially during the proofing stages!
FIRST: In a large mixing bowl, measure and add 1 ½ cups of water. It is paramount that your water is at room temperature, ideally between 78-81 degrees Fahrenheit (25-27°C). This specific temperature range is crucial because it creates the optimum environment for active dry yeast to begin its work – to activate, thrive, and multiply efficiently. This initial burst of yeast activity is absolutely vital for the successful rise and development of your pizza dough. To ensure your water is at the right temperature, let it sit out for at least 15-30 minutes, or verify with a reliable food thermometer.
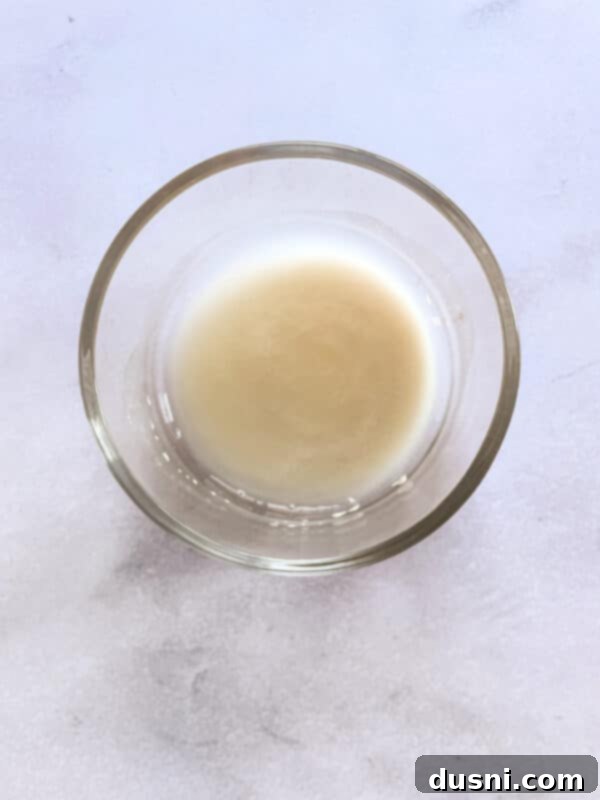
SECOND: Take a separate, smaller bowl and sprinkle the active dry yeast into it. Then, from the large bowl, carefully take 2 tablespoons of the room temperature water and add it to the small bowl containing the yeast. Gently stir this mixture, then set it aside. This step is known as “proofing” the yeast. Within 5-10 minutes, the mixture should become visibly foamy and bubbly, indicating that the yeast is active and ready to be incorporated into your dough. If it doesn’t foam, your yeast might be old or the water temperature was incorrect, and you may need to start with fresh yeast.
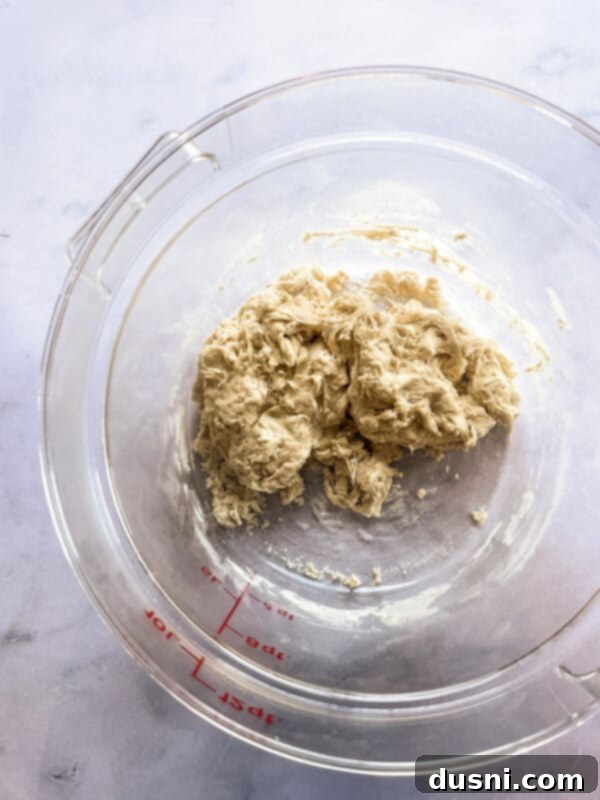
THIRD: Now, add your bread flour to the remaining water in the large bowl from step 1. Using your hands or a sturdy spatula, mix these ingredients together until they are just incorporated. At this stage, the mixture will appear shaggy, lumpy, and quite sticky, with no dry pockets of flour visible. Do not overmix. Cover the bowl tightly with plastic wrap or a damp kitchen towel and let it rest undisturbed for 30 minutes. This resting period, known as “autolyse,” allows the flour to fully hydrate and the gluten proteins to begin developing naturally, which makes the subsequent kneading process much easier and more effective.
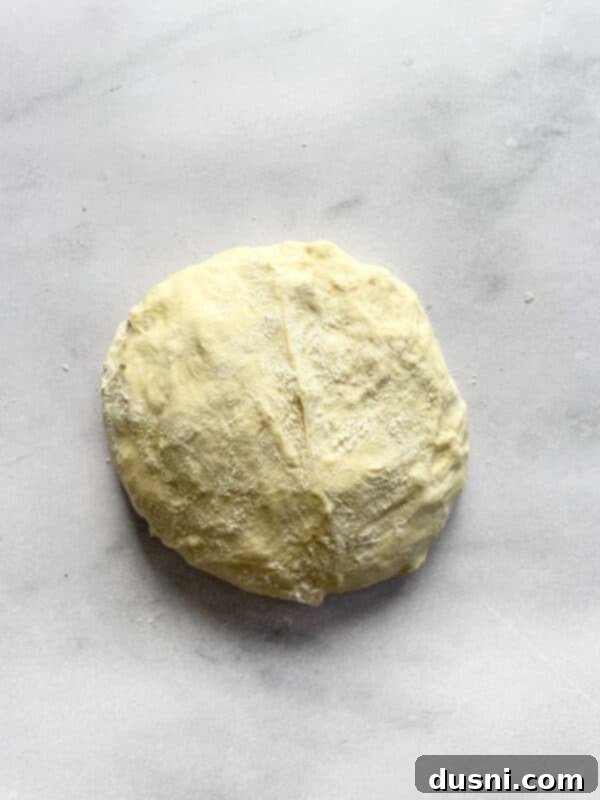
FOURTH: After the 30-minute autolyse, sprinkle the salt evenly over the surface of the dough. Next, pour the activated and foamy yeast mixture from the small bowl directly onto the dough. Now, it’s time to incorporate these final ingredients thoroughly. You can mix by hand, repeatedly folding and gently pressing the dough until the salt and yeast mixture are fully absorbed and the dough starts to feel more cohesive and slightly less sticky. Alternatively, for a less strenuous method, transfer the dough to the bowl of a stand mixer equipped with a dough hook. Mix on a low speed for approximately 4-5 minutes. The dough should transform into a soft, smooth, and notably elastic ball that pulls away cleanly from the sides of the bowl.
FIFTH: Prepare a clean, large mixing bowl by lightly oiling its interior, preferably with olive oil, to prevent any sticking during the rise. Transfer your freshly kneaded dough ball into this oiled bowl, turning it once to ensure all surfaces are lightly coated. Cover the bowl tightly with plastic wrap or a clean, damp kitchen towel. This initiates the first rise, also known as bulk fermentation. After the initial 30 minutes of this rise, gently perform a “first fold.” This involves gently stretching a portion of the dough up and folding it over onto itself towards the center, rotating the bowl, and repeating this action 3-4 times around the dough. This folding technique helps to build strength and structure in the dough. After the fold, re-cover the bowl and allow the dough to continue rising in a warm, draft-free location for a full 6 hours. This extended, slow proofing is critical for developing the dough’s complex flavor and perfect texture.
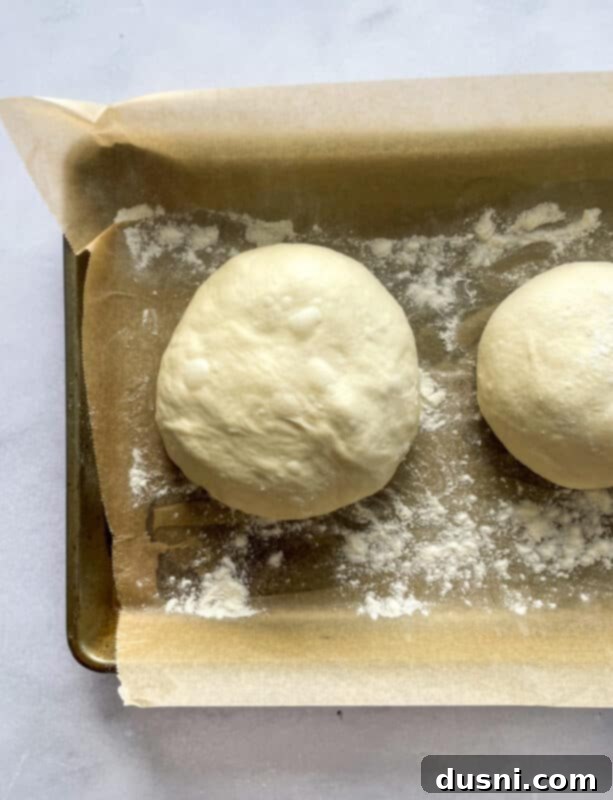
SIXTH: Once the impressive 6-hour rise is complete, gently remove the dough from its bowl onto a lightly floured work surface. Be careful not to forcefully deflate the dough, maintaining as much of the airy structure as possible. Divide the dough into two equal portions. Gently shape each portion into a smooth, round ball. Place these dough balls onto a lightly floured baking sheet or a piece of parchment paper. Lightly dust the tops of the dough balls with flour, then cover them loosely with plastic wrap or a clean kitchen towel. Allow them to proof for an additional 30-60 minutes. This final proofing stage, often called the “bench rest,” helps the dough relax, making it much easier to roll out and shape without resistance.
SEVENTH: As your dough undergoes its final proof, it’s time to prepare your oven for baking. Preheat your oven to its highest possible temperature setting, typically between 475-550°F (245-290°C). If you own a pizza stone or baking steel, place it inside the oven while it preheats. Allowing the stone to heat thoroughly for at least 30-60 minutes at this high temperature is crucial. A scorching hot pizza stone provides intense, direct heat to the bottom of the crust, mimicking a professional pizza oven and ensuring a wonderfully crispy base.
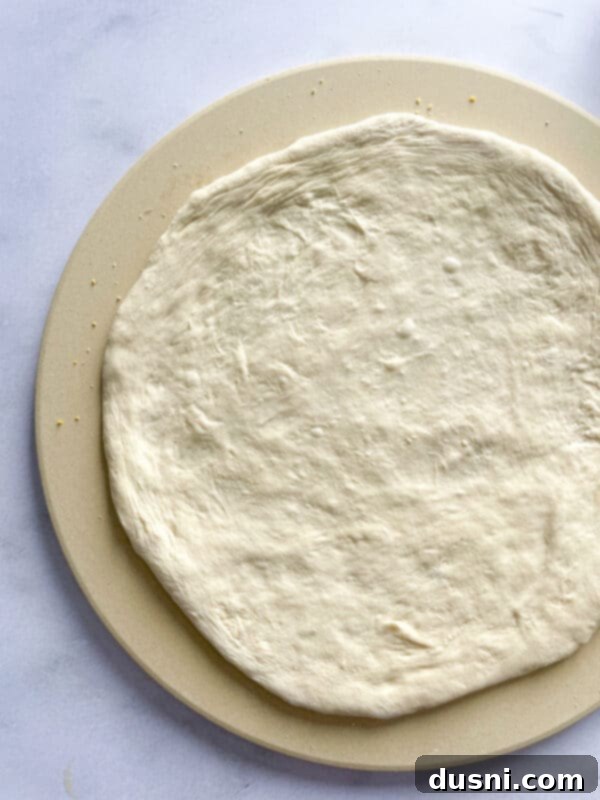
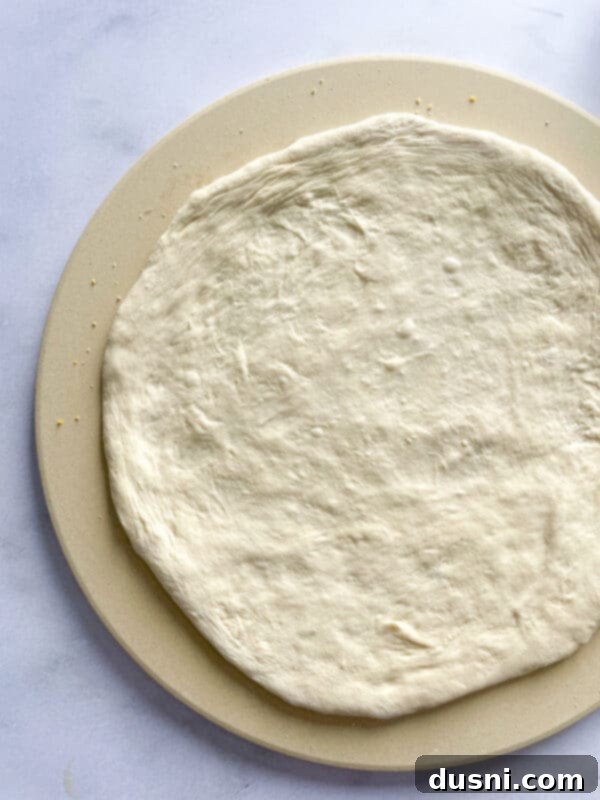
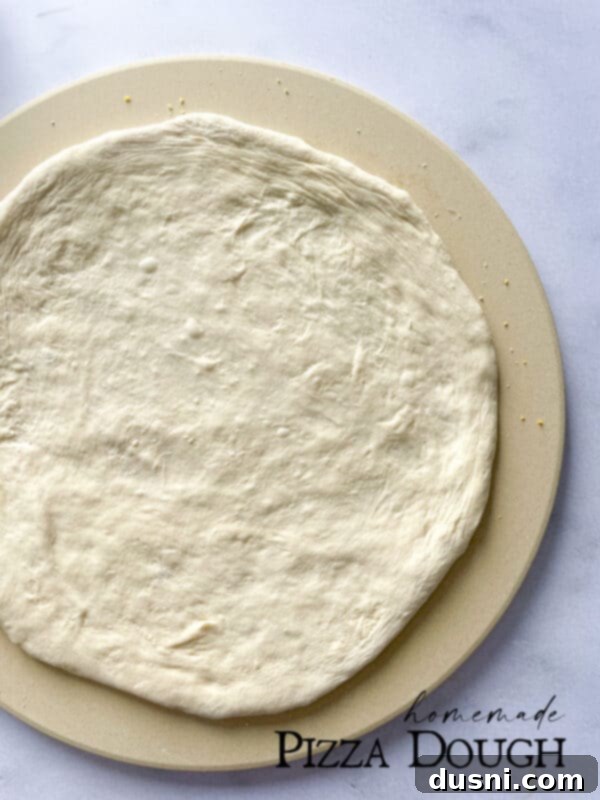
EIGHTH: Before you begin shaping, perform the “finger dent test” to confirm your dough is perfectly proofed. Gently press the dough with your knuckle or finger; if it springs back slowly but still leaves a small indent, it’s ideally ready for shaping. If the dough springs back immediately, it needs a little more proofing time. If the indent remains completely and the dough feels very slack, it might be slightly over-proofed, though often still usable. Once confirmed ready, lightly flour your work surface once more. Using a rolling pin or simply your hands, gently stretch and roll out the dough to achieve your desired thickness. This recipe yields enough dough for two standard pizza crusts – you can create two 12-inch pizzas with a thicker, chewier crust, or two 14-inch pizzas for a lighter, thinner, and crispier result, entirely according to your preference.
Note: This recipe will make two pizza crusts – either two 12” thick crust pizzas or two 14” thin crust pizzas according to your preference.
Love This Recipe? Pin It for Your Next Pizza Night!
Don’t forget where you found this fantastic homemade pizza dough recipe! Pin it to your favorite Pinterest board before you go, so you can easily reference it for all your future pizza-making adventures!
Bringing Your Homemade Pizza to Life: Topping and Baking
With your perfectly prepared homemade pizza dough now shaped and ready, the most exciting part begins: customizing it with your favorite toppings! Unleash your creativity, whether you opt for classic pepperoni and mozzarella, a gourmet combination, or a vegetable medley. Once your chosen toppings are artfully arranged, it’s time for the oven. After allowing your pizza stone to preheat for at least 30-60 minutes (ensuring it’s screaming hot for that perfect crisp crust), carefully remove it from the oven. Gently transfer your assembled pizza onto the hot stone using a pizza peel that has been lightly dusted with cornmeal or flour to prevent sticking. This ensures a smooth and effortless transition.
Carefully slide the pizza back into the preheated oven. Bake for approximately 8-12 minutes, or until the crust is beautifully golden brown, the cheese is melted and bubbly, and any other toppings are perfectly cooked. Baking times can vary slightly depending on your oven’s calibration and the thickness of your crust and toppings, so keep a close eye on it. Once your magnificent pizza is cooked to perfection, remove it from the oven and allow it to cool for a few minutes on a wire rack before slicing. This brief cooling period helps the cheese set and prevents your delicious toppings from sliding off. Finally, gather your loved ones and savor every incredible bite of your extraordinary homemade pizza!

More Delicious Pizza Recipes to Inspire Your Culinary Creations
Now that you’ve mastered the foundational skill of crafting your own homemade pizza crust, an exciting world of pizza possibilities awaits! You’re perfectly equipped to invent your own signature pizzas adorned with all your favorite toppings. Or, if you’re seeking inspiration, embark on a flavorful adventure by trying one of these tried-and-true, incredibly delicious recipes:
- Spinach Artichoke Alfredo Pizza (pictured above) – A luxurious and creamy pizza combining two beloved dips.
- Buffalo Chicken Pizza – For those who crave a zesty, spicy kick and bold flavors.
- Chicken Pesto Pizza – A vibrant and fresh option with aromatic basil pesto.
- Reuben Pizza – An unexpectedly delightful and hearty fusion of classic deli flavors.
But the pizza inspiration doesn’t stop there! Explore these innovative pizza-inspired recipes that take familiar flavors in exciting new directions:
- Pizza Pasta – All the beloved flavors of pizza reimagined in a comforting pasta dish.
- Pepperoni Pizza Grilled Cheese – A cheesy, crispy sandwich that brings the joy of pizza to a classic comfort food.
- Pizza Dip – The ultimate warm and gooey appetizer, perfect for sharing at any gathering.
- Open Faced Pizza Burgers – A hearty and satisfying meal that combines burger and pizza deliciousness.
- All of My PIZZA Recipes – Dive into a treasure trove of even more pizza creations and ideas!
Frequently Asked Questions About Homemade Pizza Dough
- What is basic pizza dough made of? At its heart, basic pizza dough is a beautifully simple combination of fundamental ingredients: flour (often bread flour for best results), water, salt, and yeast. In many recipes, including this one, a small amount of oil (typically olive oil) is also added. These ingredients work in harmony to create the elasticity, structure, and distinct flavor that define a truly great pizza crust.
- Which flour is best for homemade pizza dough? The choice of flour plays a significant role in the final texture of your pizza crust. For a chewy, airy, and well-structured crust that has a satisfying bite, bread flour is generally considered the best choice. Its higher protein content (typically 12-14%) fosters robust gluten development, which gives the dough its elasticity and allows it to trap gases, creating those desirable bubbles and a softer interior. If your preference leans towards a very crispy, thin crust pizza, all-purpose flour, with its lower protein and gluten content, will yield a firmer, crispier result. This recipe, designed for versatility, recommends bread flour for an all-around excellent and balanced crust.
- What is a pizza peel? A pizza peel is an indispensable tool for any serious pizza enthusiast, whether in a bustling pizzeria or a home kitchen. It is essentially a large, flat spatula, often crafted from wood or metal, with a sturdy handle. Its primary function is to safely and easily transfer raw, assembled pizzas into a scorching hot oven (particularly onto a pizza stone or baking steel) and then to retrieve the cooked pizza once it’s golden and bubbly. Using a pizza peel prevents spills, protects your hands from intense heat, and makes the entire transfer process much smoother and more efficient.
- What are bakers’ percentages? Bakers’ percentages, often referred to as baker’s math, constitute a professional and highly precise method for writing and analyzing baking recipes. In this system, every ingredient is expressed as a percentage of the total flour weight, which is always designated as 100%. For instance, if a recipe uses 500 grams of flour (100%), and 350 grams of water, the hydration would be 70% (350g water / 500g flour = 0.70 or 70%). This method provides an incredibly clear, scalable, and exact formula, making it effortless to adjust recipe yields while maintaining consistent results. Professional bakers and pizzaiolos rely heavily on this precision to ensure replicable, high-quality outcomes across all their batches. For a deeper dive into this powerful concept, you can visit King Arthur’s Flour.
- Can I freeze pizza dough? Yes, absolutely! Freezing pizza dough is a fantastic strategy for meal prepping and ensures you have fresh dough readily available whenever a pizza craving strikes. Once your pizza dough has completed its full rise and is ready for shaping, simply portion it out (e.g., into individual pizza crust sizes). Place each portion into an airtight freezer bag, ensuring you squeeze out as much air as possible to prevent freezer burn. The dough can be safely frozen for up to three months. When you’re ready to use it, transfer the frozen dough to the refrigerator to thaw overnight, then allow it to come to room temperature on your counter for an hour or two before shaping and baking.
Expert Tips and Tricks for Making the Perfect Homemade Pizza Crust
Achieving the perfect homemade pizza crust consistently involves paying attention to a few key techniques and considerations. Keep these expert tips in mind to ensure your dough turns out beautifully, fragrant, and delicious every single time:
- **Always Use Room Temperature Water**: For activating your active dry yeast, using water that is consistently between 78-81 degrees Fahrenheit (25-27°C) is non-negotiable. This temperature range is critical for the yeast to “wake up,” become active, and multiply effectively, which is vital for the dough’s proper rise and overall texture. If your water is too cold, the yeast will be sluggish; if it’s too hot, it can kill the yeast. Letting tap water sit out for at least 15-30 minutes helps achieve this ideal warmth.
- **Optimize Your Proofing Environment**: When lightly oiling the bowl for your dough’s crucial first rise, I strongly recommend using a good quality olive oil. This not only prevents the dough from sticking but also subtly enhances its flavor. Place your covered bowl in a warm, draft-free spot. Ideal locations can include a slightly warmed oven (turned off, of course!), a cozy corner near a sunny window, or on top of a warm appliance. A consistent and gentle warmth aids in a steady and even rise.
- **Master the Finger Dent Test for Perfect Proofing**: Don’t rush or skip the “finger dent test” – it’s your most reliable indicator of whether your dough is perfectly proofed and ready for shaping. Gently press the dough with your finger; if it springs back slowly and leaves a slight, shallow indent, it’s perfectly proofed and ready to go. If it bounces back immediately and aggressively, it needs more time to proof. If the indent remains completely and the dough feels very slack, it might be slightly over-proofed, but often still perfectly usable. Patience at this stage yields the best crust texture.
- **Smart Storage for Leftover Dough**: This generous recipe yields enough dough for two delicious pizzas. If you only plan to bake one pizza immediately, the remaining dough can be easily stored for later enjoyment. For short-term storage, place the dough in an airtight, resealable bag or container and store it in the refrigerator for up to 3 days. For longer storage, you can freeze the dough for up to 3 months, as detailed in the FAQ section. Always remember to bring refrigerated dough to room temperature before shaping, and thaw frozen dough in the fridge before bringing it to room temp.
- **Crucial Oven and Pizza Stone Preheat**: To achieve that coveted crispy, perfectly baked crust, a screaming hot oven is absolutely paramount. Preheat your oven to its maximum temperature setting (typically 475-550°F or 245-290°C) for at least 30-60 minutes with your pizza stone or baking steel placed inside. This extensive preheating ensures the stone reaches its full heat potential, providing a powerful initial blast of heat to the bottom of your pizza that flawlessly mimics a professional pizza oven.
- **Gentle Dough Handling is Key**: Once your dough has completed its proofing stages, handle it with care and gentleness. Overworking or forcefully deflating the dough can compromise its beautifully airy structure and make it less pliable. Use lightly floured hands and a rolling pin (if you prefer, though hands are often best for shaping) to gently stretch and shape it, working from the center outwards to create your perfect crust.
Make tonight an unforgettable PIZZA NIGHT with this exceptional homemade pizza dough! Imagine the joy of preparing the dough ahead of time, then gathering your family to unleash their creativity, crafting their own personalized pizza masterpieces. Pizza truly is always a good time, and with this reliable recipe, you’re guaranteed a fantastic, delicious, and memorable experience!

LIKE THIS RECIPE?
Don’t forget to give it a ⭐️⭐️⭐️⭐️⭐️ star rating and
leave a comment below the recipe!
Print Recipe
Homemade Pizza Dough
Equipment
-
KitchenAid Gourmet Rolling Pin, One Size, Red
-
Kitchenaid Stand Mixer
-
OUII Aluminum Pizza Peel Metal – 12 x 14 Inch
-
KitchenAid Classic Pizza Wheel
-
14” Pizza Cutter by KitchenStar | Rocker Style
Ingredients
- 500 grams about 4 ⅓ cups of Bread Flour
- 350 grams 1 ½ cups room temperature Water, divided
- 1 gram ¼ teaspoon of active dry yeast
- 10 grams ½ Tablespoon + ⅓ teaspoon sea salt
Instructions
-
Add water into a bowl, and set aside.
-
Add yeast into a separate smaller bowl. Add 2 tbsp of water from the bowl in step 1 to the small bowl with the yeast. Set aside.
-
Combine flour with the remaining water in the bowl from step 1. Mix until just incorporated. Let stand covered for 30 minutes.
-
After 30 minutes, sprinkle salt over the top of the dough. Add the standing yeast mixture to the dough as well. Mix by hand and fold the dough until the salt and yeast are fully incorporated.
-
Knead dough by hand or with your dough hook in the bowl of your stand mixer on low for about 4-5 minutes until soft and elastic.
-
Lightly oil the bowl, add the dough ball and cover it with plastic wrap. After 30 minutes apply the first fold. Cover once again and let rise for 6 hours.
-
Remove from the bowl onto a floured surface. Divide the dough into two equal balls. Shape and add to a lightly floured bake sheet. Flour the tops of the dough cover and let proof for another 30-60 minutes.
-
Meanwhile, preheat the oven to the highest setting possible and preheat your pizza stone.
-
Check proof using the finger dent test. Once ready, flour the work surface once again using a rolling pin and roll out the dough to desired thickness.
-
Top pizza with desired toppings.
-
After about 30 minutes of heating your pizza stone, remove from the oven and add assembled pizza using a pizza peel.
-
Put back into the oven for 10 minutes. Or until the pizza is browning and bubbly.
-
Remove from oven and let cool.
-
Enjoy!
Notes
- Please note that all ingredients are measured in grams vs. cups. The difference between grams and cups is weight vs. volume. Although I have listed both measurements, your recipe will yield much better results if you measure in grams (weight). The reason for this is no matter how carefully you measure a cup of flour, every level cup of flour will contain a slightly different volume of flour than the last measured cup. To remedy this, and get a proper measurement every time, you have to weigh your flour on a scale. Professional bakers and pizza makers all measure this way because it is precise and the results can be replicated by others. This is particularly important for flour and water. However, if you do not have a food scale, I have listed the volumetric measurements for you.
- This will make 2 pizza crusts. Two 12’ thicker crusts or Two 14” thin crusts
- This recipe is adapted from Ken Forkish’s Same Day Straight Pizza Dough recipe.
Nutrition
